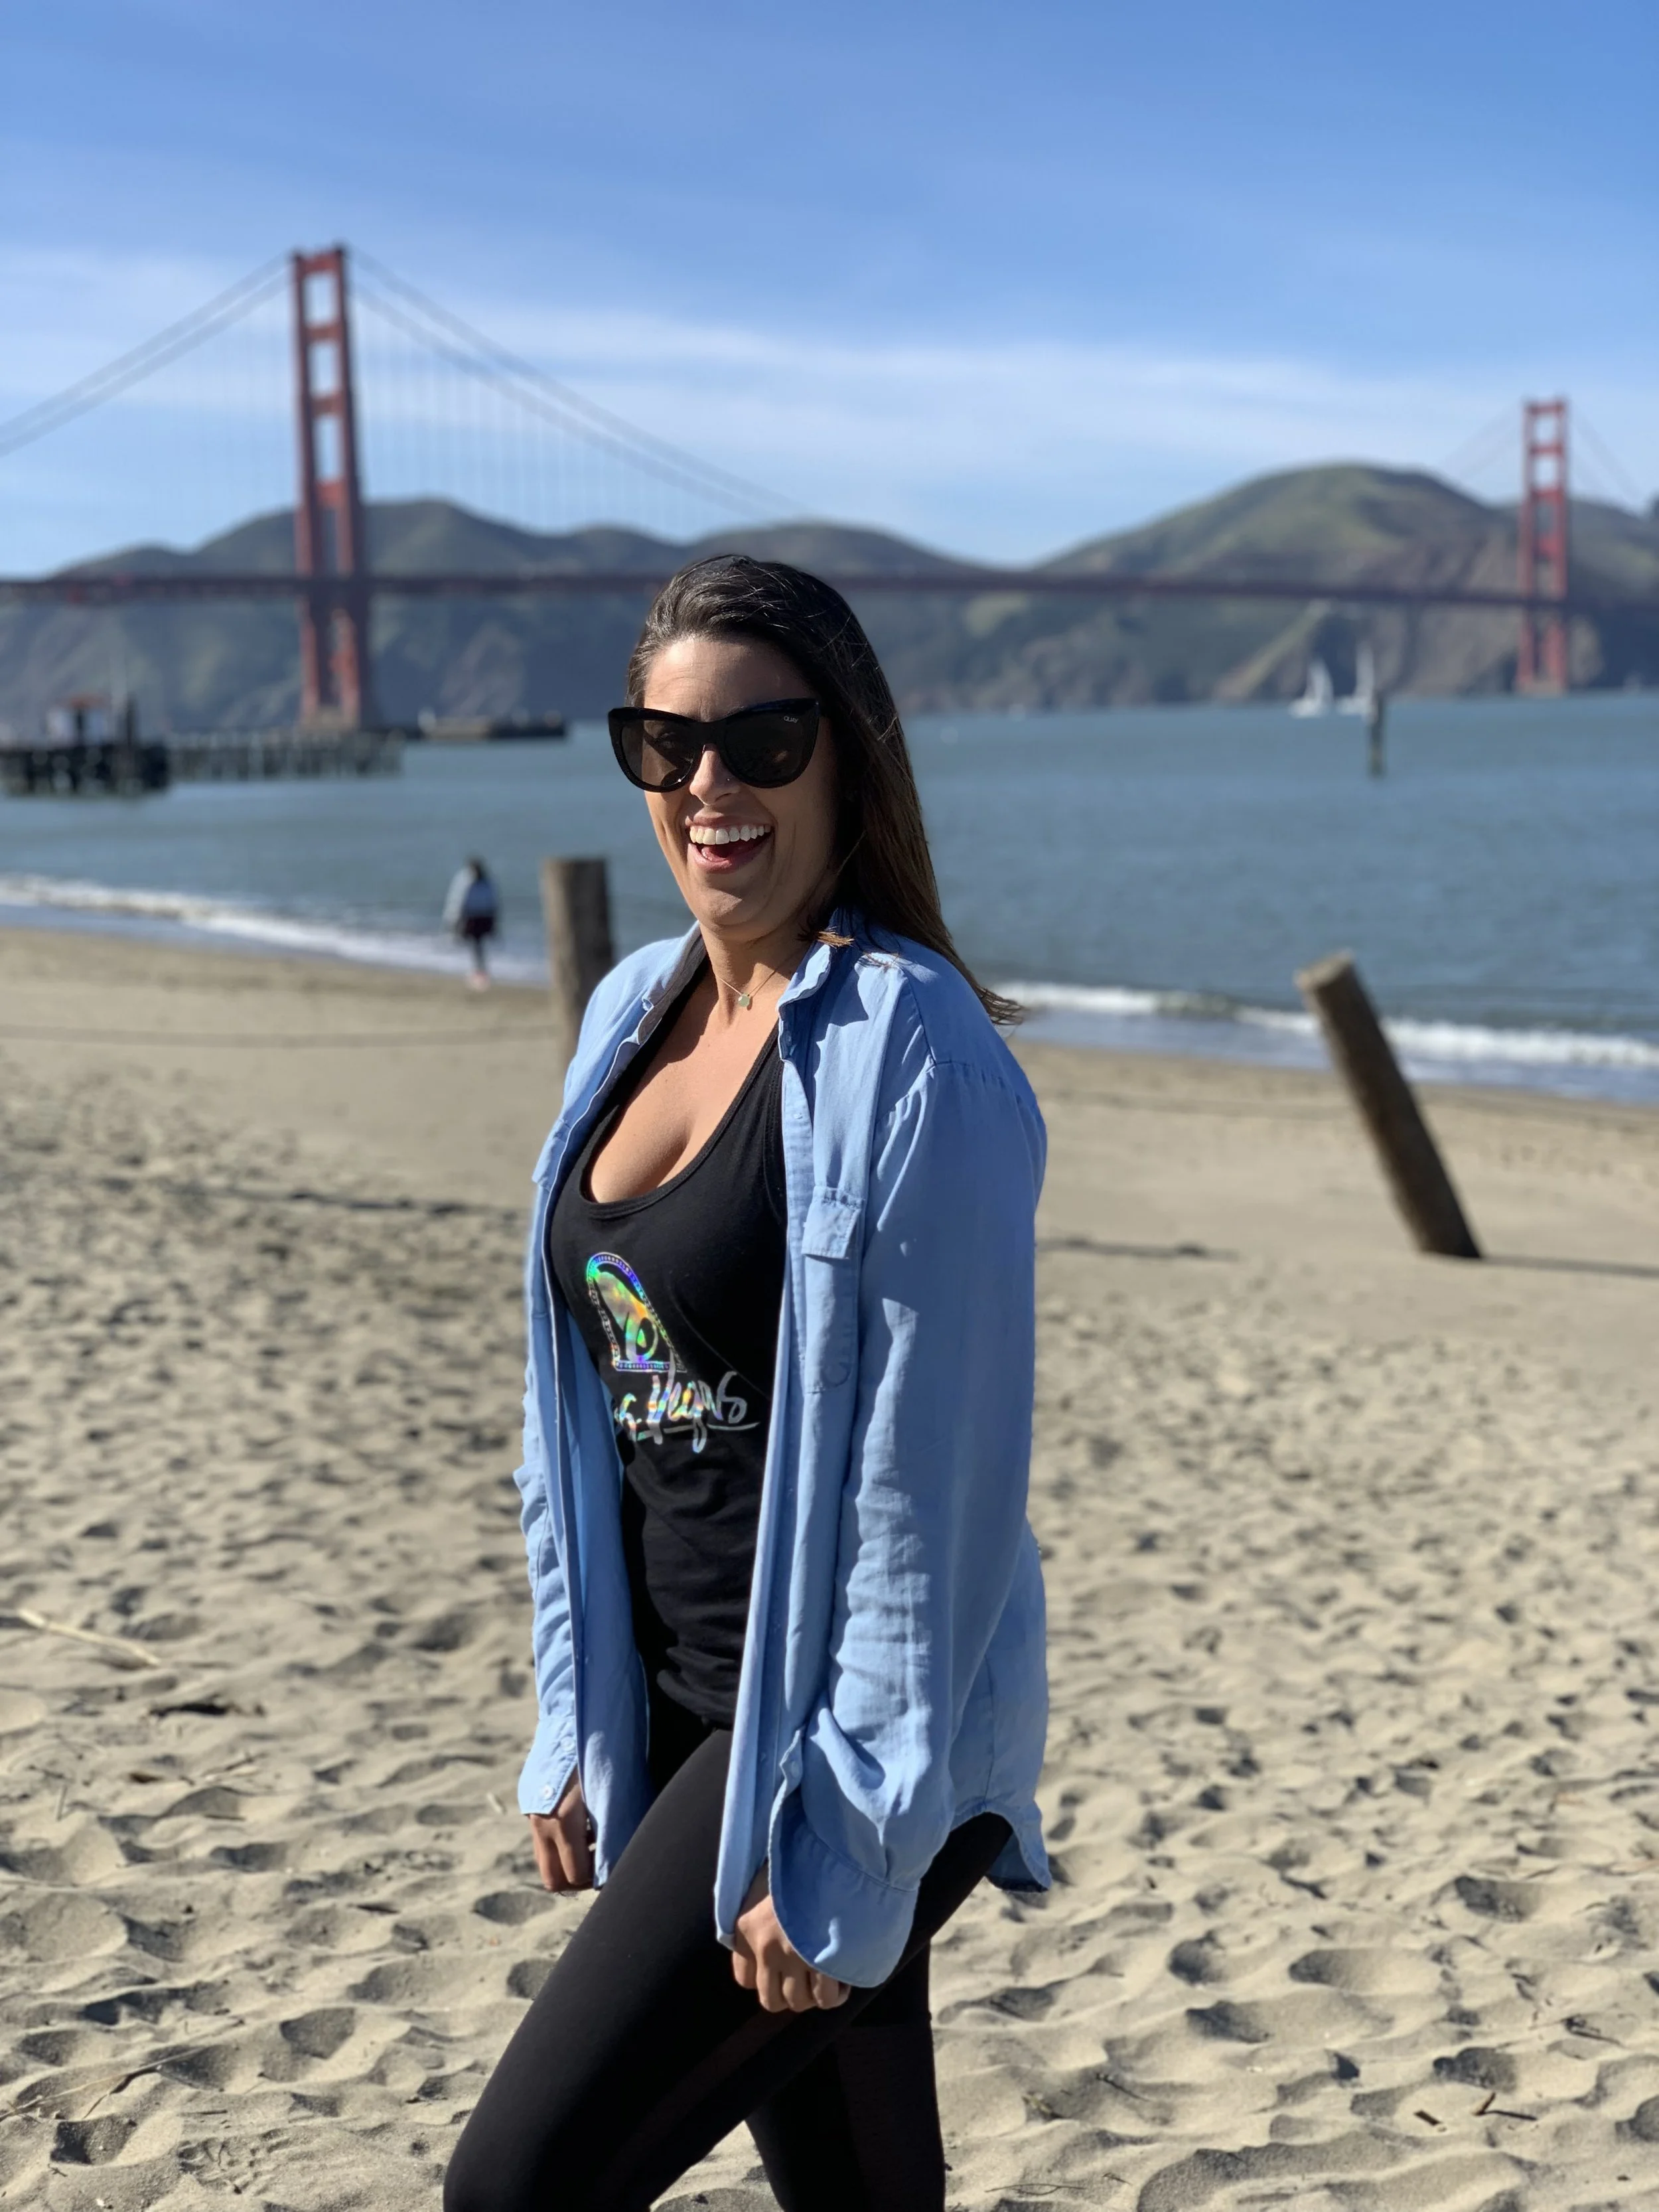

THE ULTIMATE ROAD TRIP GUIDE TO UTAH'S NATIONAL PARKS
I am so excited to share with you my ULTIMATE ROAD TRIP GUIDE thru Utah’s 5 Beautiful National Parks, also known as The Mighty 5, along with many gorgeous pit stops, must-see destinations, abandoned finds, yummy eats, and so much more! From the breathtaking views at the Grand Canyon, climbing down into the ground at Antelope Canyon, exploring over 2,000 arches at Arches National Park, racing to Capitol Reef National Park to snag a warm, giant cinnamon bun (more news on this later!), to dipping into the water and hiking thru the gorgeous Narrows at Zion. This guide will provide you with all the information I wish I knew ahead of time such as a reasonable budget, purchasing The National Parks Pass, and a packing list to all the tips and secrets to completing this road trip successfully and affordably without missing anything worth seeing!

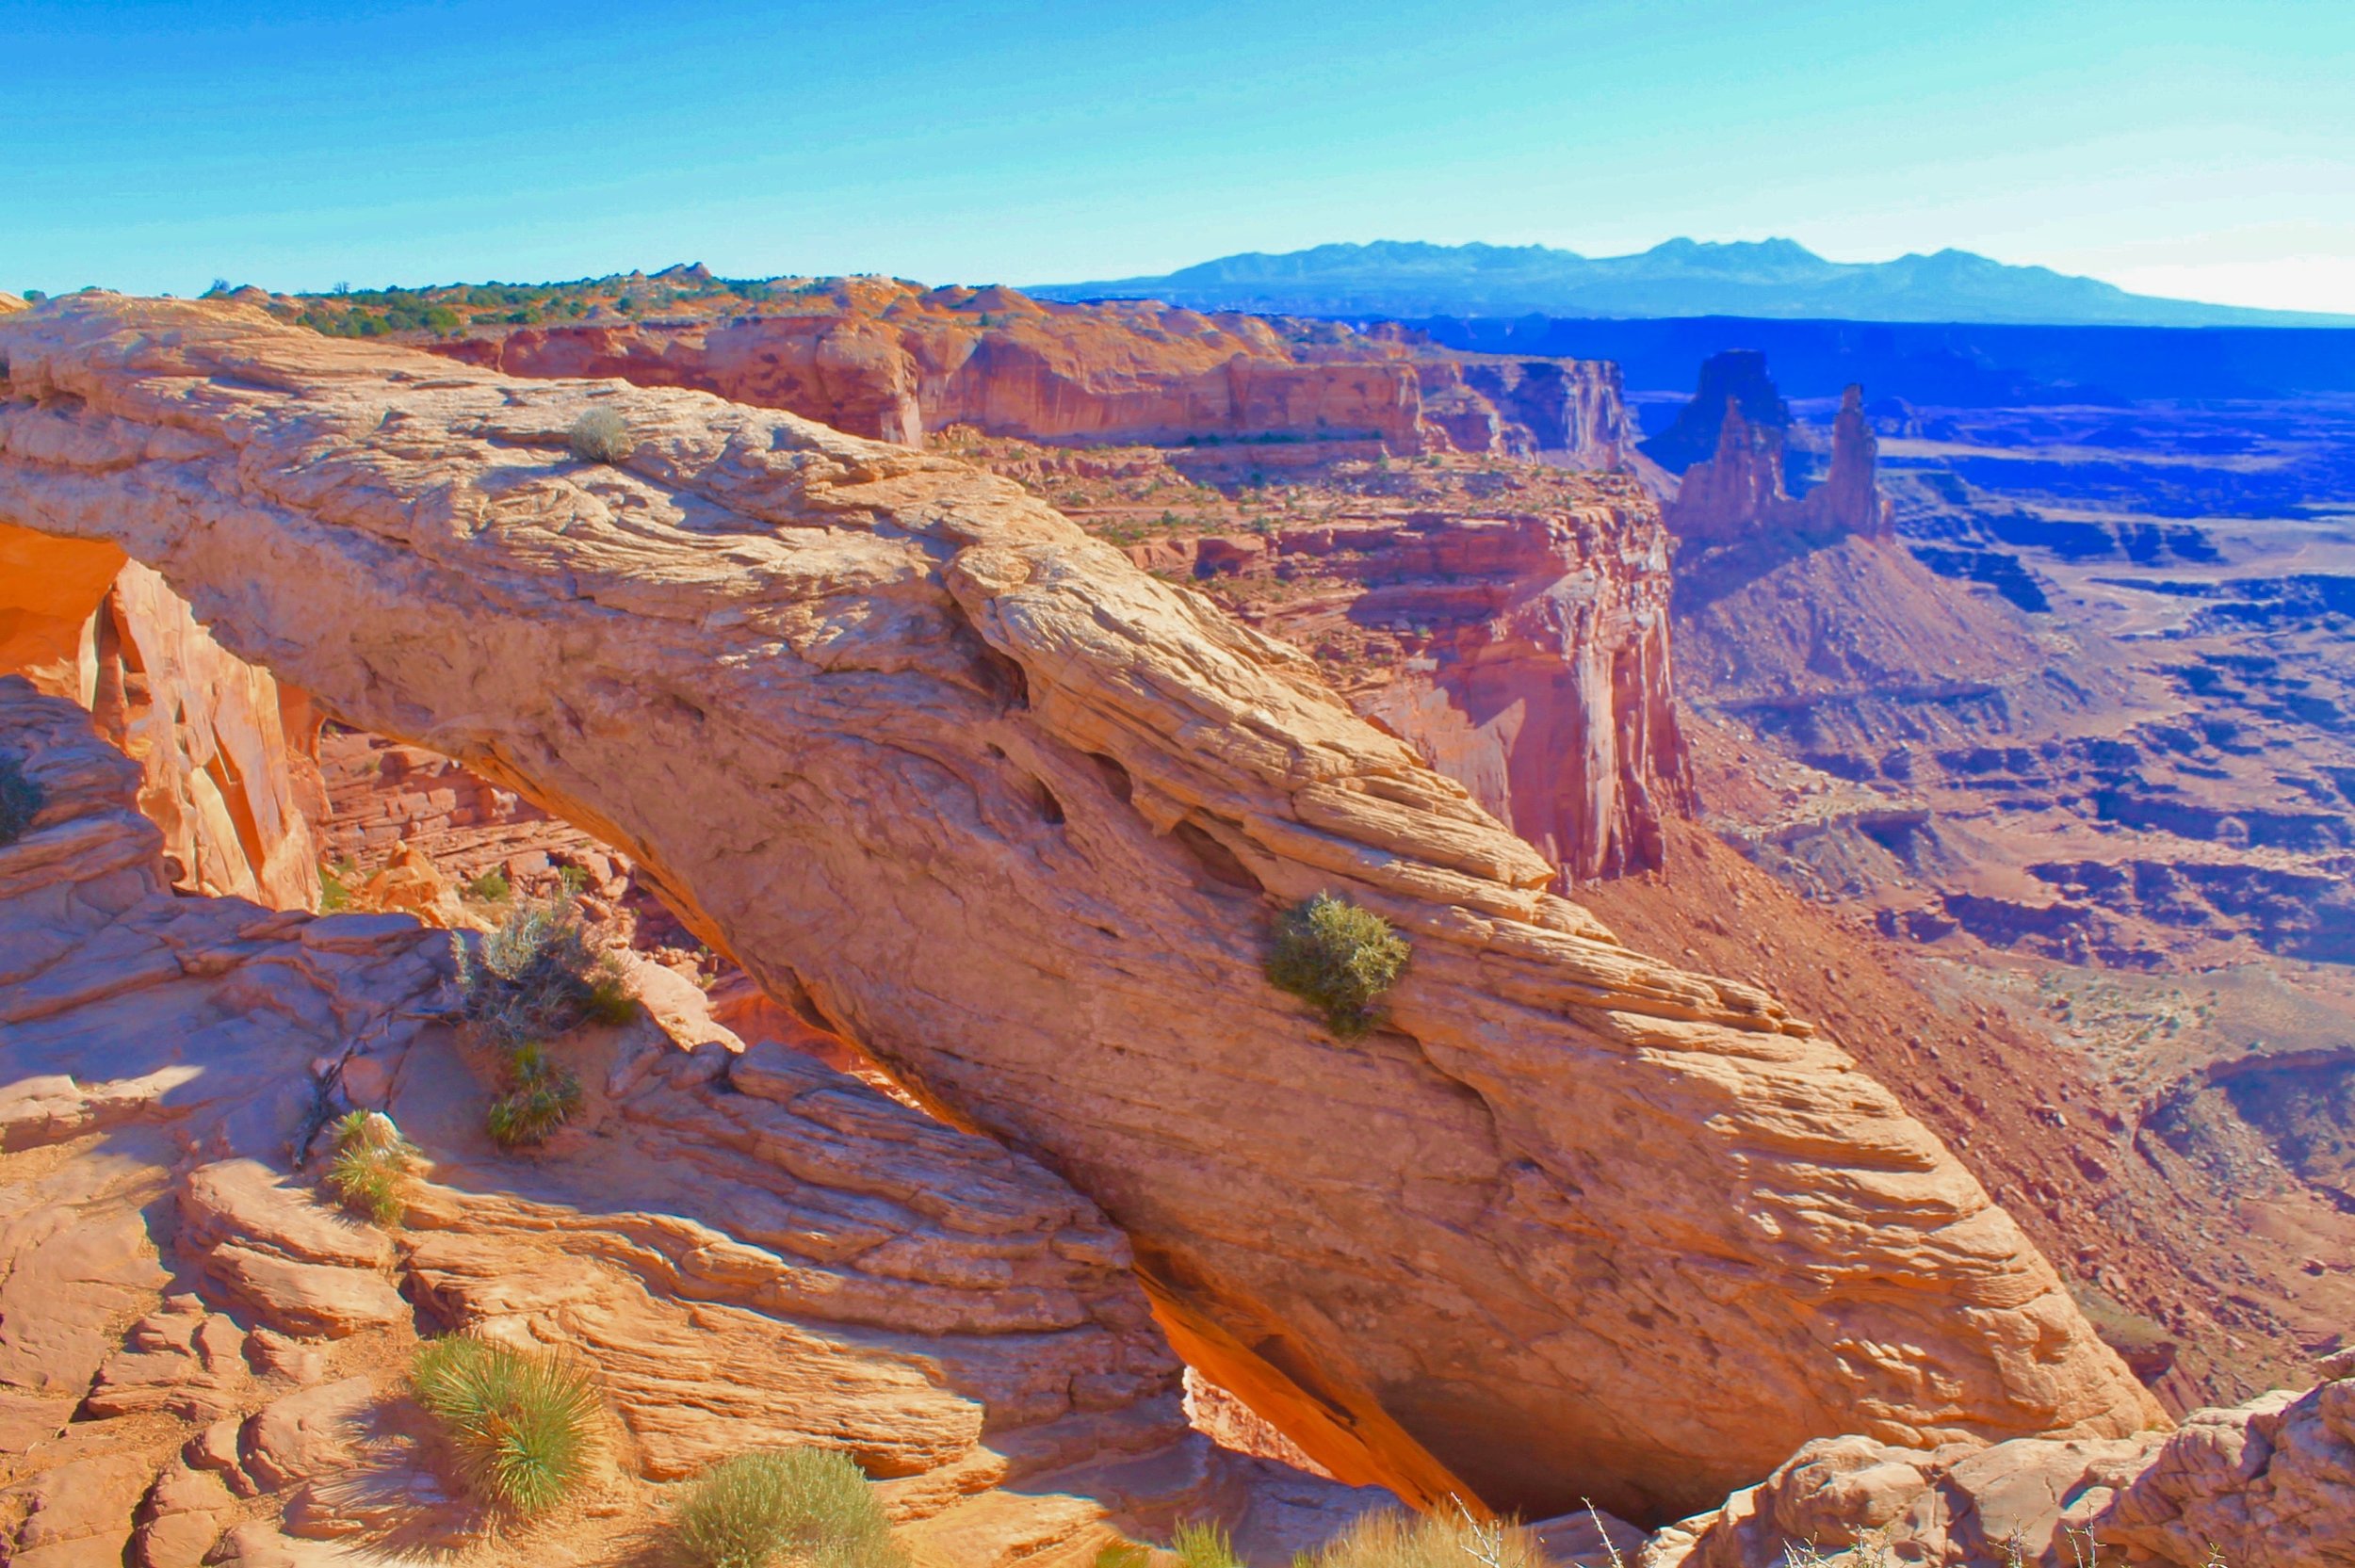
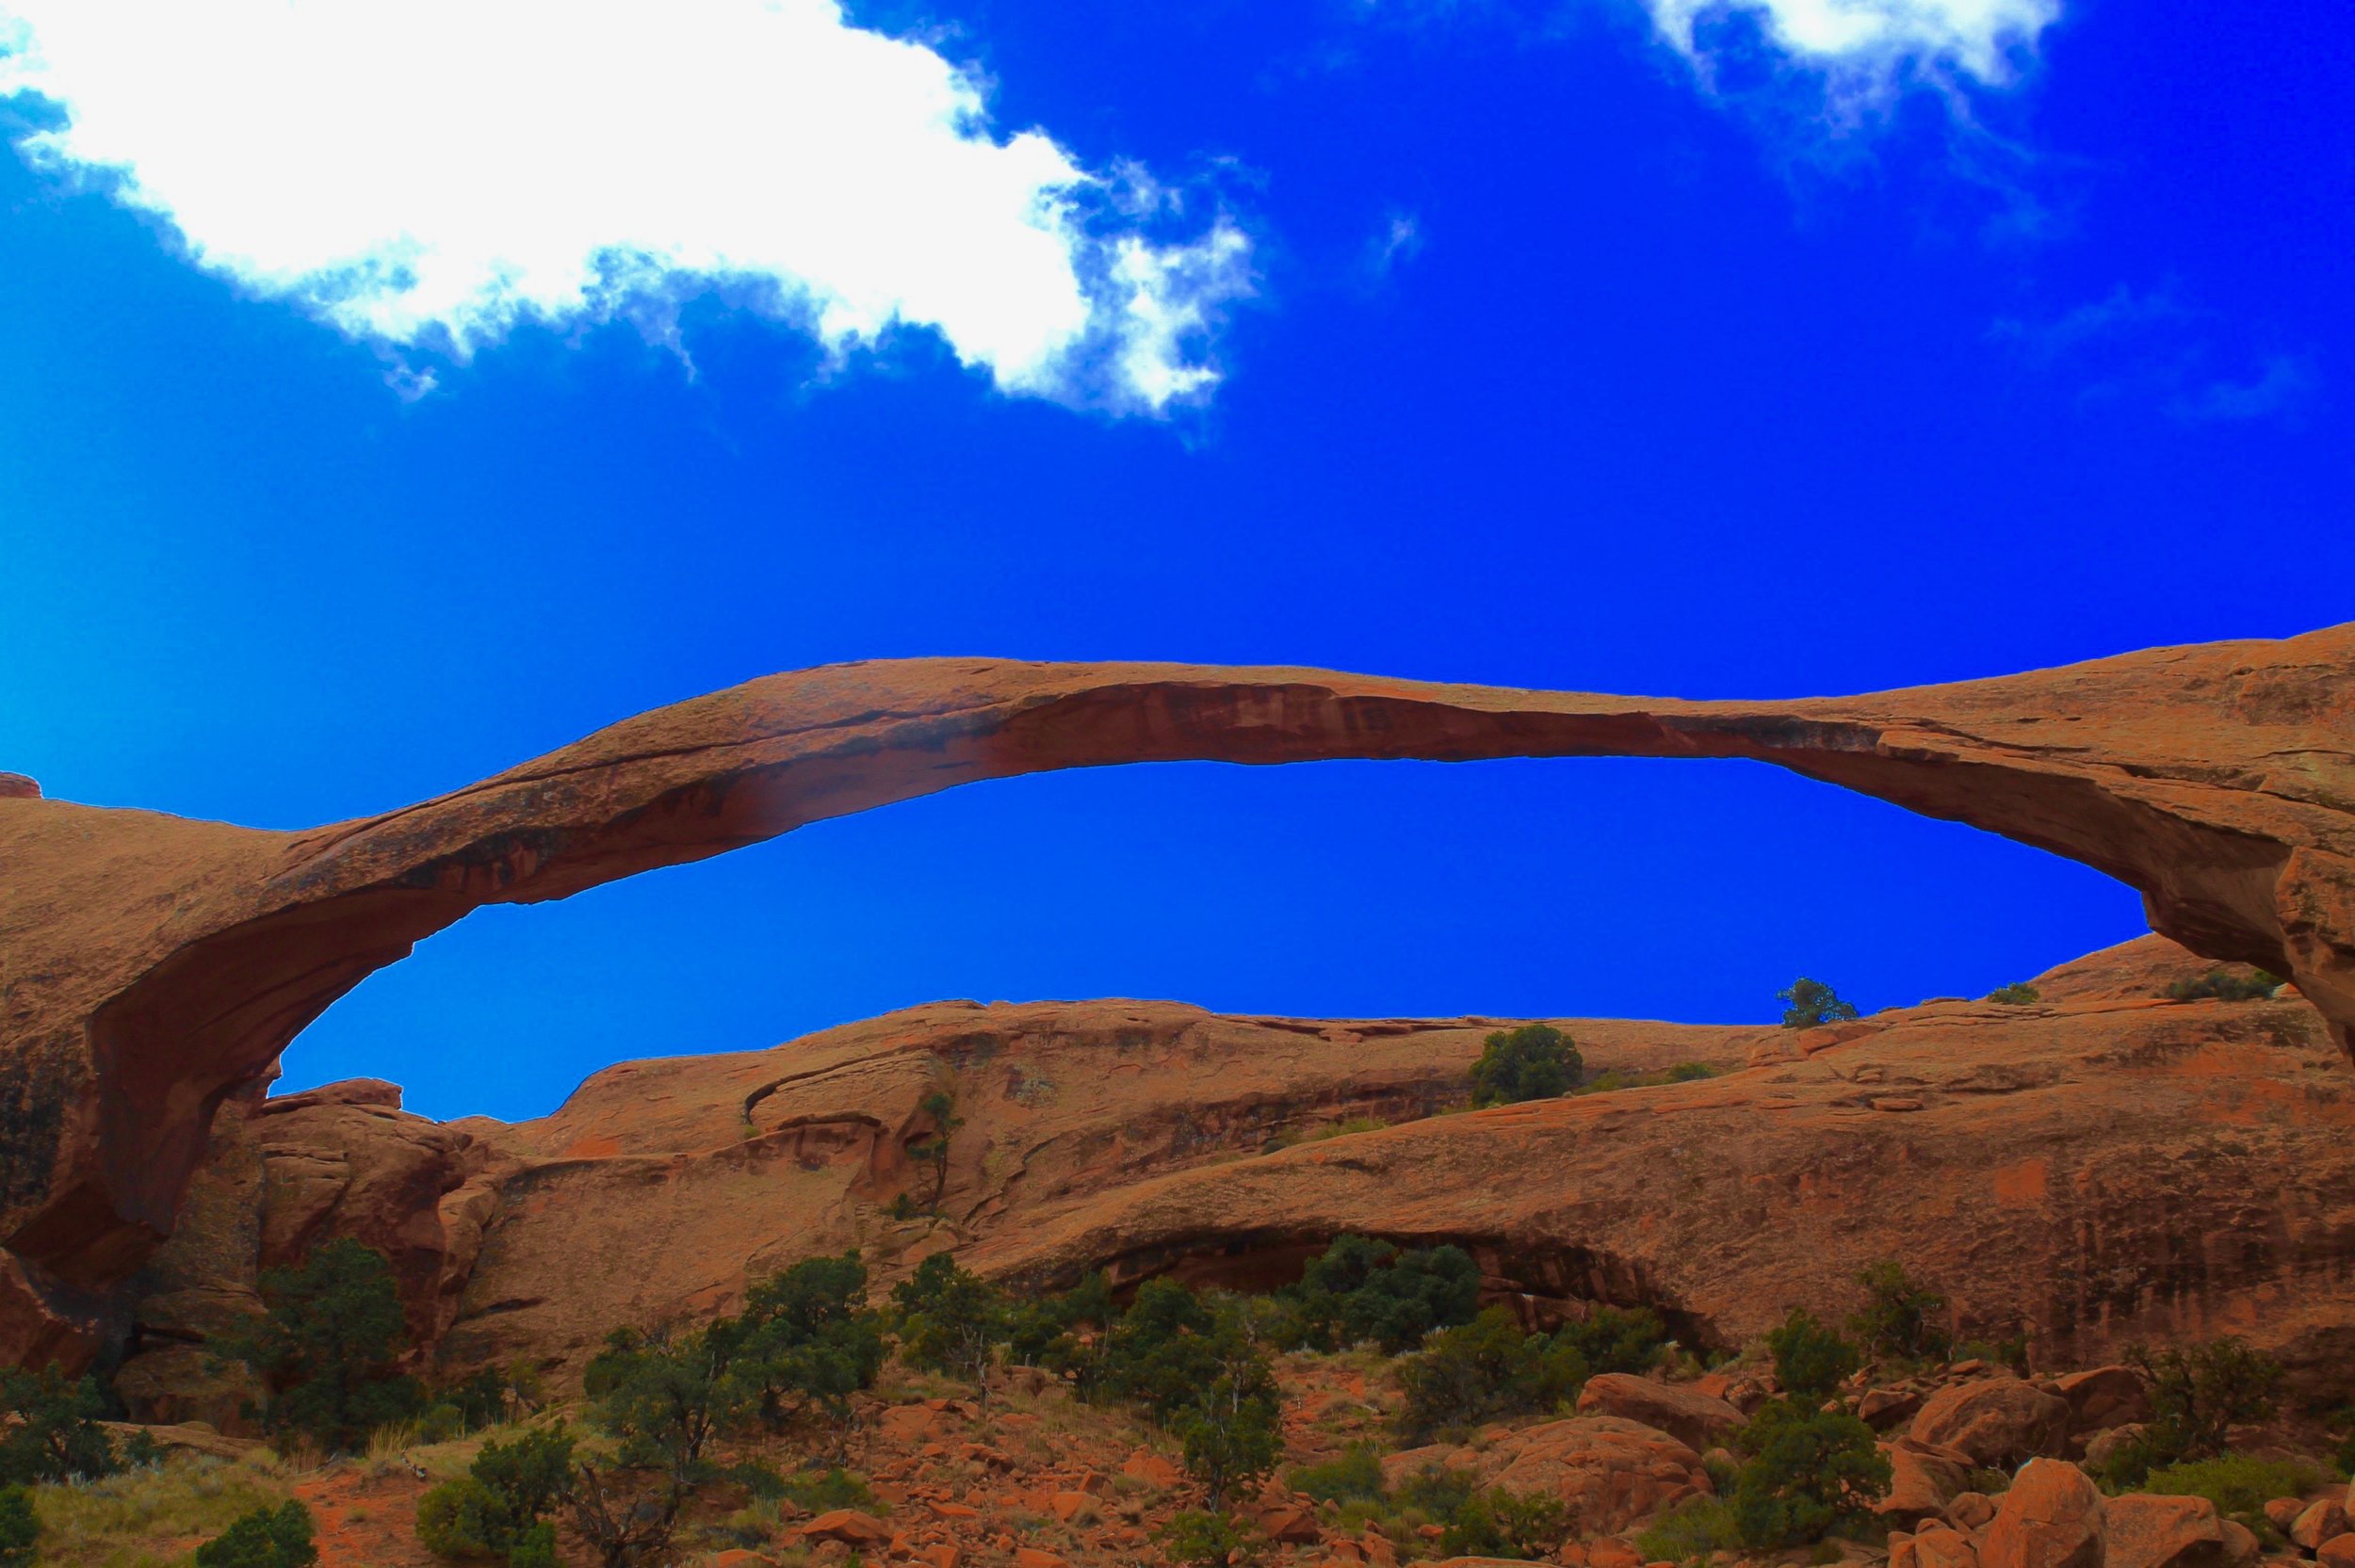
Landscape Arch, Arches National Park
A LITTLE BACKGROUND FIRST...
This trip took place from October 3 to October 11, 2017. I drove my 2013 Toyota Corolla (after getting an oil change and new tires… be smart and make sure car maintenance is handled before any road trip). A friend and I left from Los Angeles, drove to Scottsdale, Arizona to pick up another friend, and decided to start the trip there. So a carload of 3 girls! From there, we headed north to the Grand Canyon and then preceded to Page, Arizona where we experienced Antelope Canyon and the Horseshoe Bend. Then The Mighty 5 came into play. To shorten the trip down to a week you can fly into Vegas and start at Zion National Park and reverse this trip or adjust the trip to what works best for you in terms of a start and end point! This trip can be done so many different ways so don’t feel like you have to follow this exactly! It is flexible! Let’s begin!
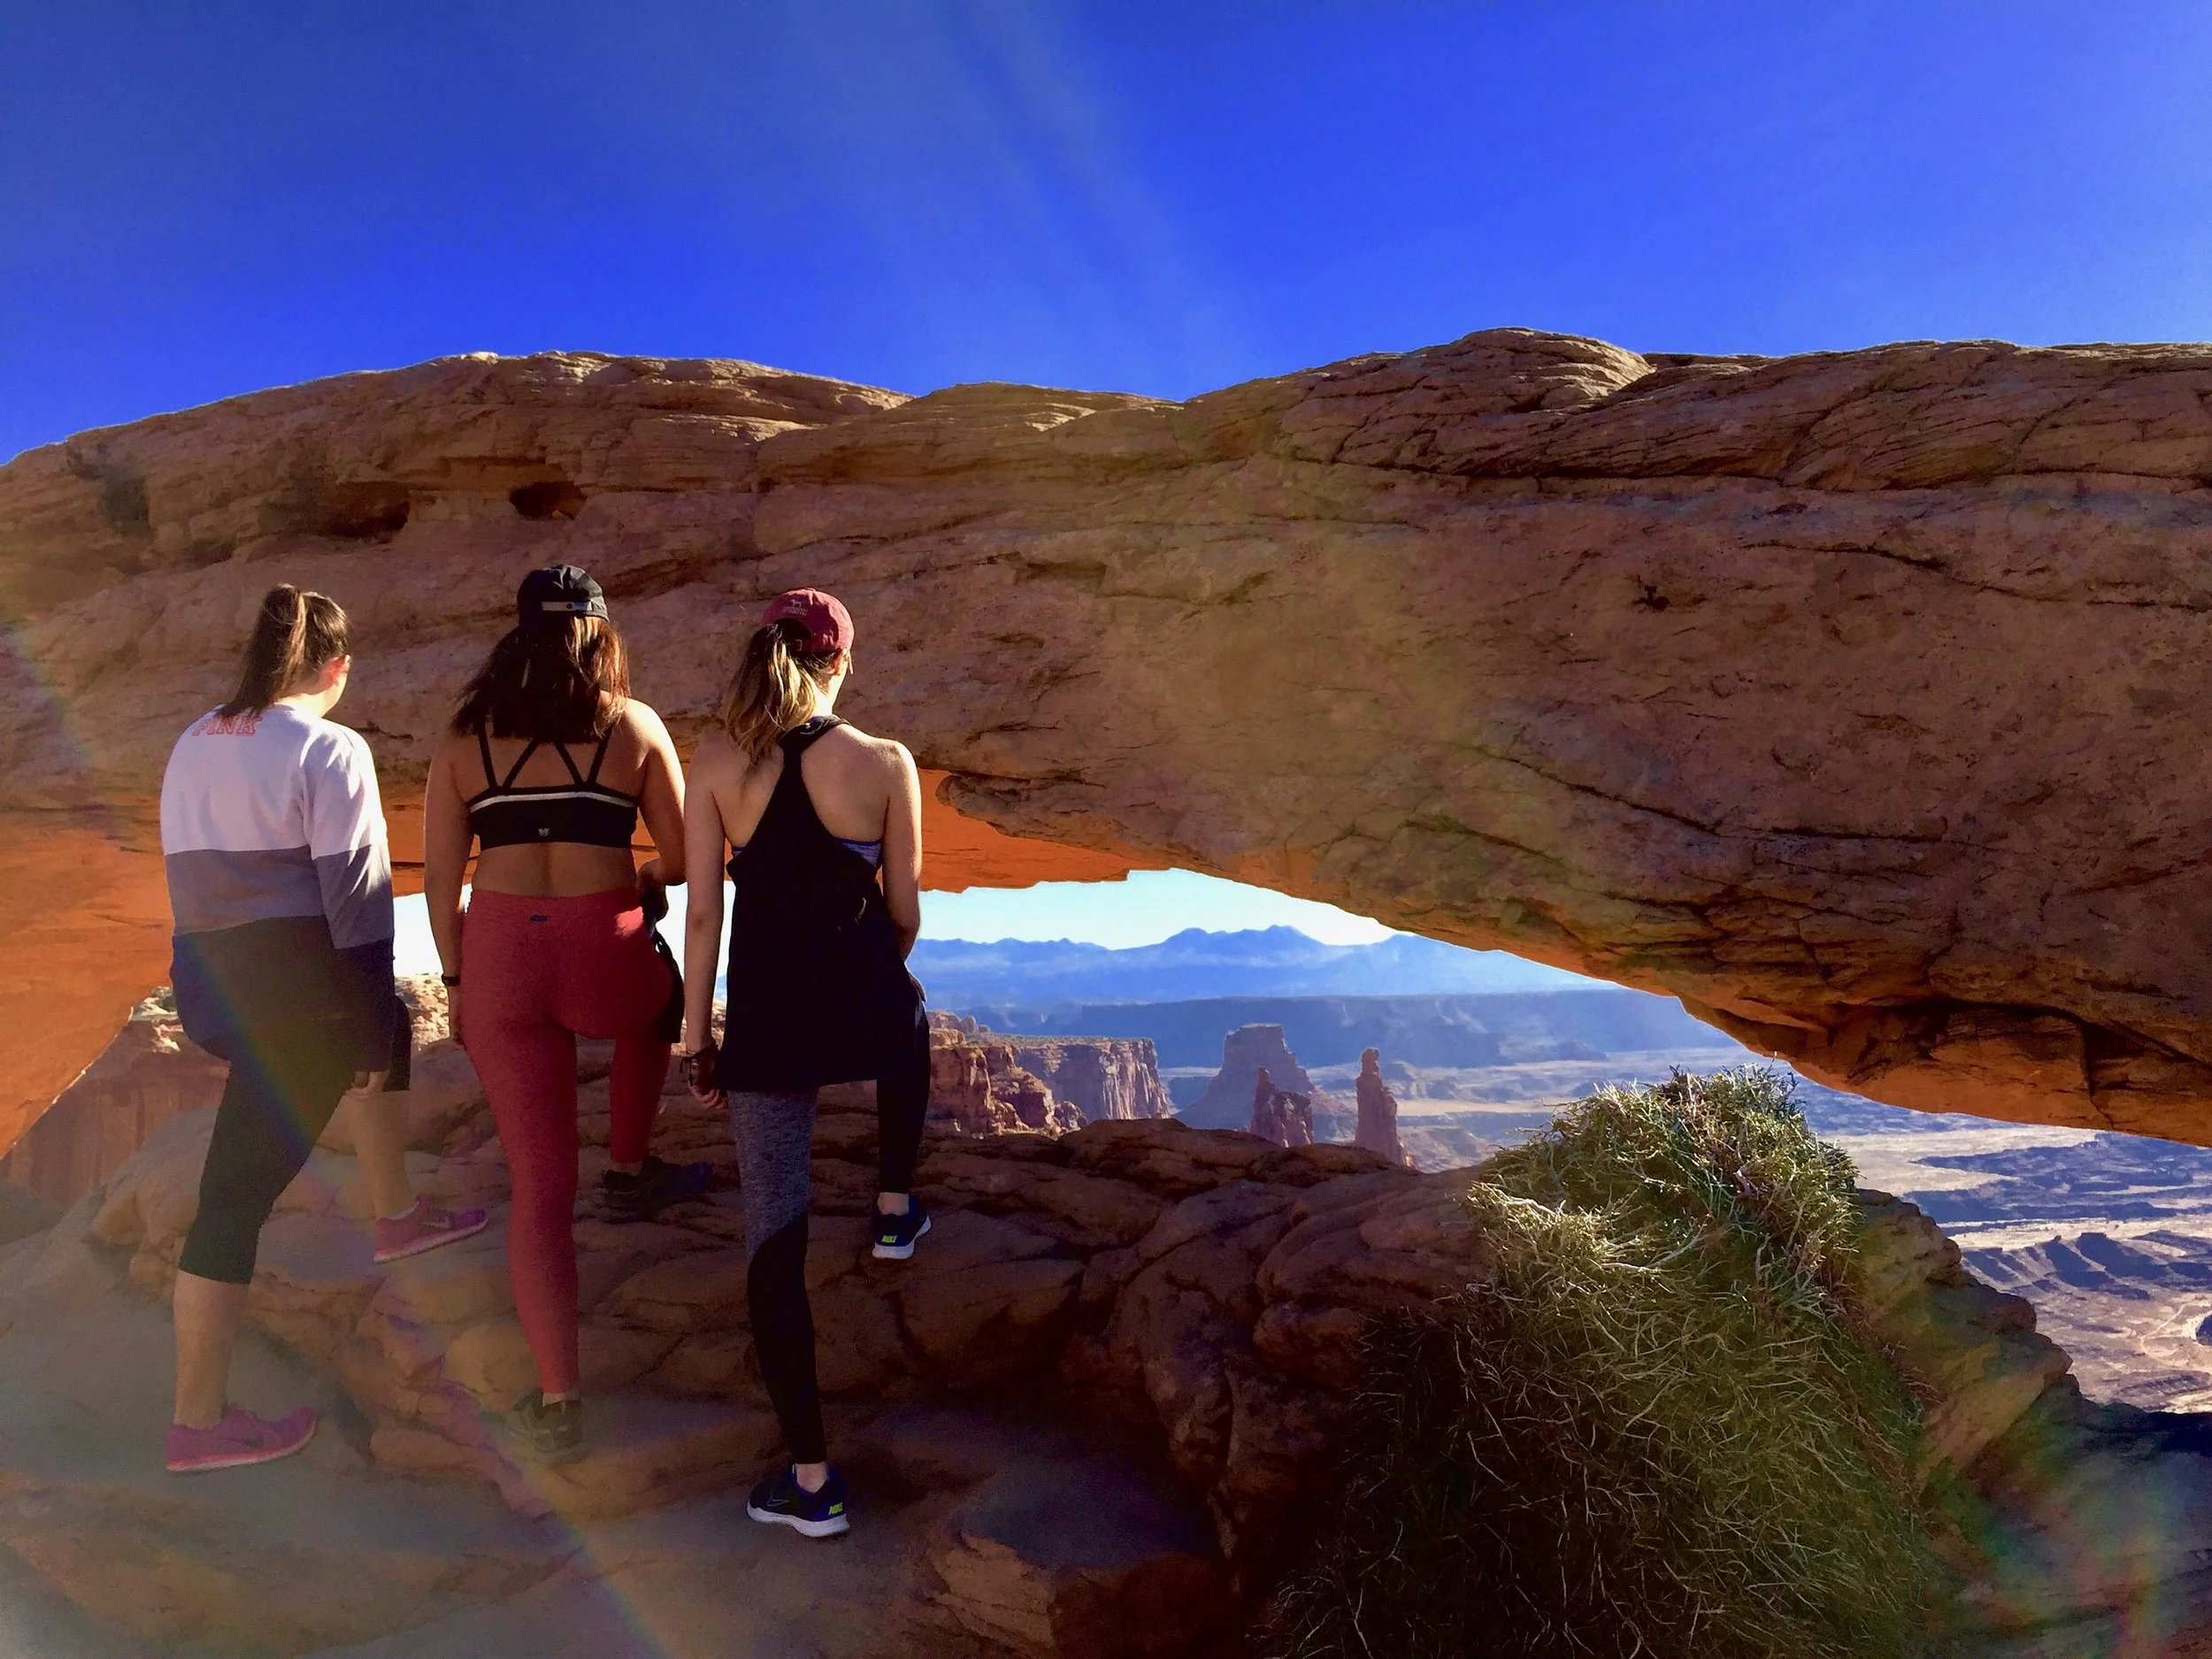
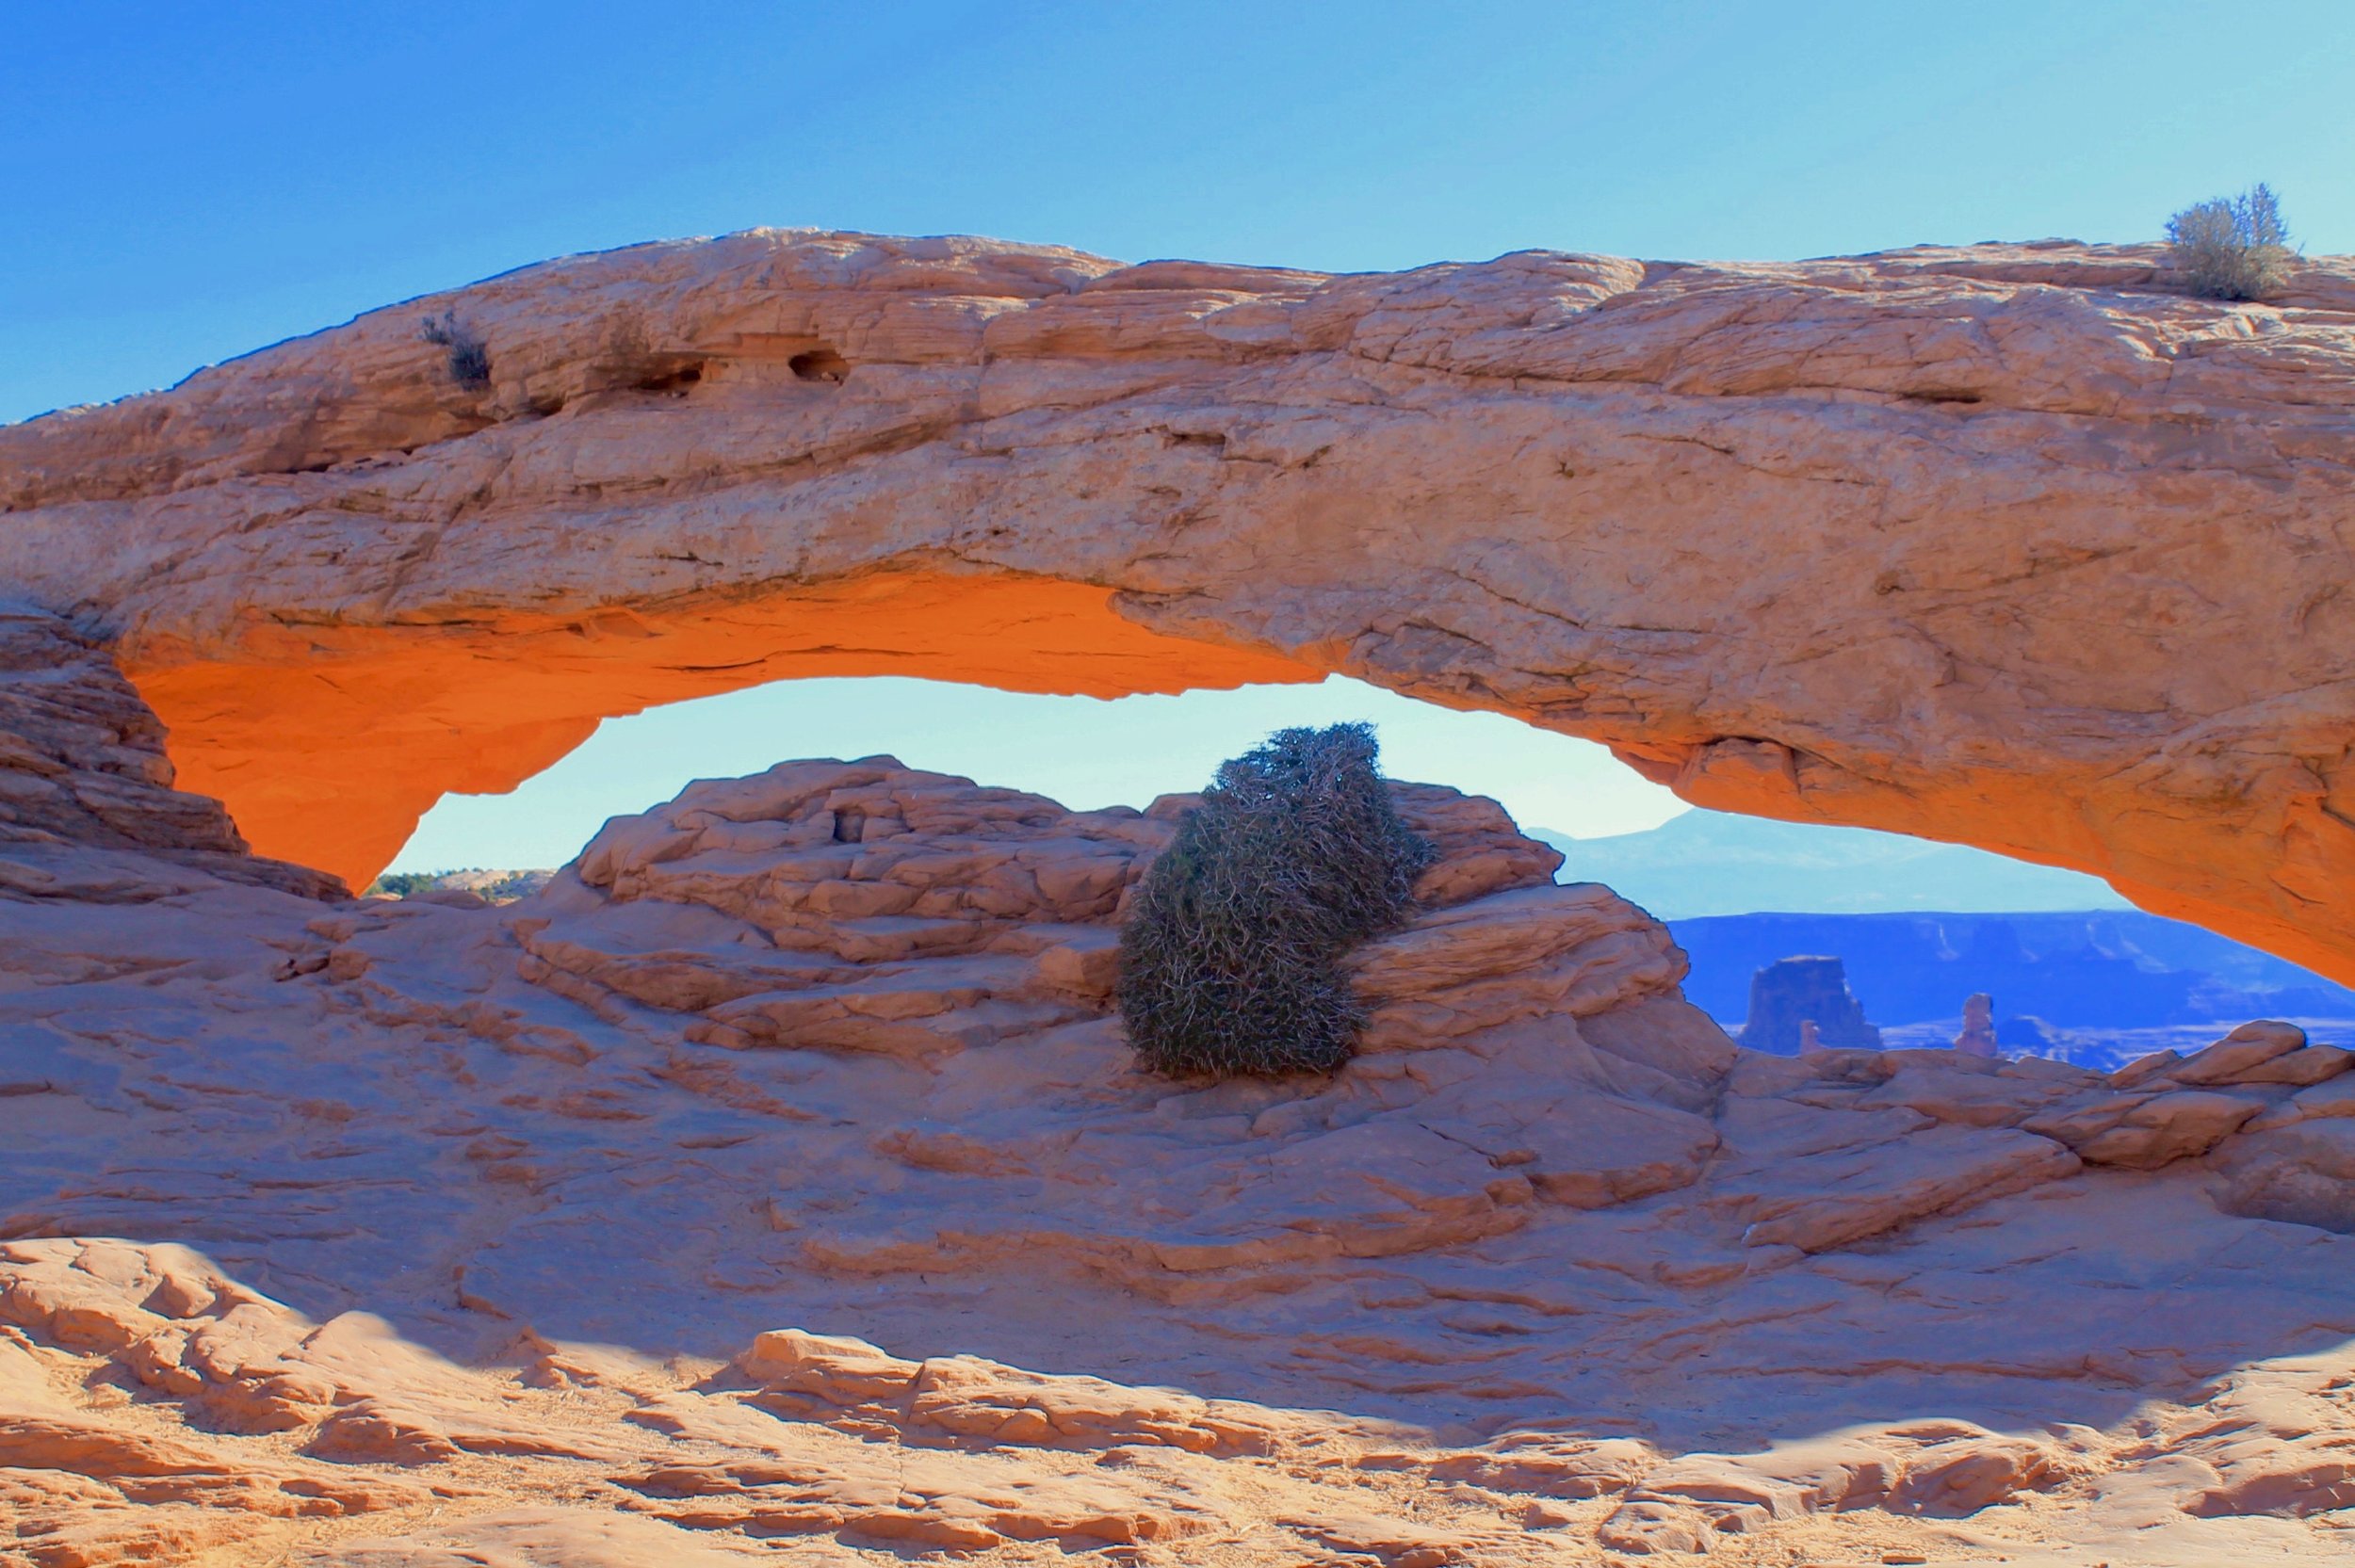
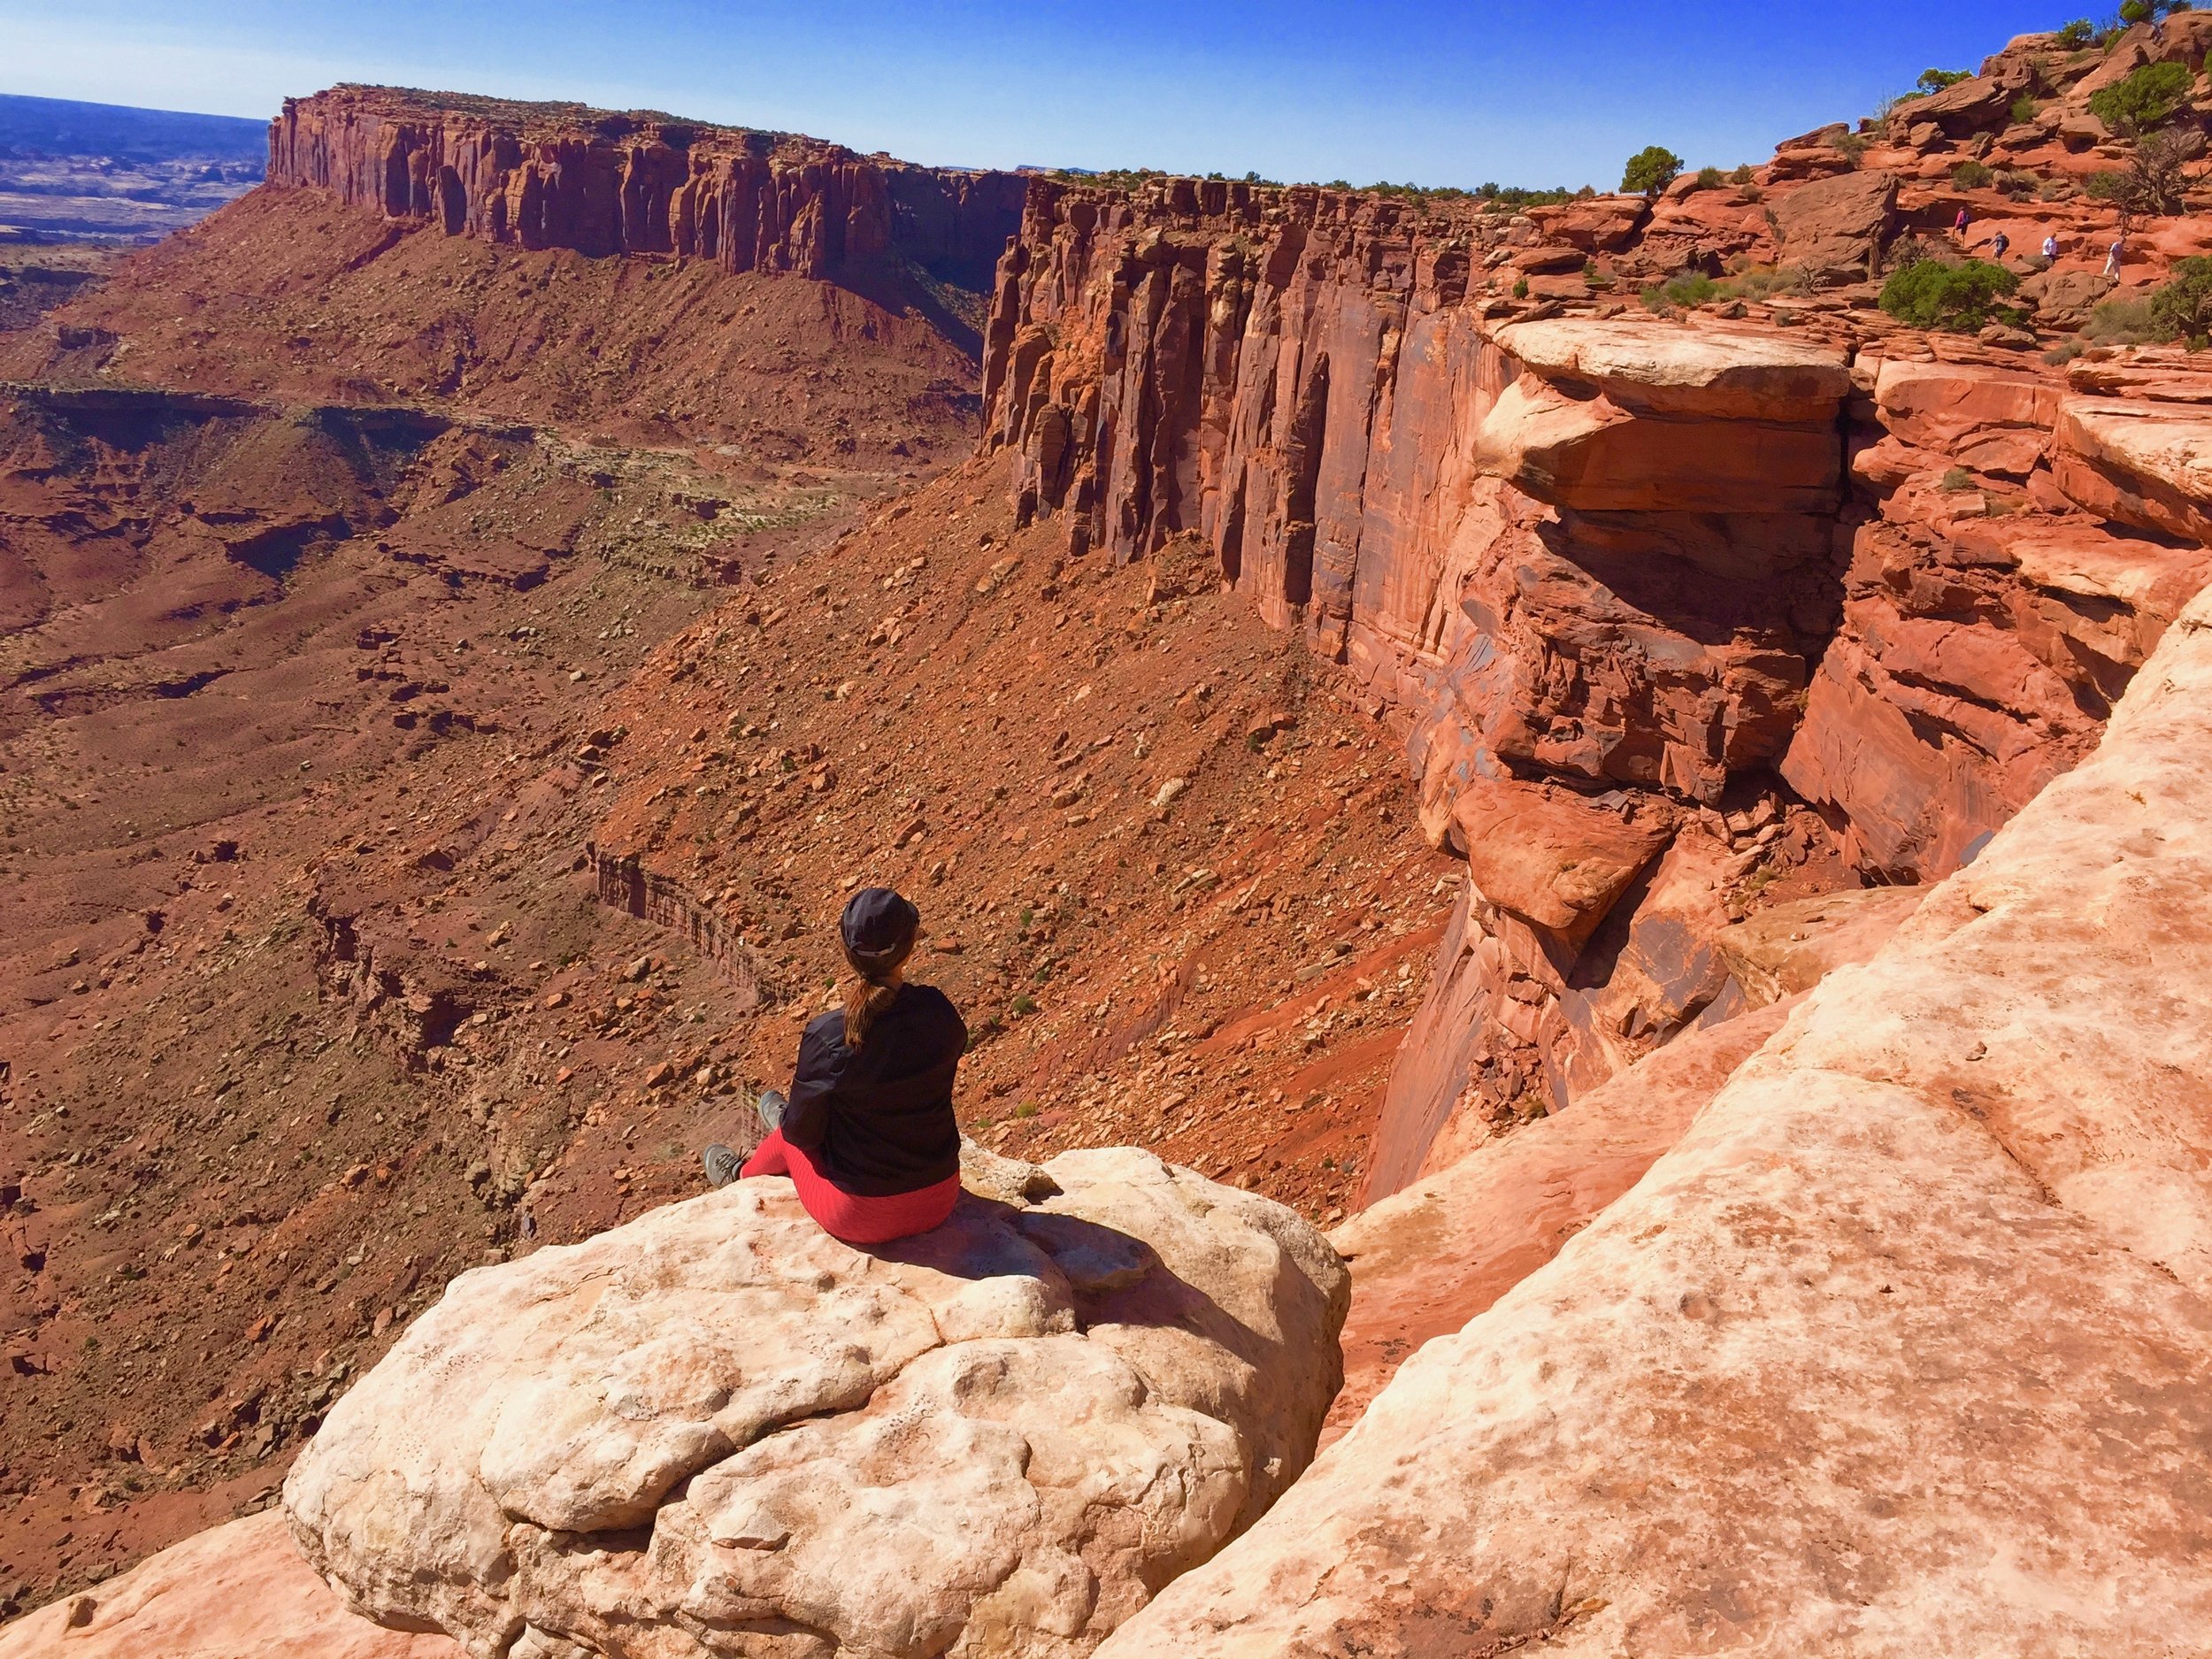
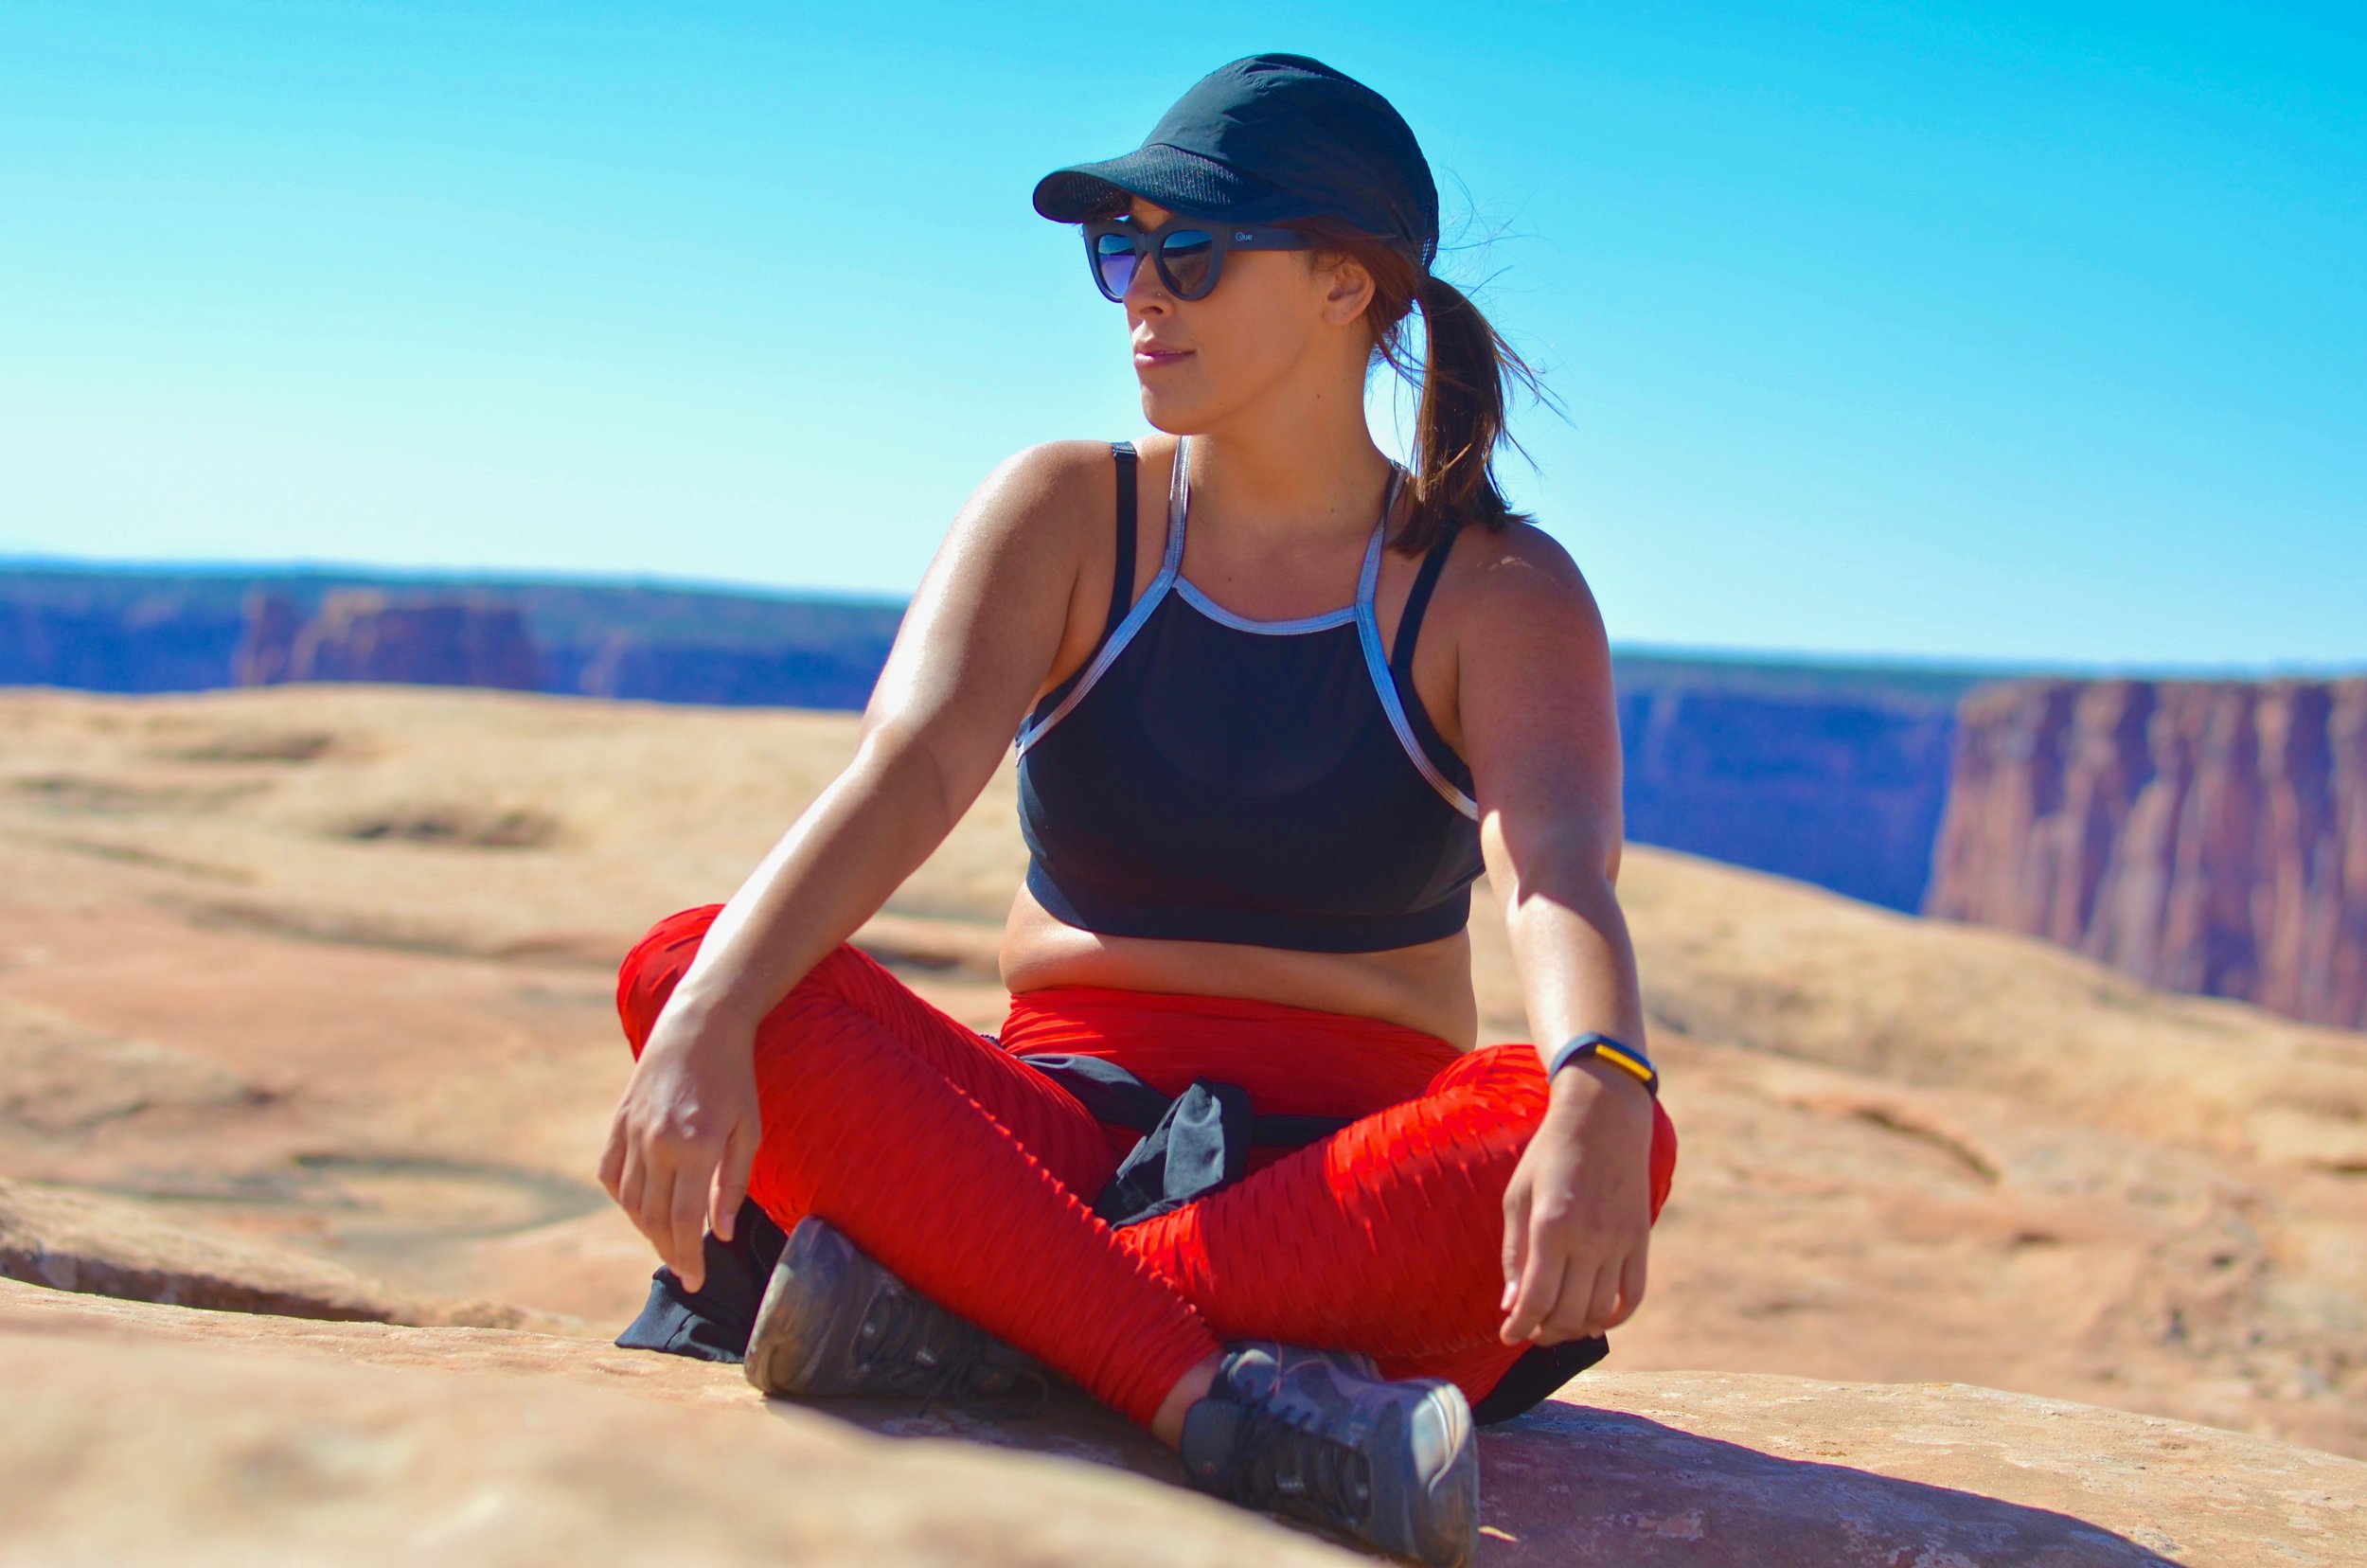
Mesa Arch, Canyonlands National Park
DAY 1: LA, CABAZON DINOSAURS, & SCOTTSDALE ARIZONA
Cabazon Dinosaurs, Cabazon, California

Palm Springs, California
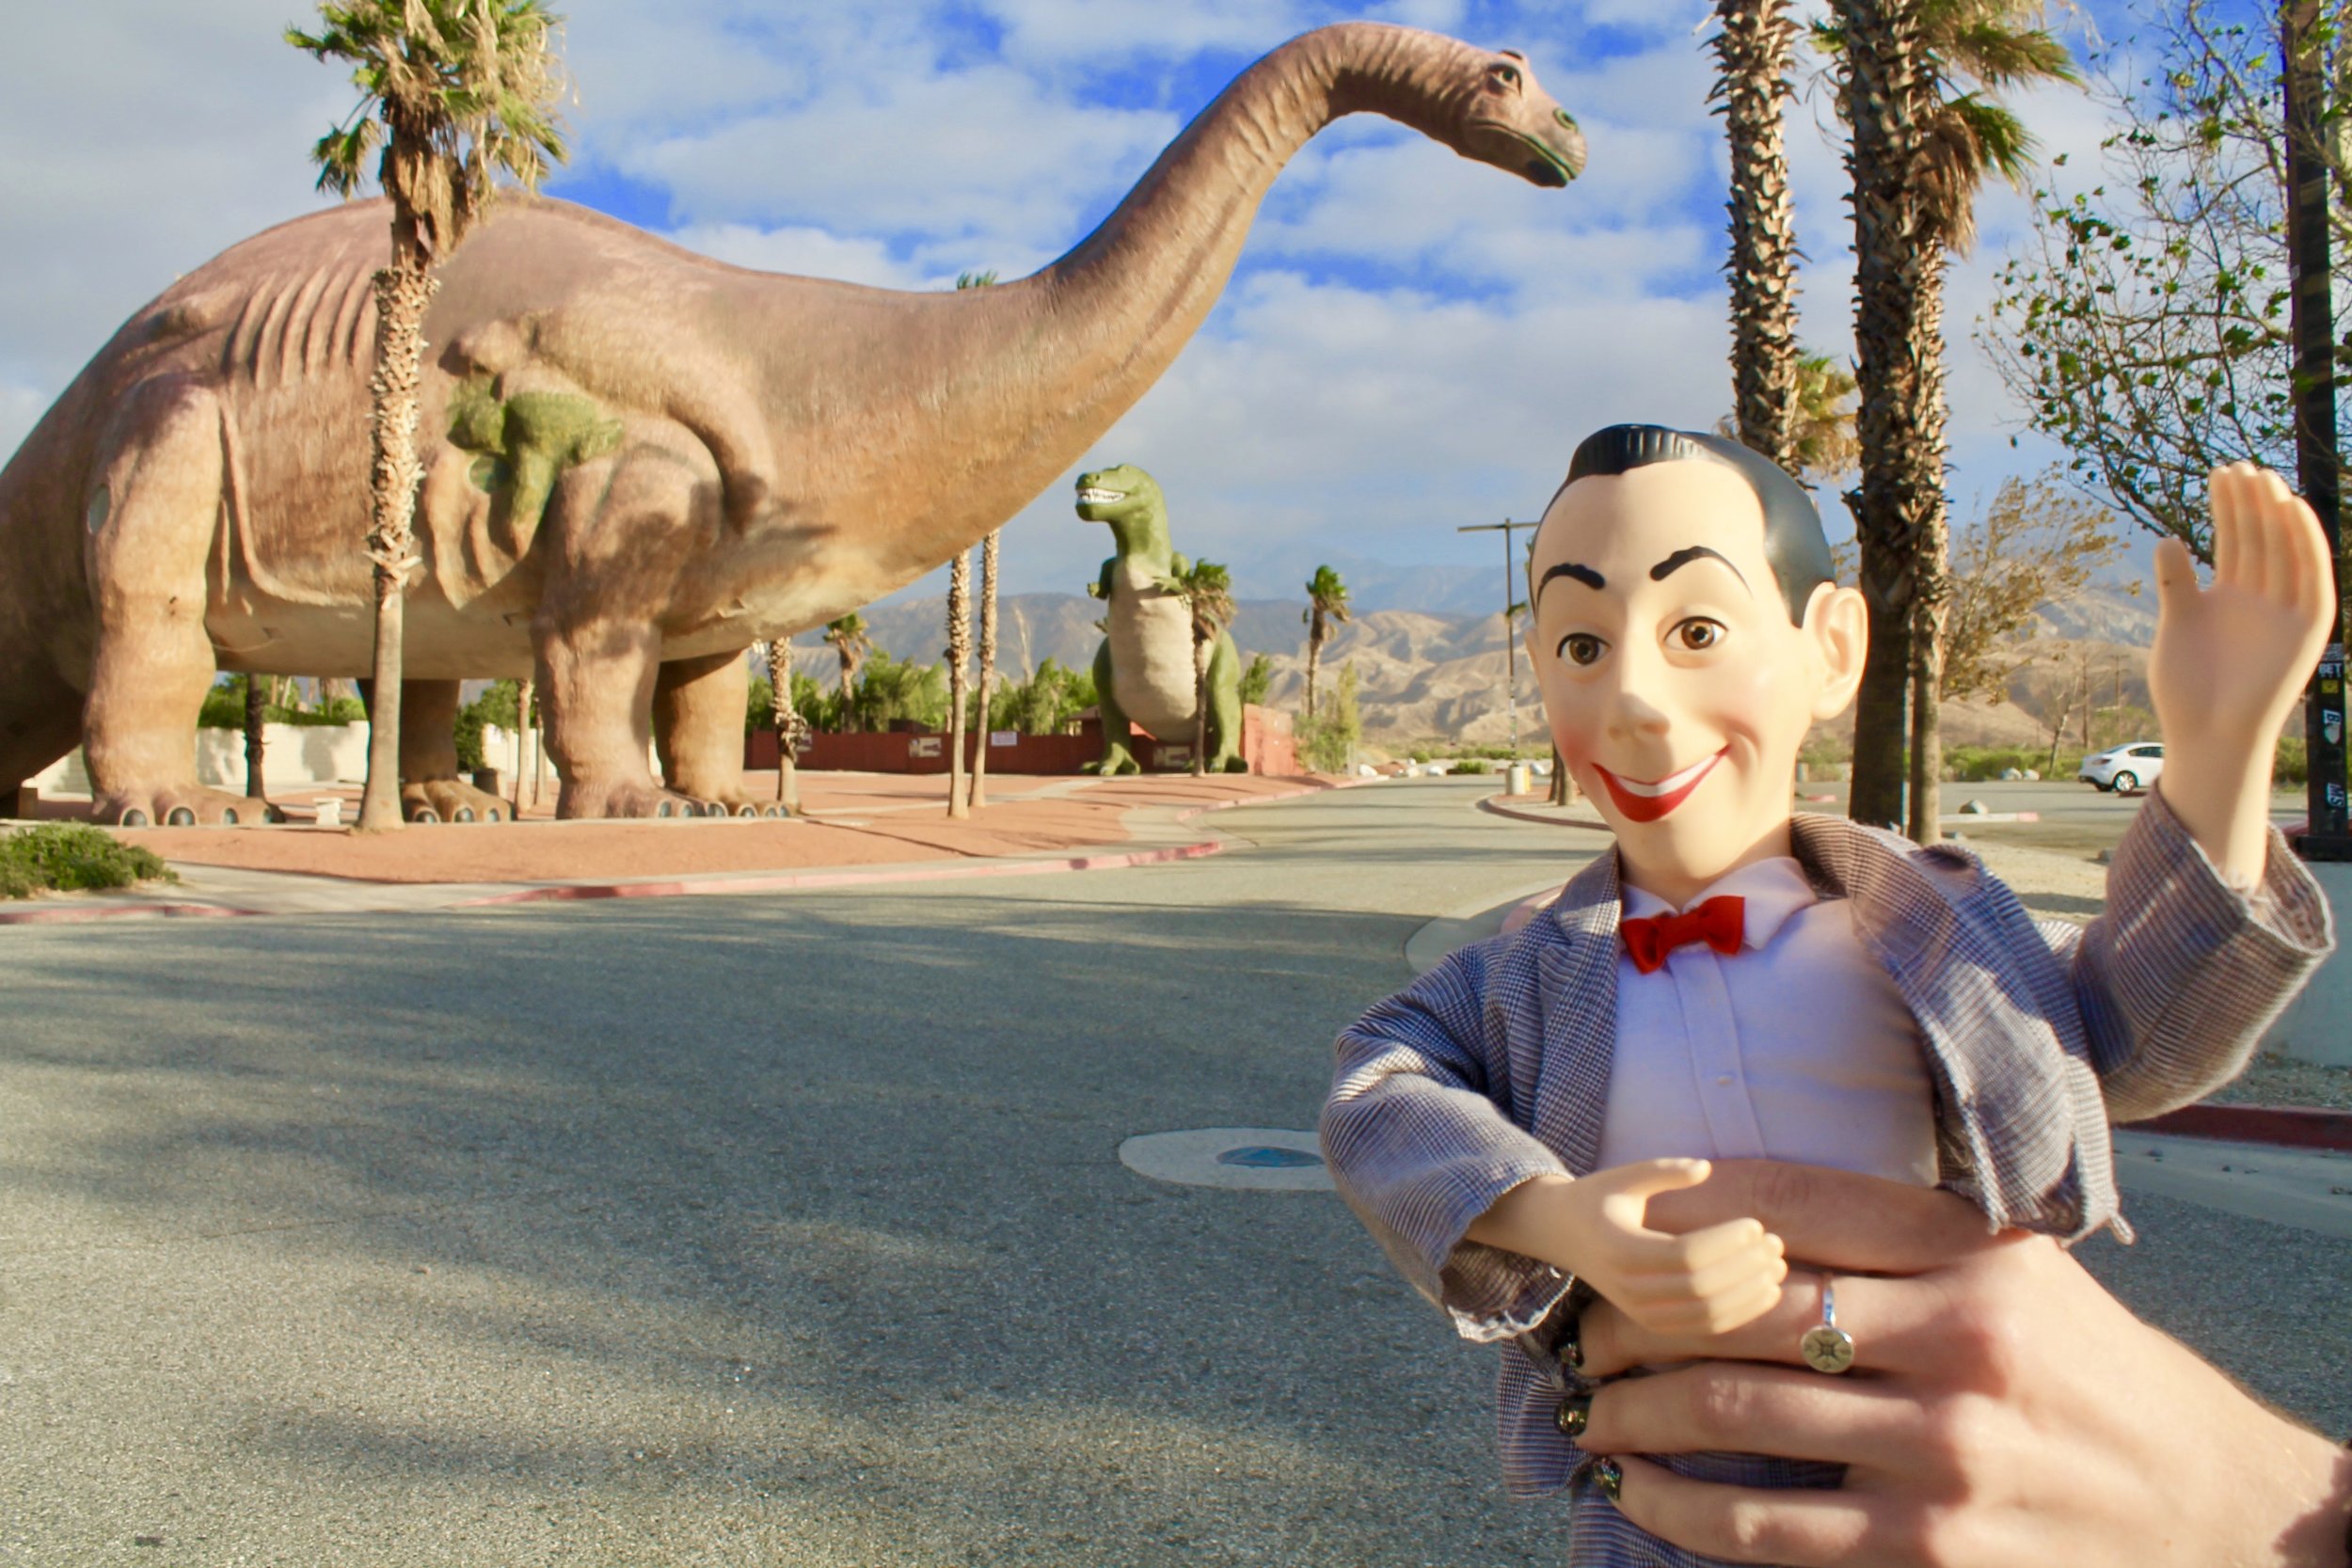
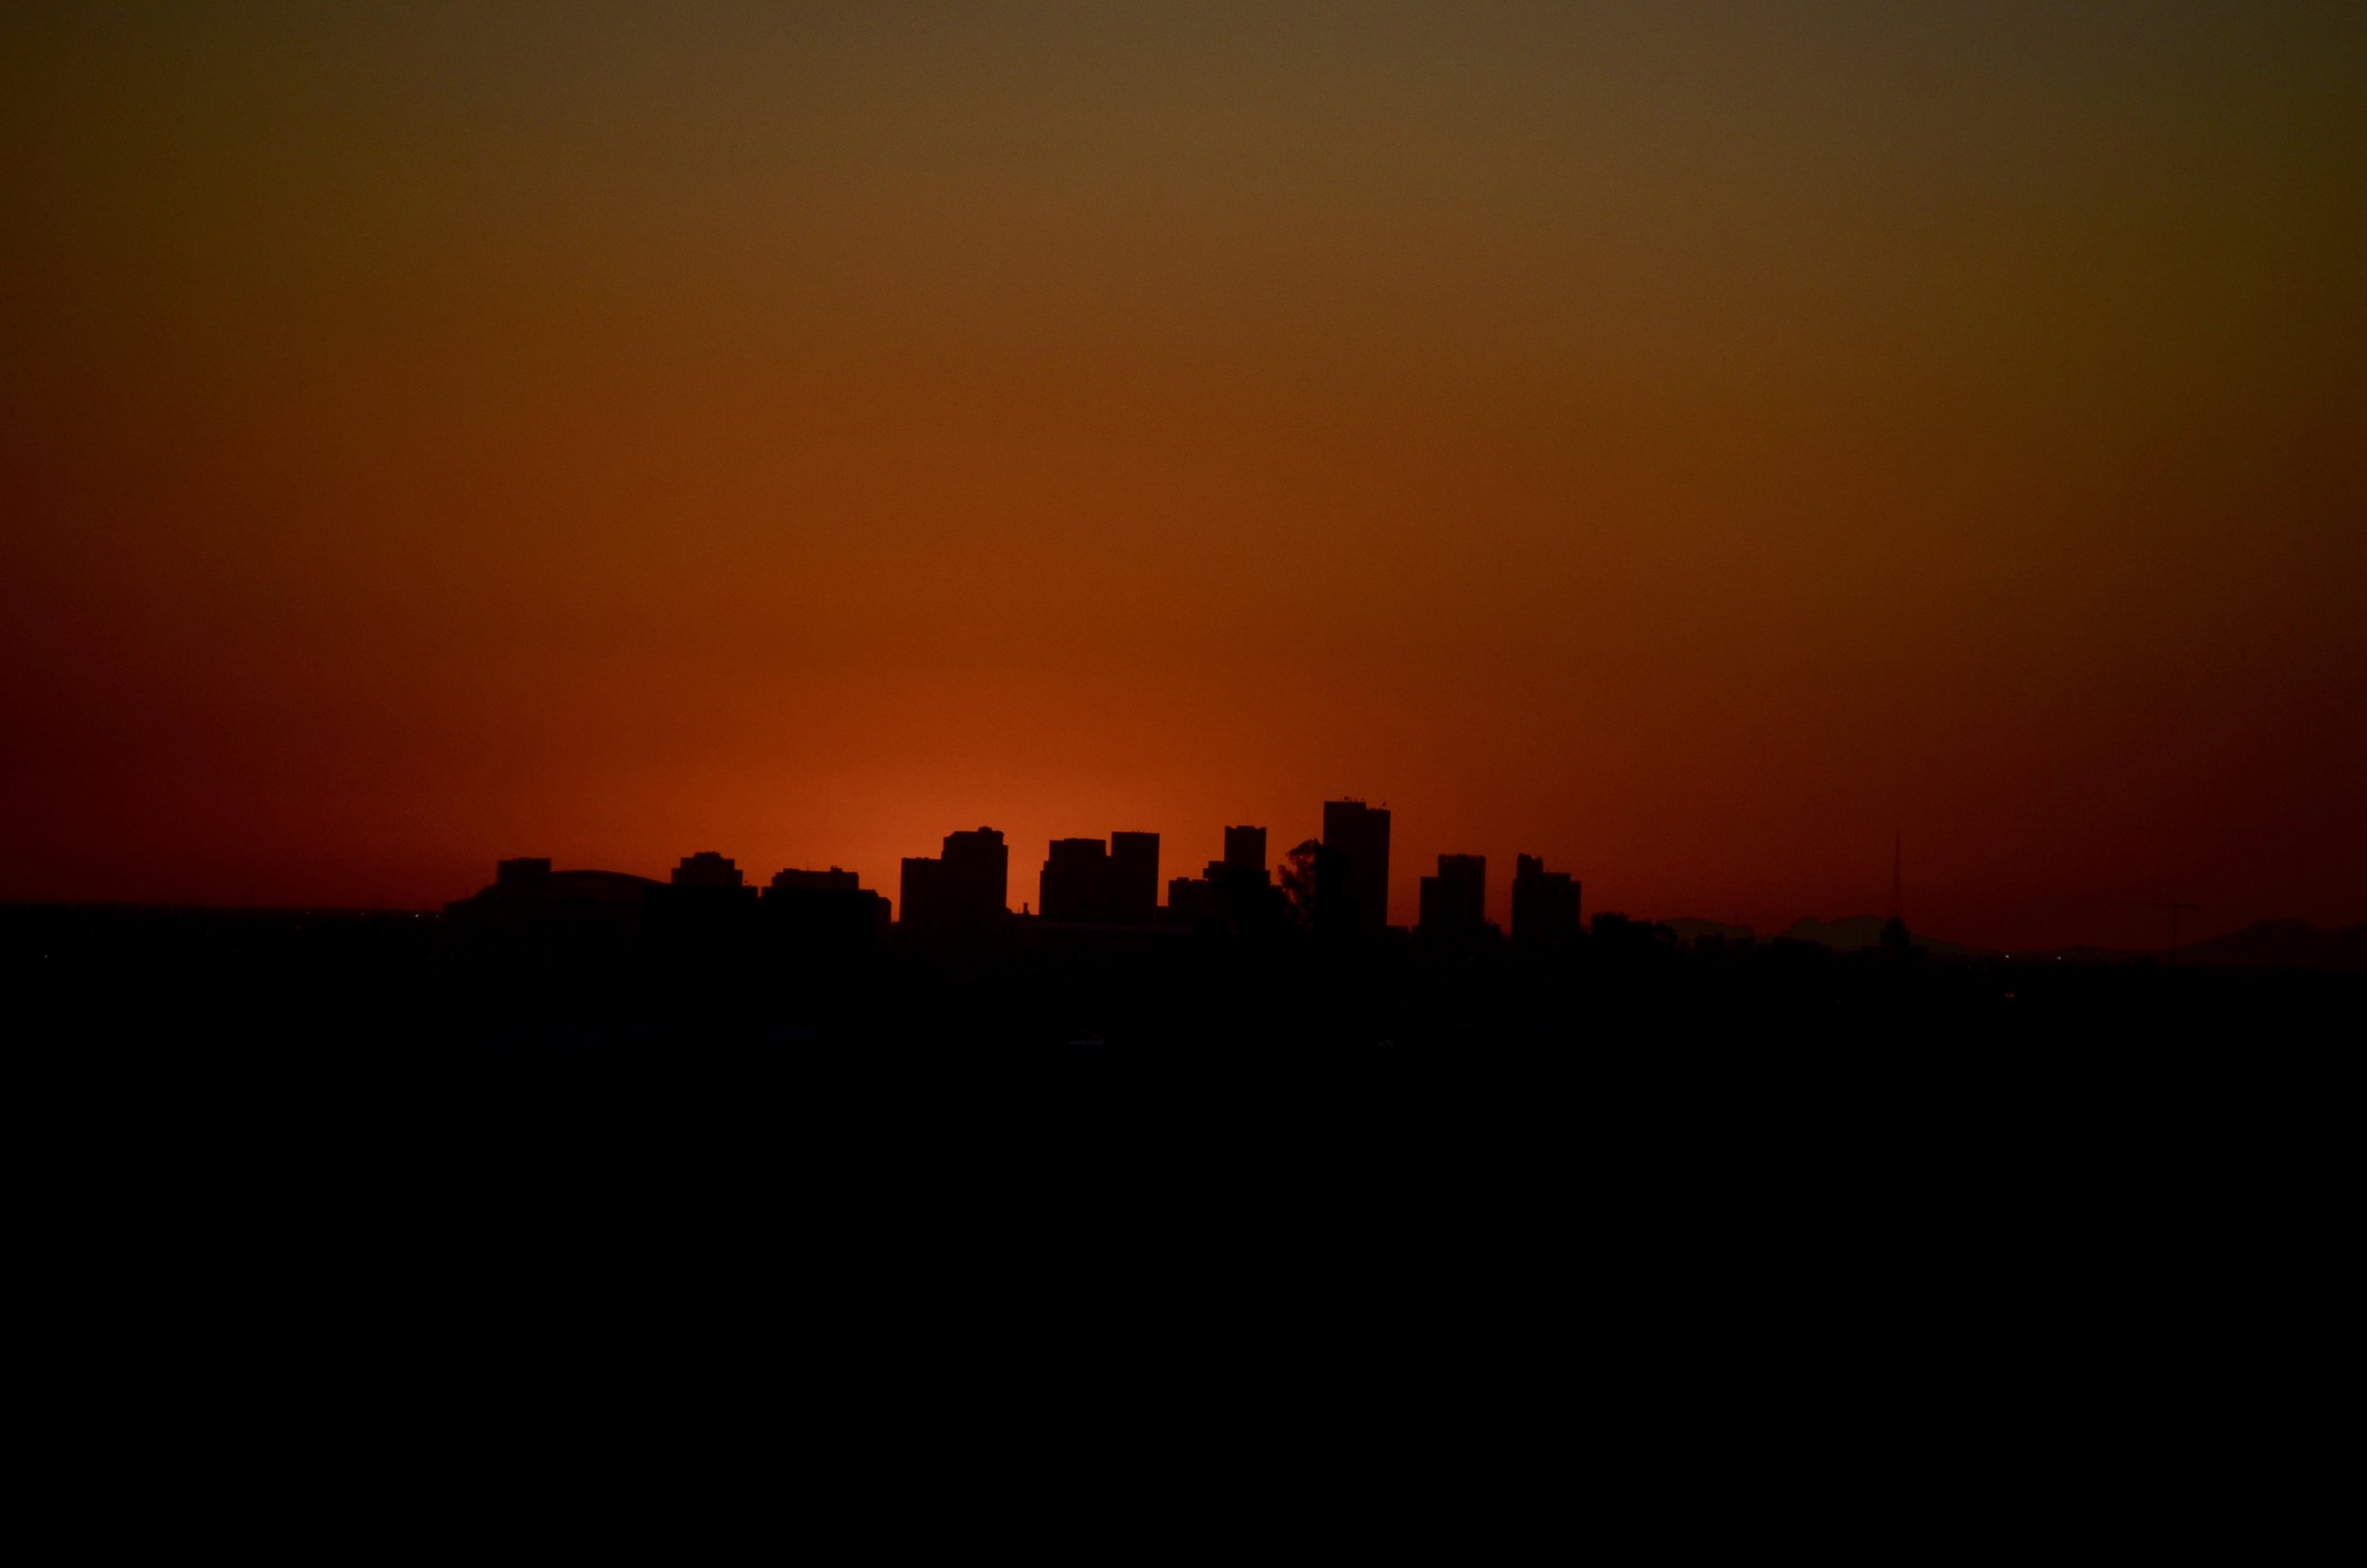
ADVENTURES: To break up the 6.5 hour drive from Los Angeles to Scottsdale, Arizona we decided to start our drive early (5am) allowing us to be in the Palm Springs area for the sunrise. We pulled over, set up the tripod, and did a little video and photo shoot while we took in the beautiful sunrise. While in this area we stopped at the Cabazon Dinosaur Attraction (Exit 106). For any Pee-Wee Herman fan you may recognize these from the movie Pee-Wee’s Big Adventure! This is an attraction you can go inside and explore during normal business hours, however, since we arrived so early in the morning we were looking to just take a few cool pics, make a silly video, and be on our way to Arizona! Upon arriving in Scottsdale we decided to head to the Hole in the Rock in Phoenix for the sunset! The Hole in the Rock is a quick 5-10 minute walk at a slight incline literally up to a giant hole in a rock that overlooks Phoenix. It was a little crowded for the sunset so be aware of that. There is a free parking lot directly in front of the formation. Then it was off to bed to get an early start the next day!
Couldn't help but pull over near Palm Springs and do a little dance at the famous Cabazon Dinosaurs from Pee-Wee's Big Adventure!
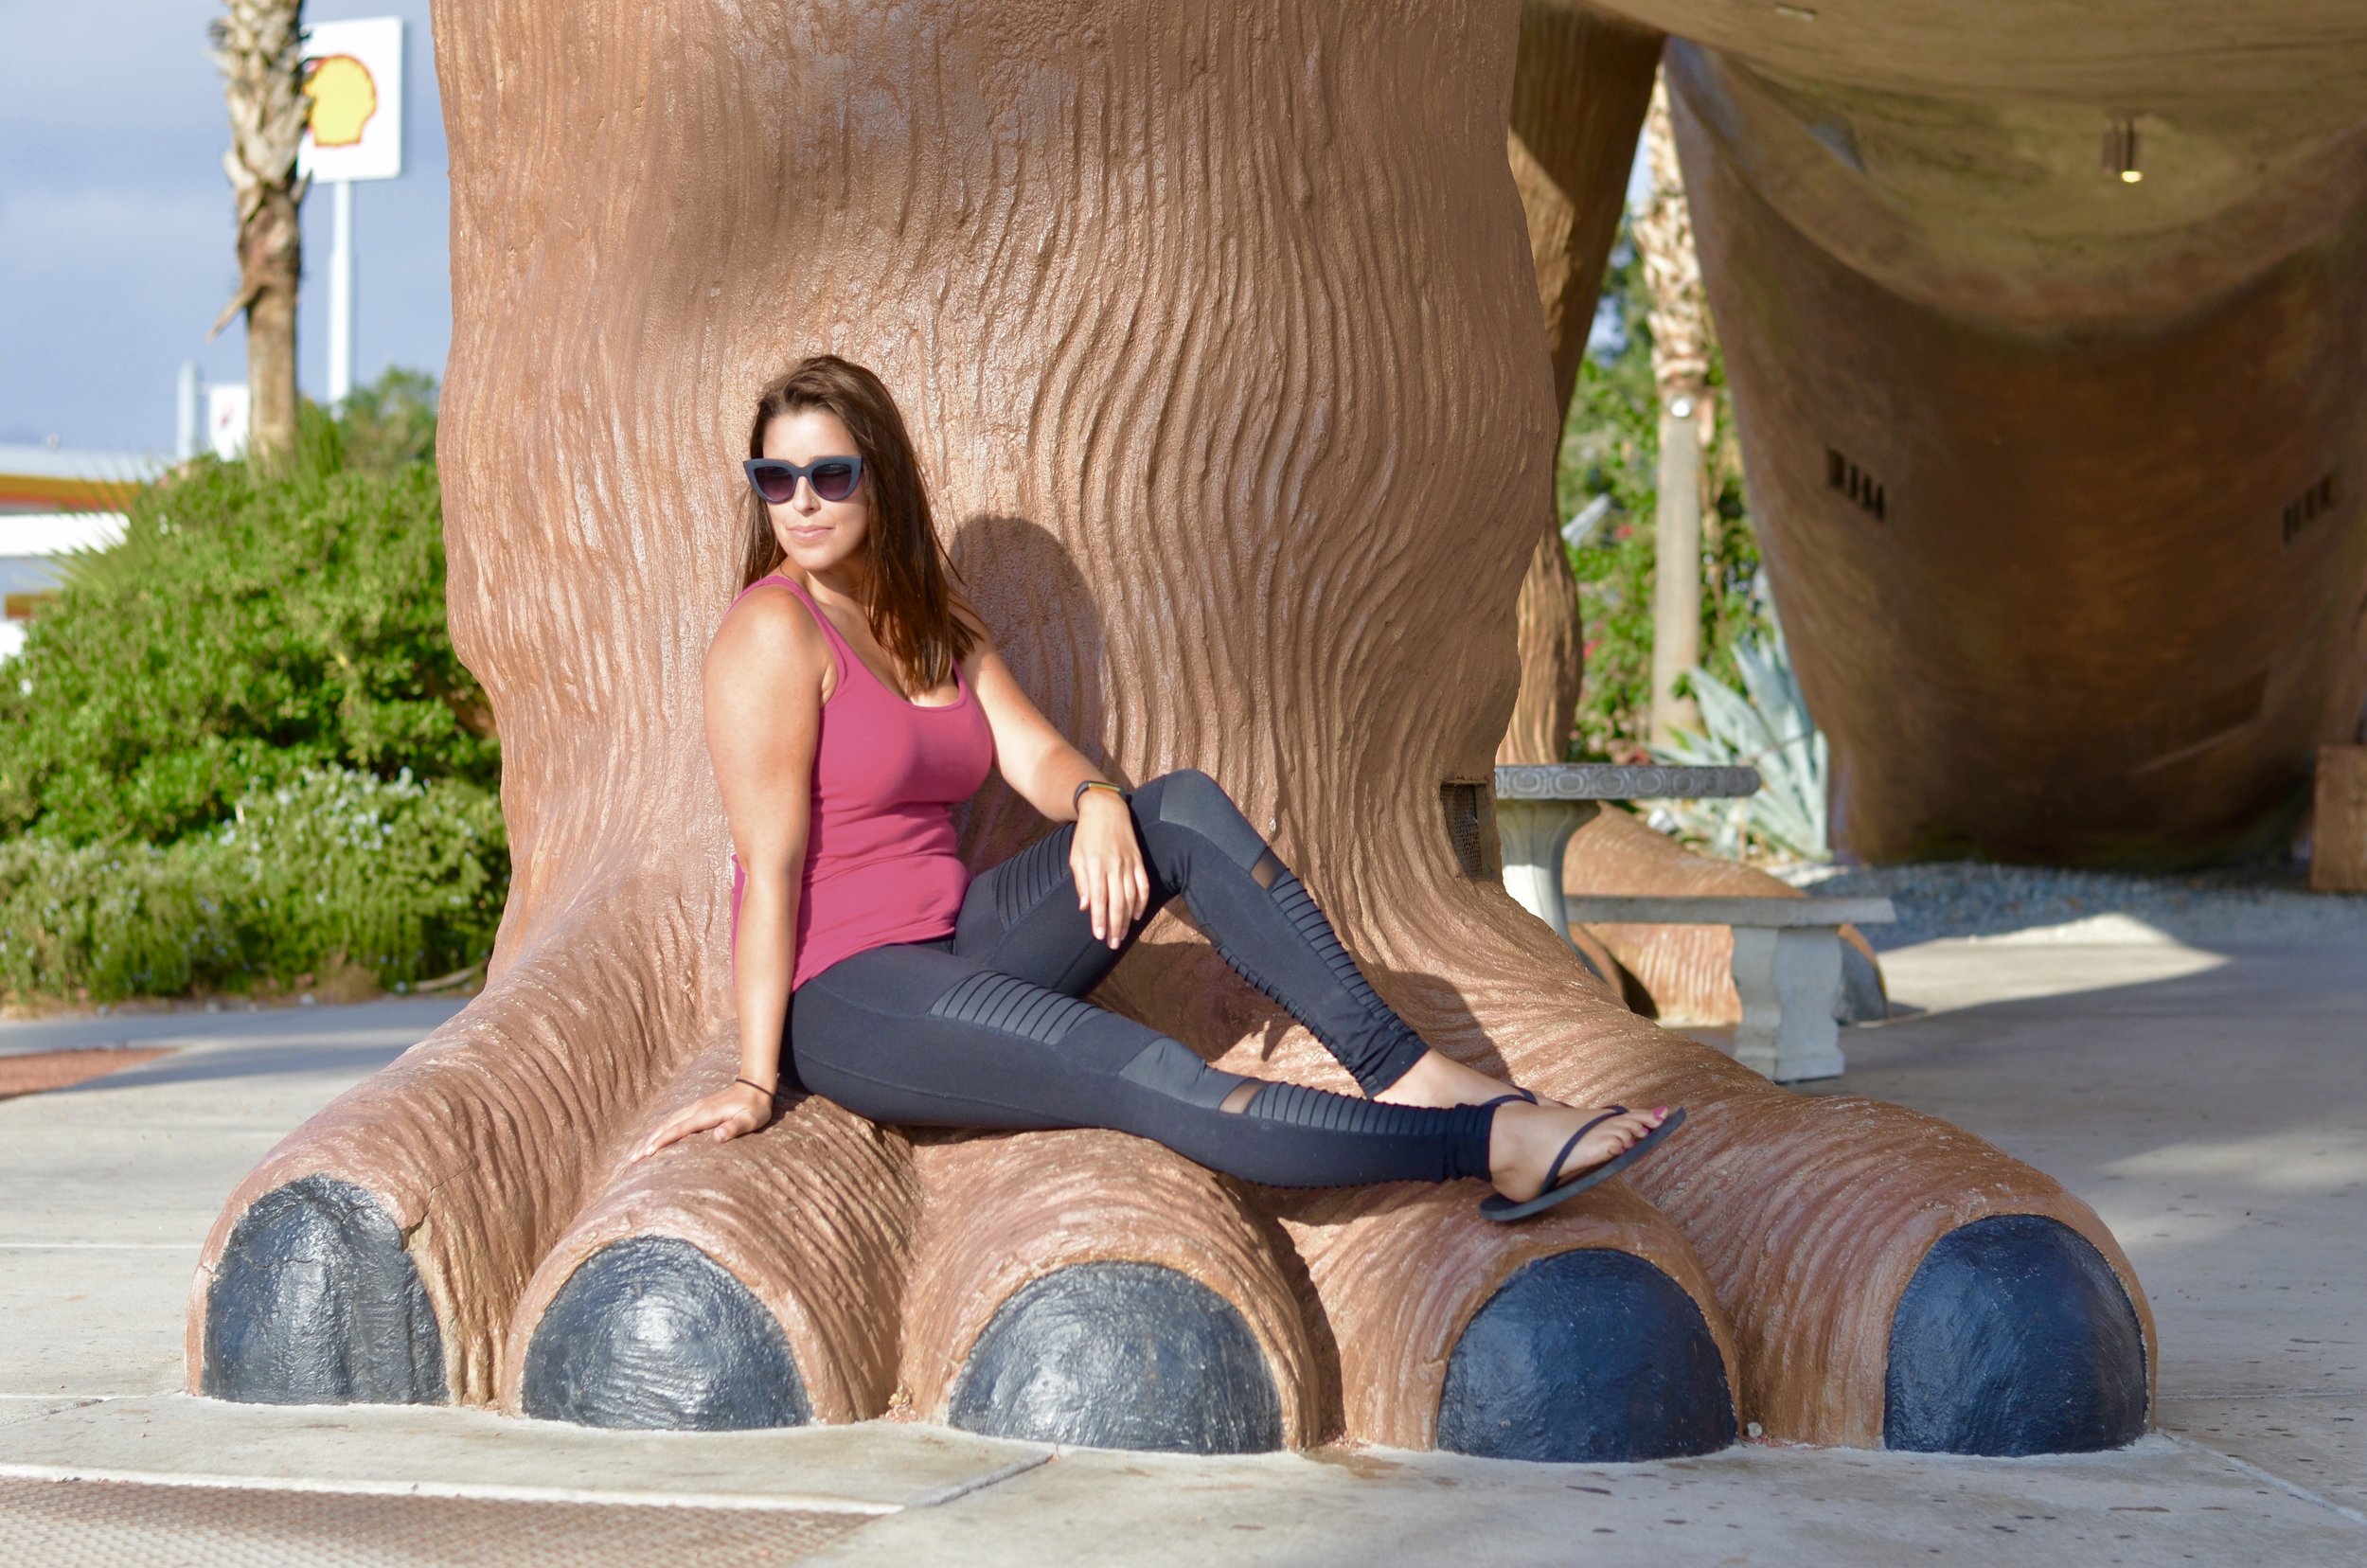
Cabazon Dinosaurs, Cabazon, California

Cabazon Dinosaurs, Cabazon, California
TIPS: Top off your gas at the Morongo Casino Exit where there is also a Starbucks for a quick coffee and breakfast grab! Gas is significantly cheaper at this exit ($1/gallon cheaper!) as opposed to the Cabazon Dinosaur Exit which is shortly after Morongo. Remember anything that is a tourist spot/trap is going to have higher prices! Keep in mind between Palm Springs and Scottsdale there is pretty much nothing except a boring drive and very few stops. Be smart about using the bathroom and getting food and gas. We stopped again at the Lovekin Exit near the California/Arizona border to refresh and refuel.

Hole-In-The-Rock at Papago Park, Phoenix, Arizona
Phoenix, Arizona
MORE INFORMATION

Hole-In-The-Rock at Papago Park, Phoenix, Arizona
- TOTAL TRAVEL TIME: 6.5-7 hours
- TOTAL MILES: 459 miles (I was also really tired and accidentally passed the dinosaurs by 30 minutes so we turned around for a short detour!) Ooops!
- GAS PRICES: $2.99/gallon
- EATS: Starbucks at Morongo Exit. Chipotle in Scottsdale. Cheesecake Factory in Scottsdale (birthday celebration).
- SLEEP: Stayed the night at my friends in Scottsdale. BUT there is a cute hotel called the Saguaro along with many other options in the area.
- WISH WE HAD TIME: Joshua Tree is still on my list BUT keep in mind this is a popular attraction specifically for camping and can get extremely hot since it is desert. I also love casinos and there are many in the Palm Springs area including the Morongo Casino and Agua Caliente! In Phoenix I would love to eventually check out the Zoo and Botanical Garden!
- FINAL MUST-SEE LIST:
- Cabazon Dinosaurs, Cabazon, CA
- Hole in the Rock, Phoenix, AZ
DAY 2: ABANDONED STOPS, SEDONA'S DEVIL'S BRIDGE, & ROUTE 66

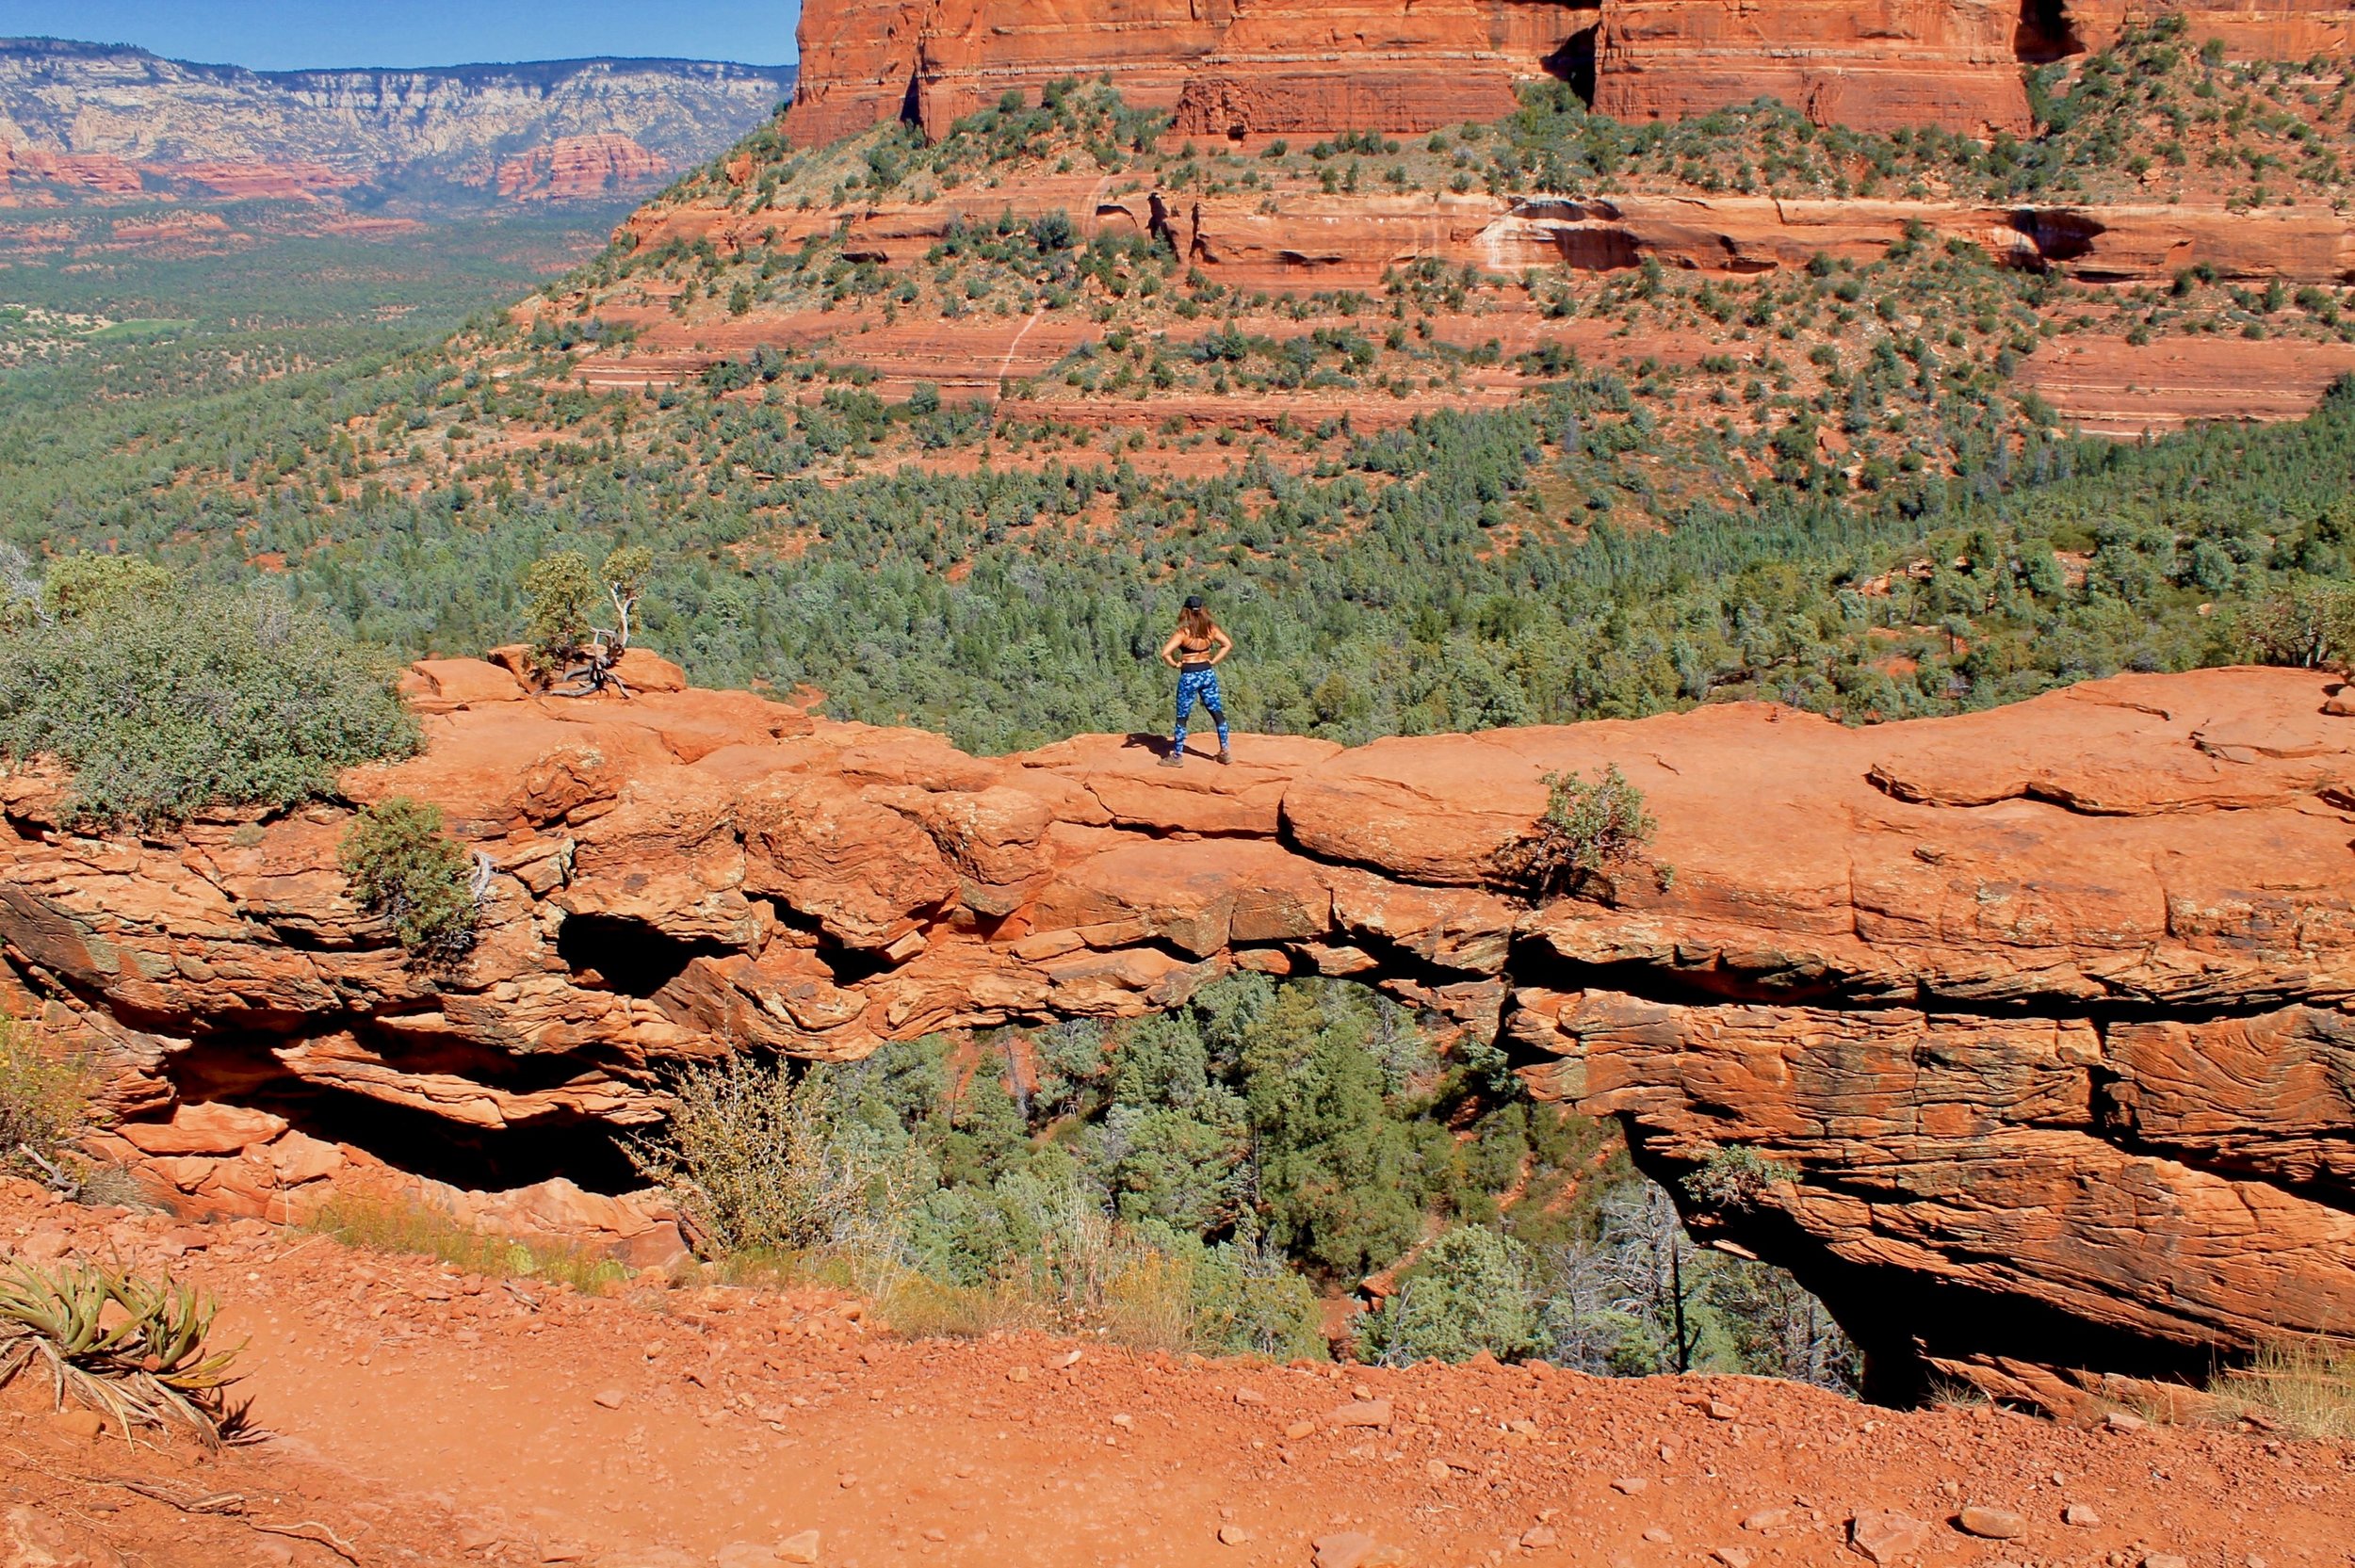
Devil's Bridge, Sedona, Arizona
ADVENTURES: Almost every day of our trip we began our day by leaving our hotel/stay by 7am. Definitely keep that in mind because it is one of the main reasons we were able to do so much and avoid crowds at certain places! We started the day by driving 2 hours from Scottsdale, AZ to Sedona, AZ. But FIRST we made a pit stop in Canyon City (literally an exit on the way) to scope out an abandoned Dog Track. A little, quick backstory. Me and my friend Katie loved checking out abandoned places in high school AND my dad is a dog/horse track lover so it seemed like a cool thing to check out! It ended up being ummm SUPER SCARY and we decided after hearing random creaking noises and imaginary dogs barking, it wasn’t smart or safe to enter! We snapped a few pics and headed to Sedona!

Abandoned Greyhound Dog Track, Black Canyon City, Arizona
Devil's Bridge, Sedona, Arizona
In Sedona we hiked the Devil’s Bridge. It took us about 2.2 hours to complete the hike and take photos. My Fitbit said it was about a 5 mile roundtrip hike. Keep in mind the trailhead itself took about 1 mile to get to (just a flat walk in sand). The parking lot is small and everything was full besides the oversized parking spaces, so we snuck the car in there and had 0 issues! Other optional parking is along the street further back! There was a bathroom there to use before the hike and then from this parking lot you begin the walk to the trailhead. We took a lot of really cool pictures but keep in mind there can be a wait time up at the viewpoint if you are looking to get photos without people in them! For this particular hike wear hiking shoes/boots, take plenty of water (I am talking fill your Camelbak and then bring spare water bottles), take lots of snacks, and be prepared for it to be hot! Earlier in the day is best for this hike as the afternoon can get scorching!

Sedona, Arizona
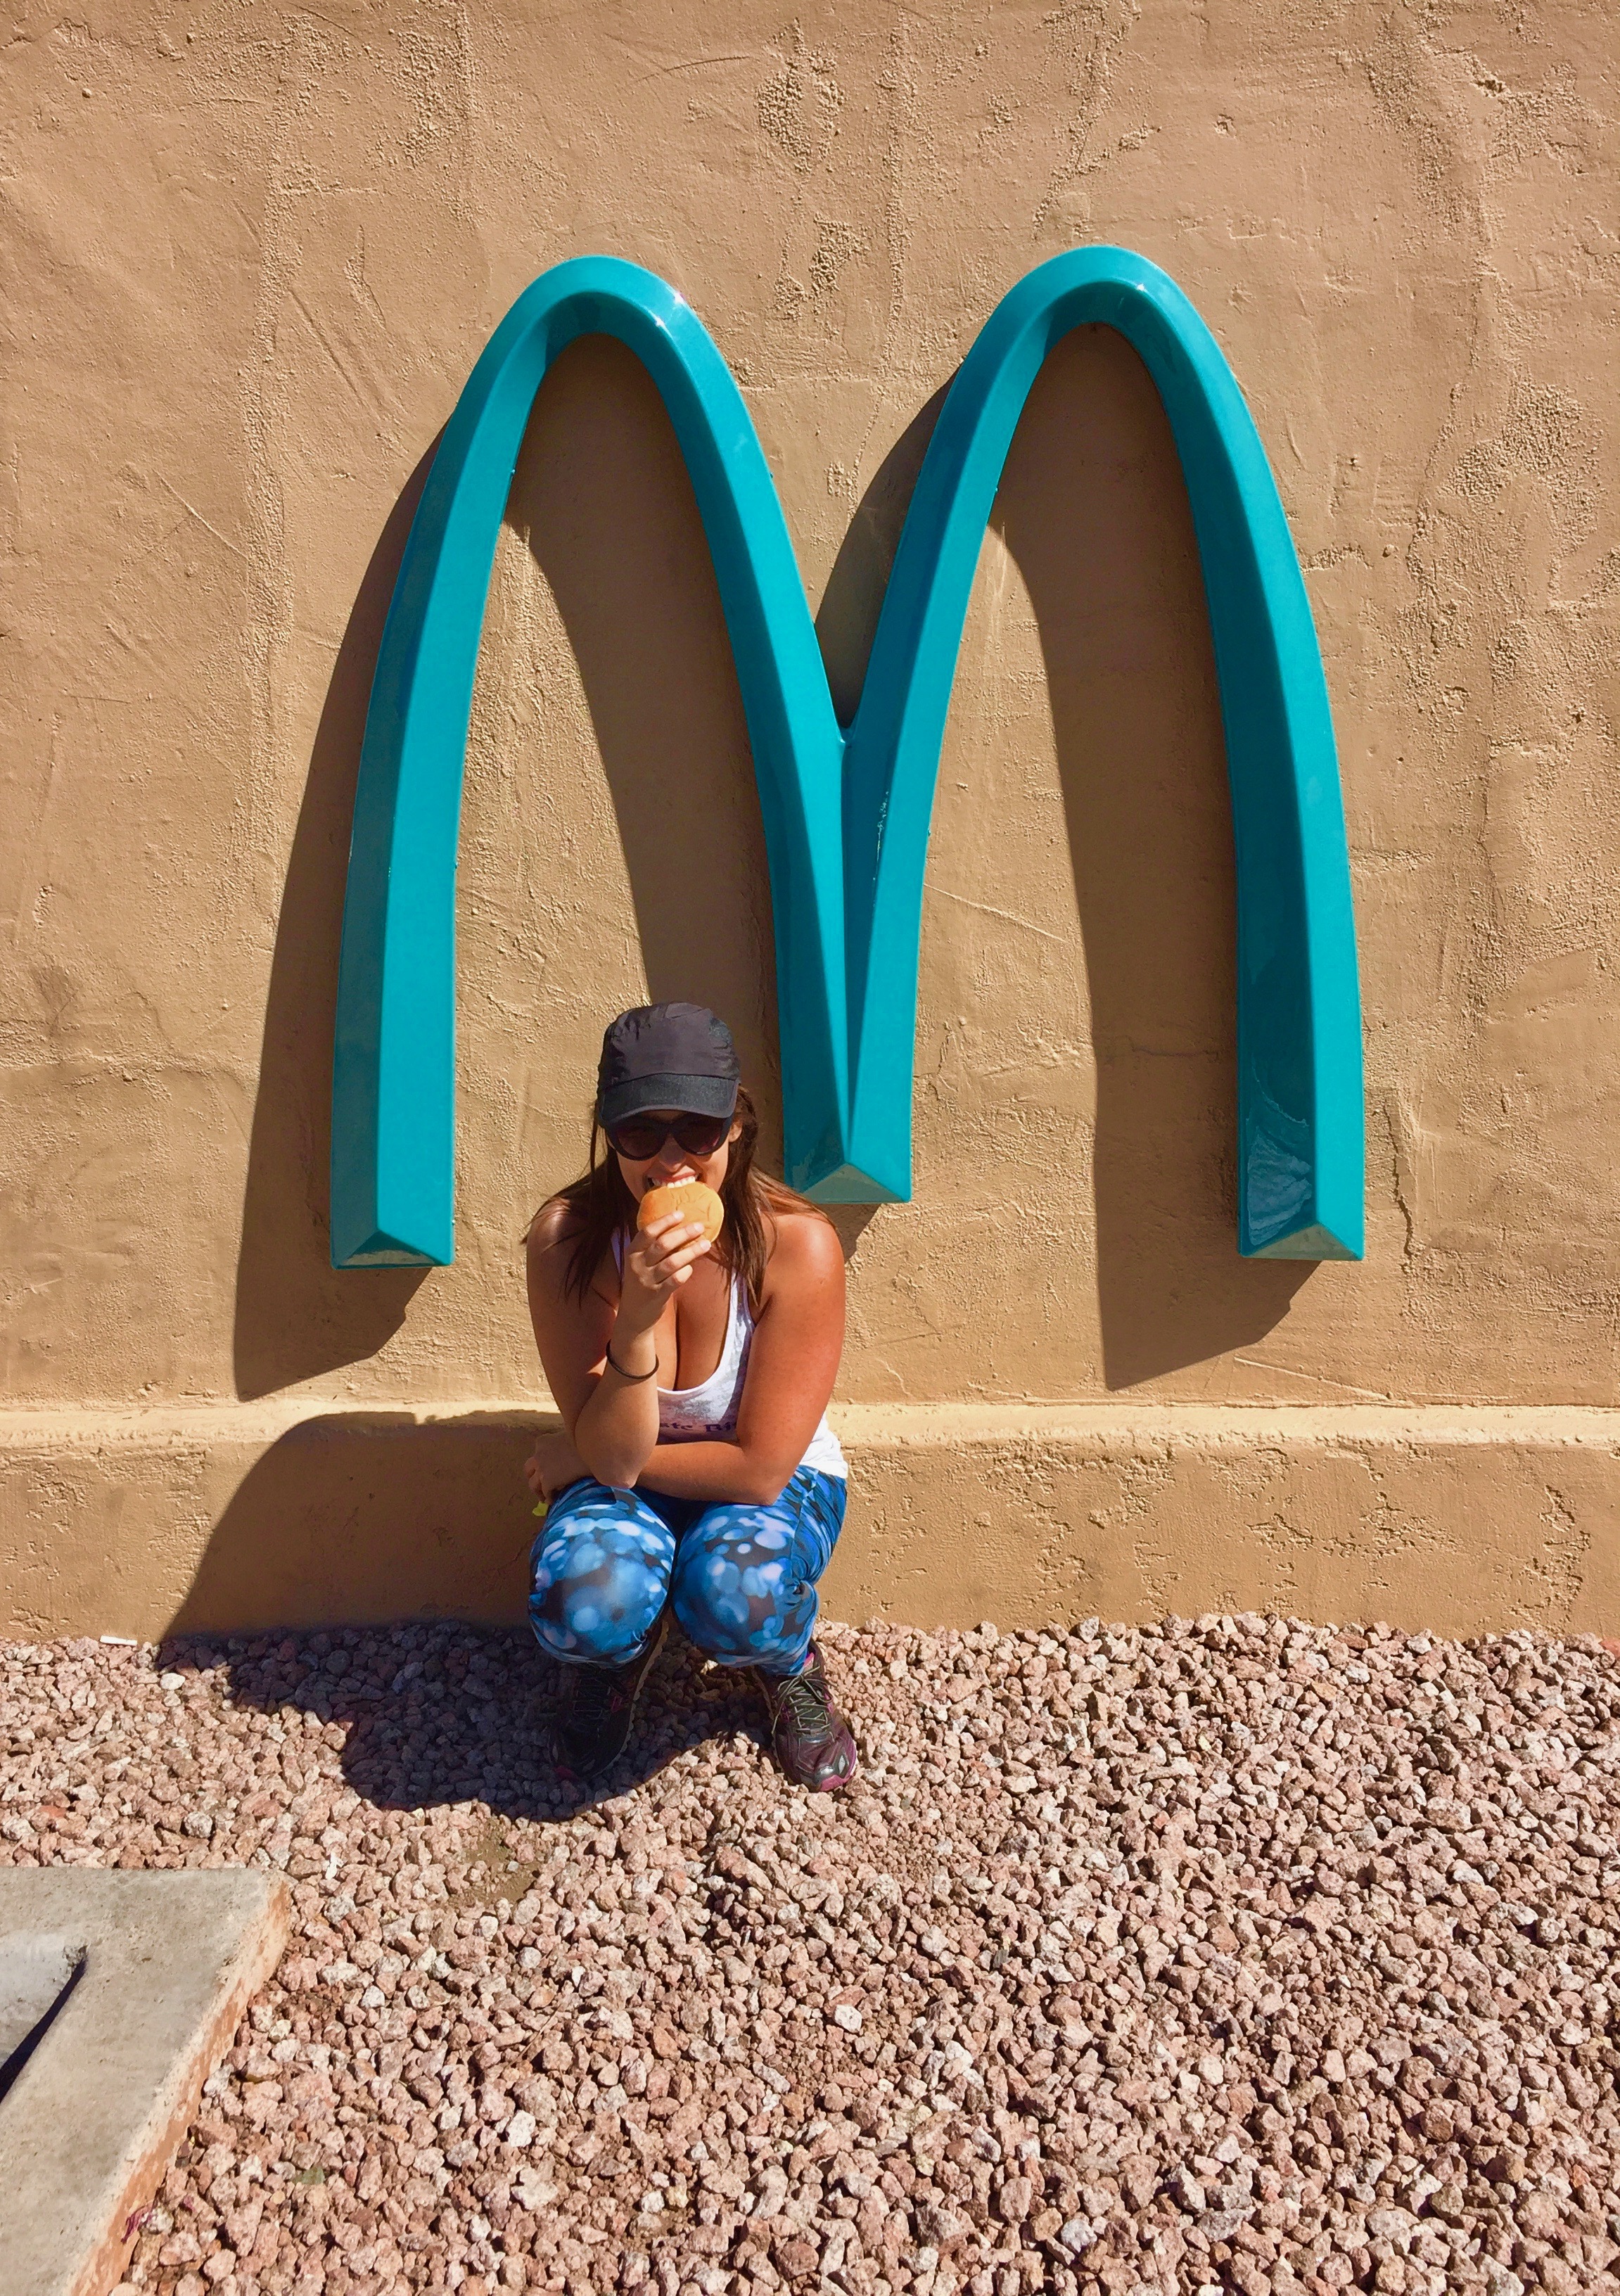
McDonald's Blue Arches, Sedona, Arizona
After Devil’s Bridge we worked up an appetite and headed to the only McDonalds in the world with blue arches! This is located right in Sedona and is pretty cool to see. AND they still had the orange Hi-C drink available, which almost all the McDonald’s locations have gotten rid of! SCORE! Next up was a little 30-45 minute drive along Route 66 to an abandoned town called Two Guns, AZ. There we took some photos of what used to be a popular road-side attraction and a pretty neat Route 66 sign. Our final destination of the evening was Williams, AZ, about an hour and 15 minutes from Two Guns, where we got comfy and cozy at the Canyon Country Inn Bed and Breakfast, but first decided to indulge at the world famous Rod's Steakhouse in Williams. Very yummy food but the portions were so big I highly recommended splitting! I had the Golden Fried Chicken with a salad and green beans. Went straight to sleep afterwards!

Two Guns, Arizona
TIPS: Be prepared to hike the Devil's Bridge and or any other hike in Sedona. Conditions tend to be hot and dry as the day goes on. Another really cool hike is Cathedral Hike. For that particular hike you will find yourself using your hands a lot so a backpack is a must! In terms of our stay I actually recommend the bed and breakfast we stayed at. It had everything we needed and they had a little breakfast spread available in the morning for us. We felt very safe and comfortable. It was also a lot cheaper than the hotels in the area.

Two Guns, Arizona

Two Guns, Arizona
MORE INFORMATION
- TOTAL TRAVEL TIME: 4 hours
- TOTAL MILES: 260 miles
- GAS PRICES: $2.49/gallon
- EATS: Starbucks in the AM at one of the exits on the way to Sedona. McDonalds for lunch in Sedona. Rod's Famous Steakhouse that has been operating in Williams, Arizona since 1946.
- SLEEP: Canyon Country Inn Bed & Breakfast in Williams, Arizona.
- WISH WE HAD TIME: We passed Slide Rock State Park shortly after leaving Sedona which sounded really cool! It is known for its natural waterslide. I also saw a lot of antiquey-type stores with cool looking artifacts and what not on our way out of Sedona too. In Williams, AZ there is an attraction called Bearizona Wildlife Park which costs to enter but sounds like you would see lots of animals!
- FINAL MUST-SEE LIST:
- Devil's Bridge Hike or Cathedral Rock Hike in Sedona, AZ
- McDonalds Blue Arches, Sedona, AZ
- Explore Route 66 ...Two Guns Ghost Town, Flagstaff, Williams, AZ

Two Guns, Arizona

Two Guns, Arizona

Two Guns, Arizona
DAY 3: FLINTSTONE'S THEME PARK & THE GRAND CANYON SOUTH RIM

Flintstone's Theme Park and Campground, Bedrock City, Arizona
ADVENTURES: We got up early and drove about 30 minutes to the Flintstone's Theme Park in Bedrock City, AZ (on the way to the Grand Canyon) which we thought was abandoned but not exactly! This attraction used to be super popular back in the day and now runs as a campground for RV's. The owners preserved the space and all the rides still operate. It was a fun little stop and a great place to take some nostalgic photos. The cost was just $5 a person to enter and they had a little gift shop with lots of Flintstone's memorabilia.
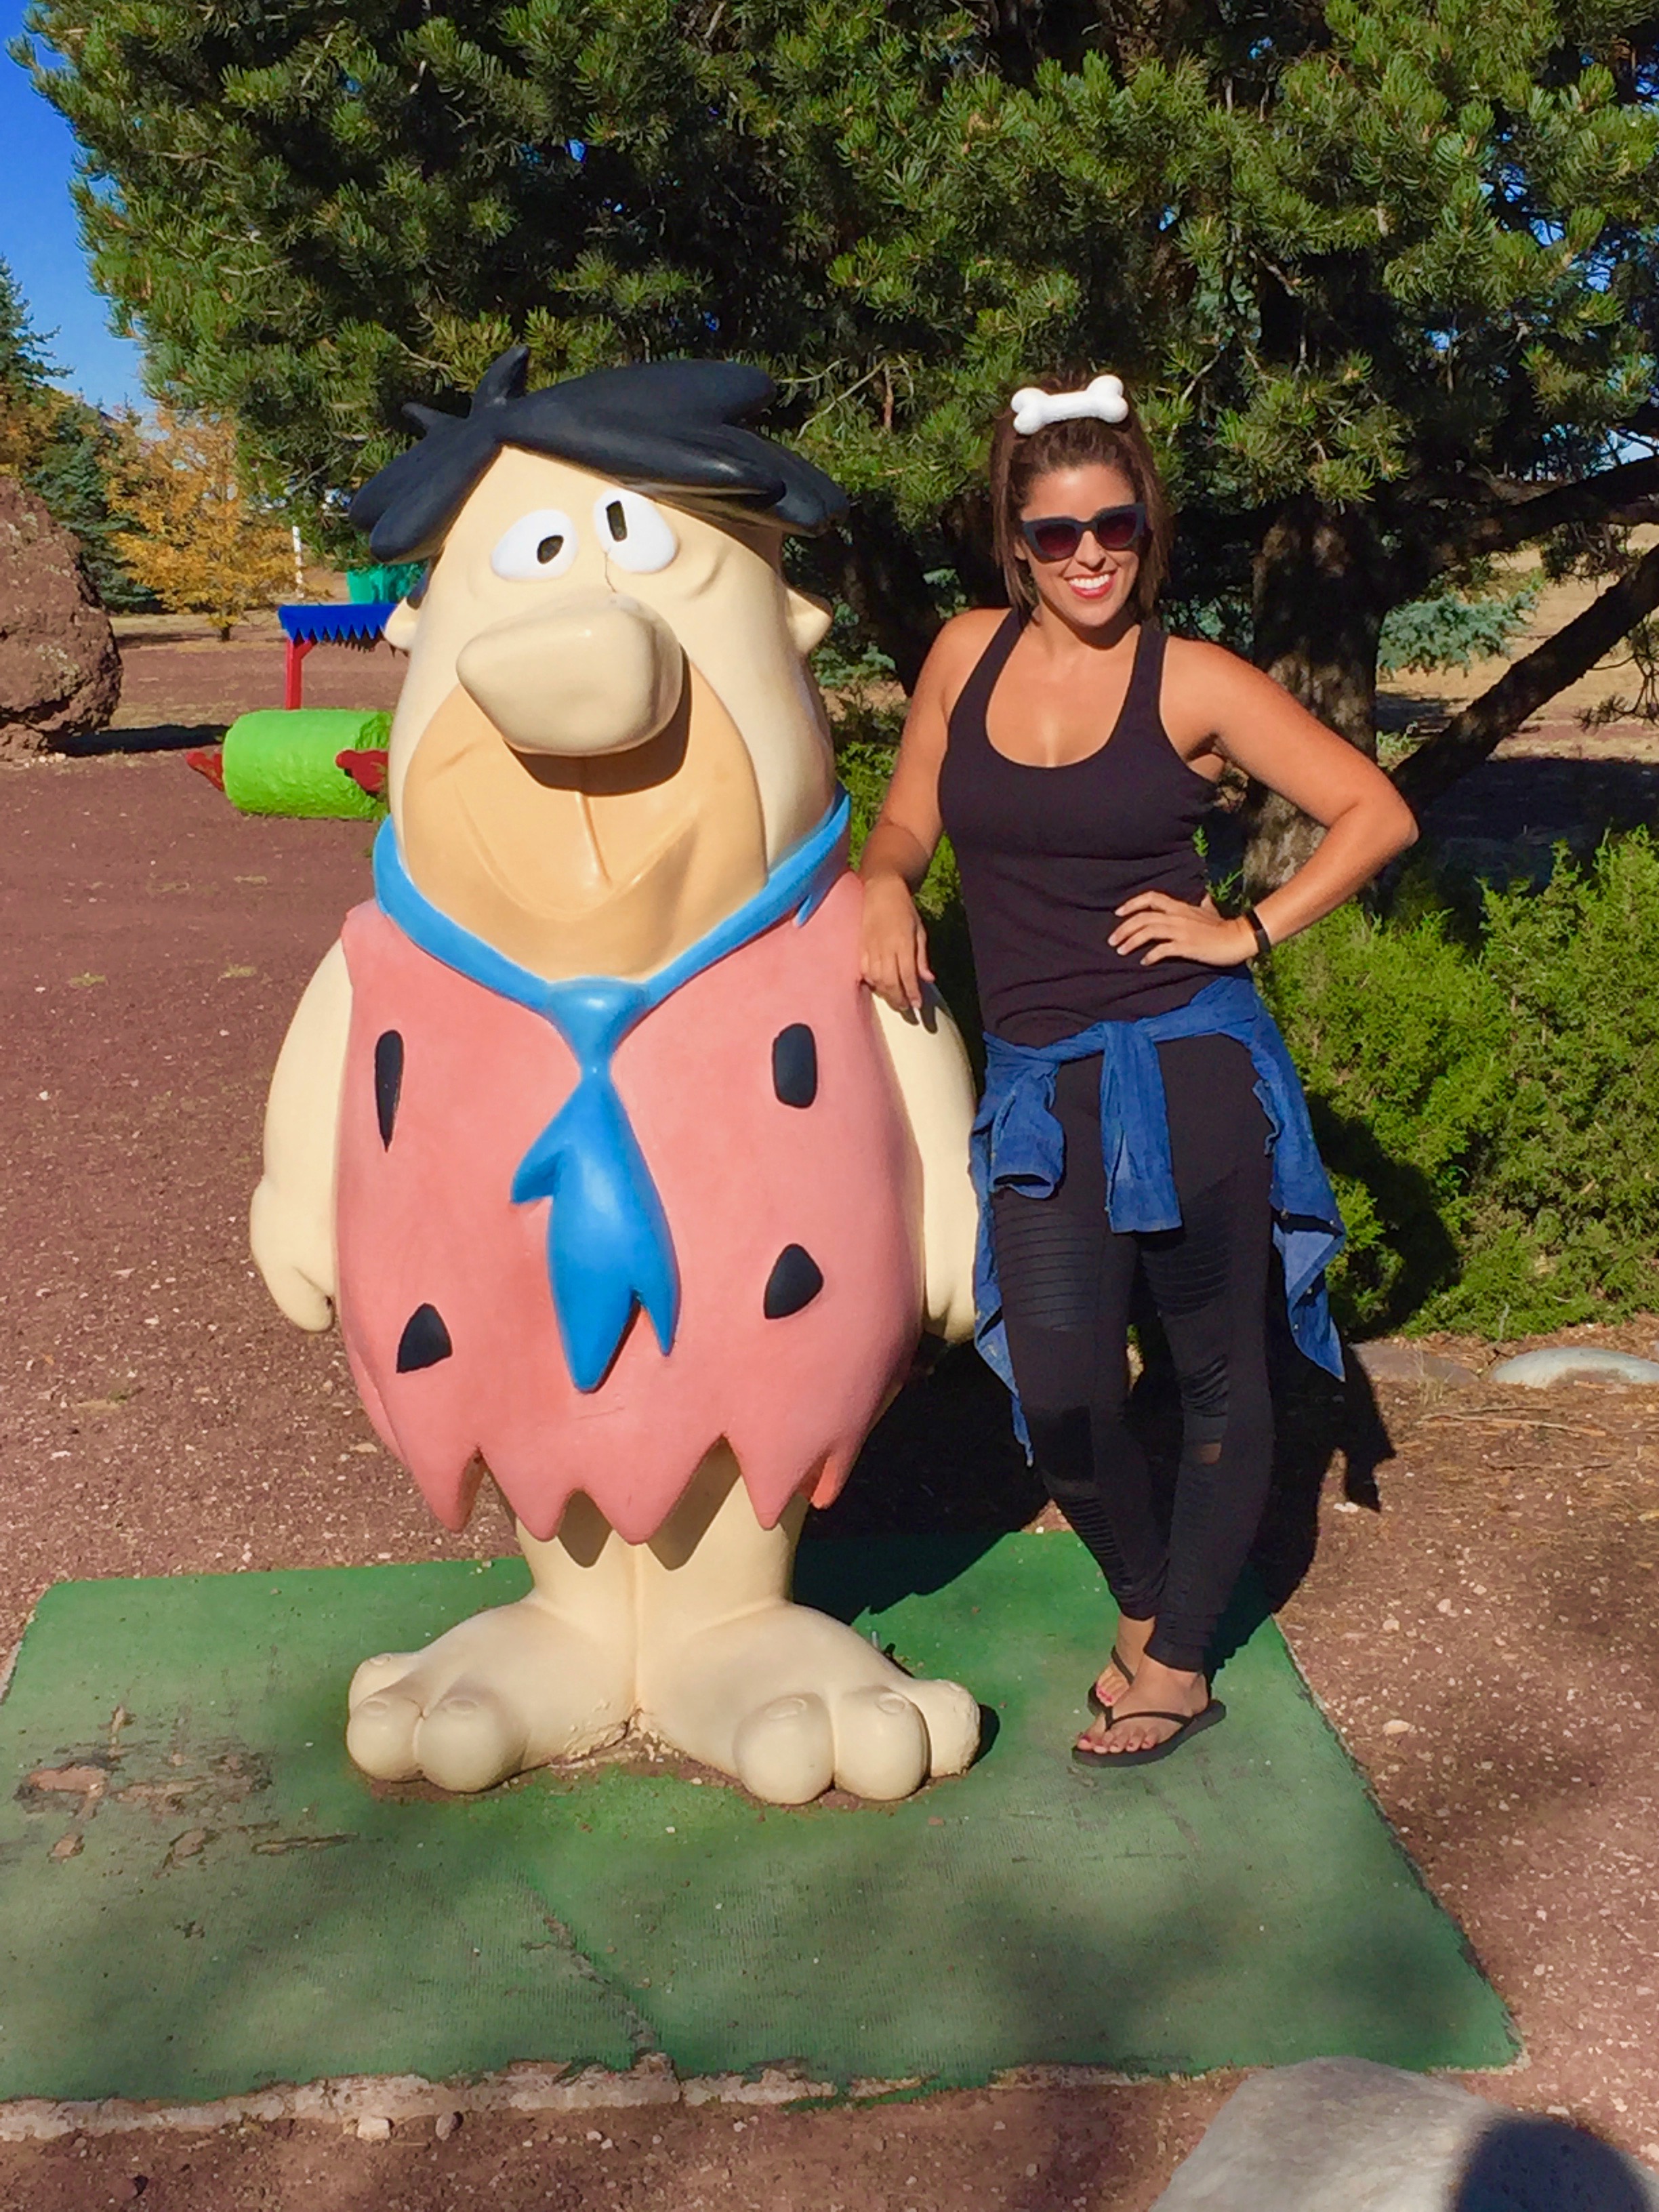
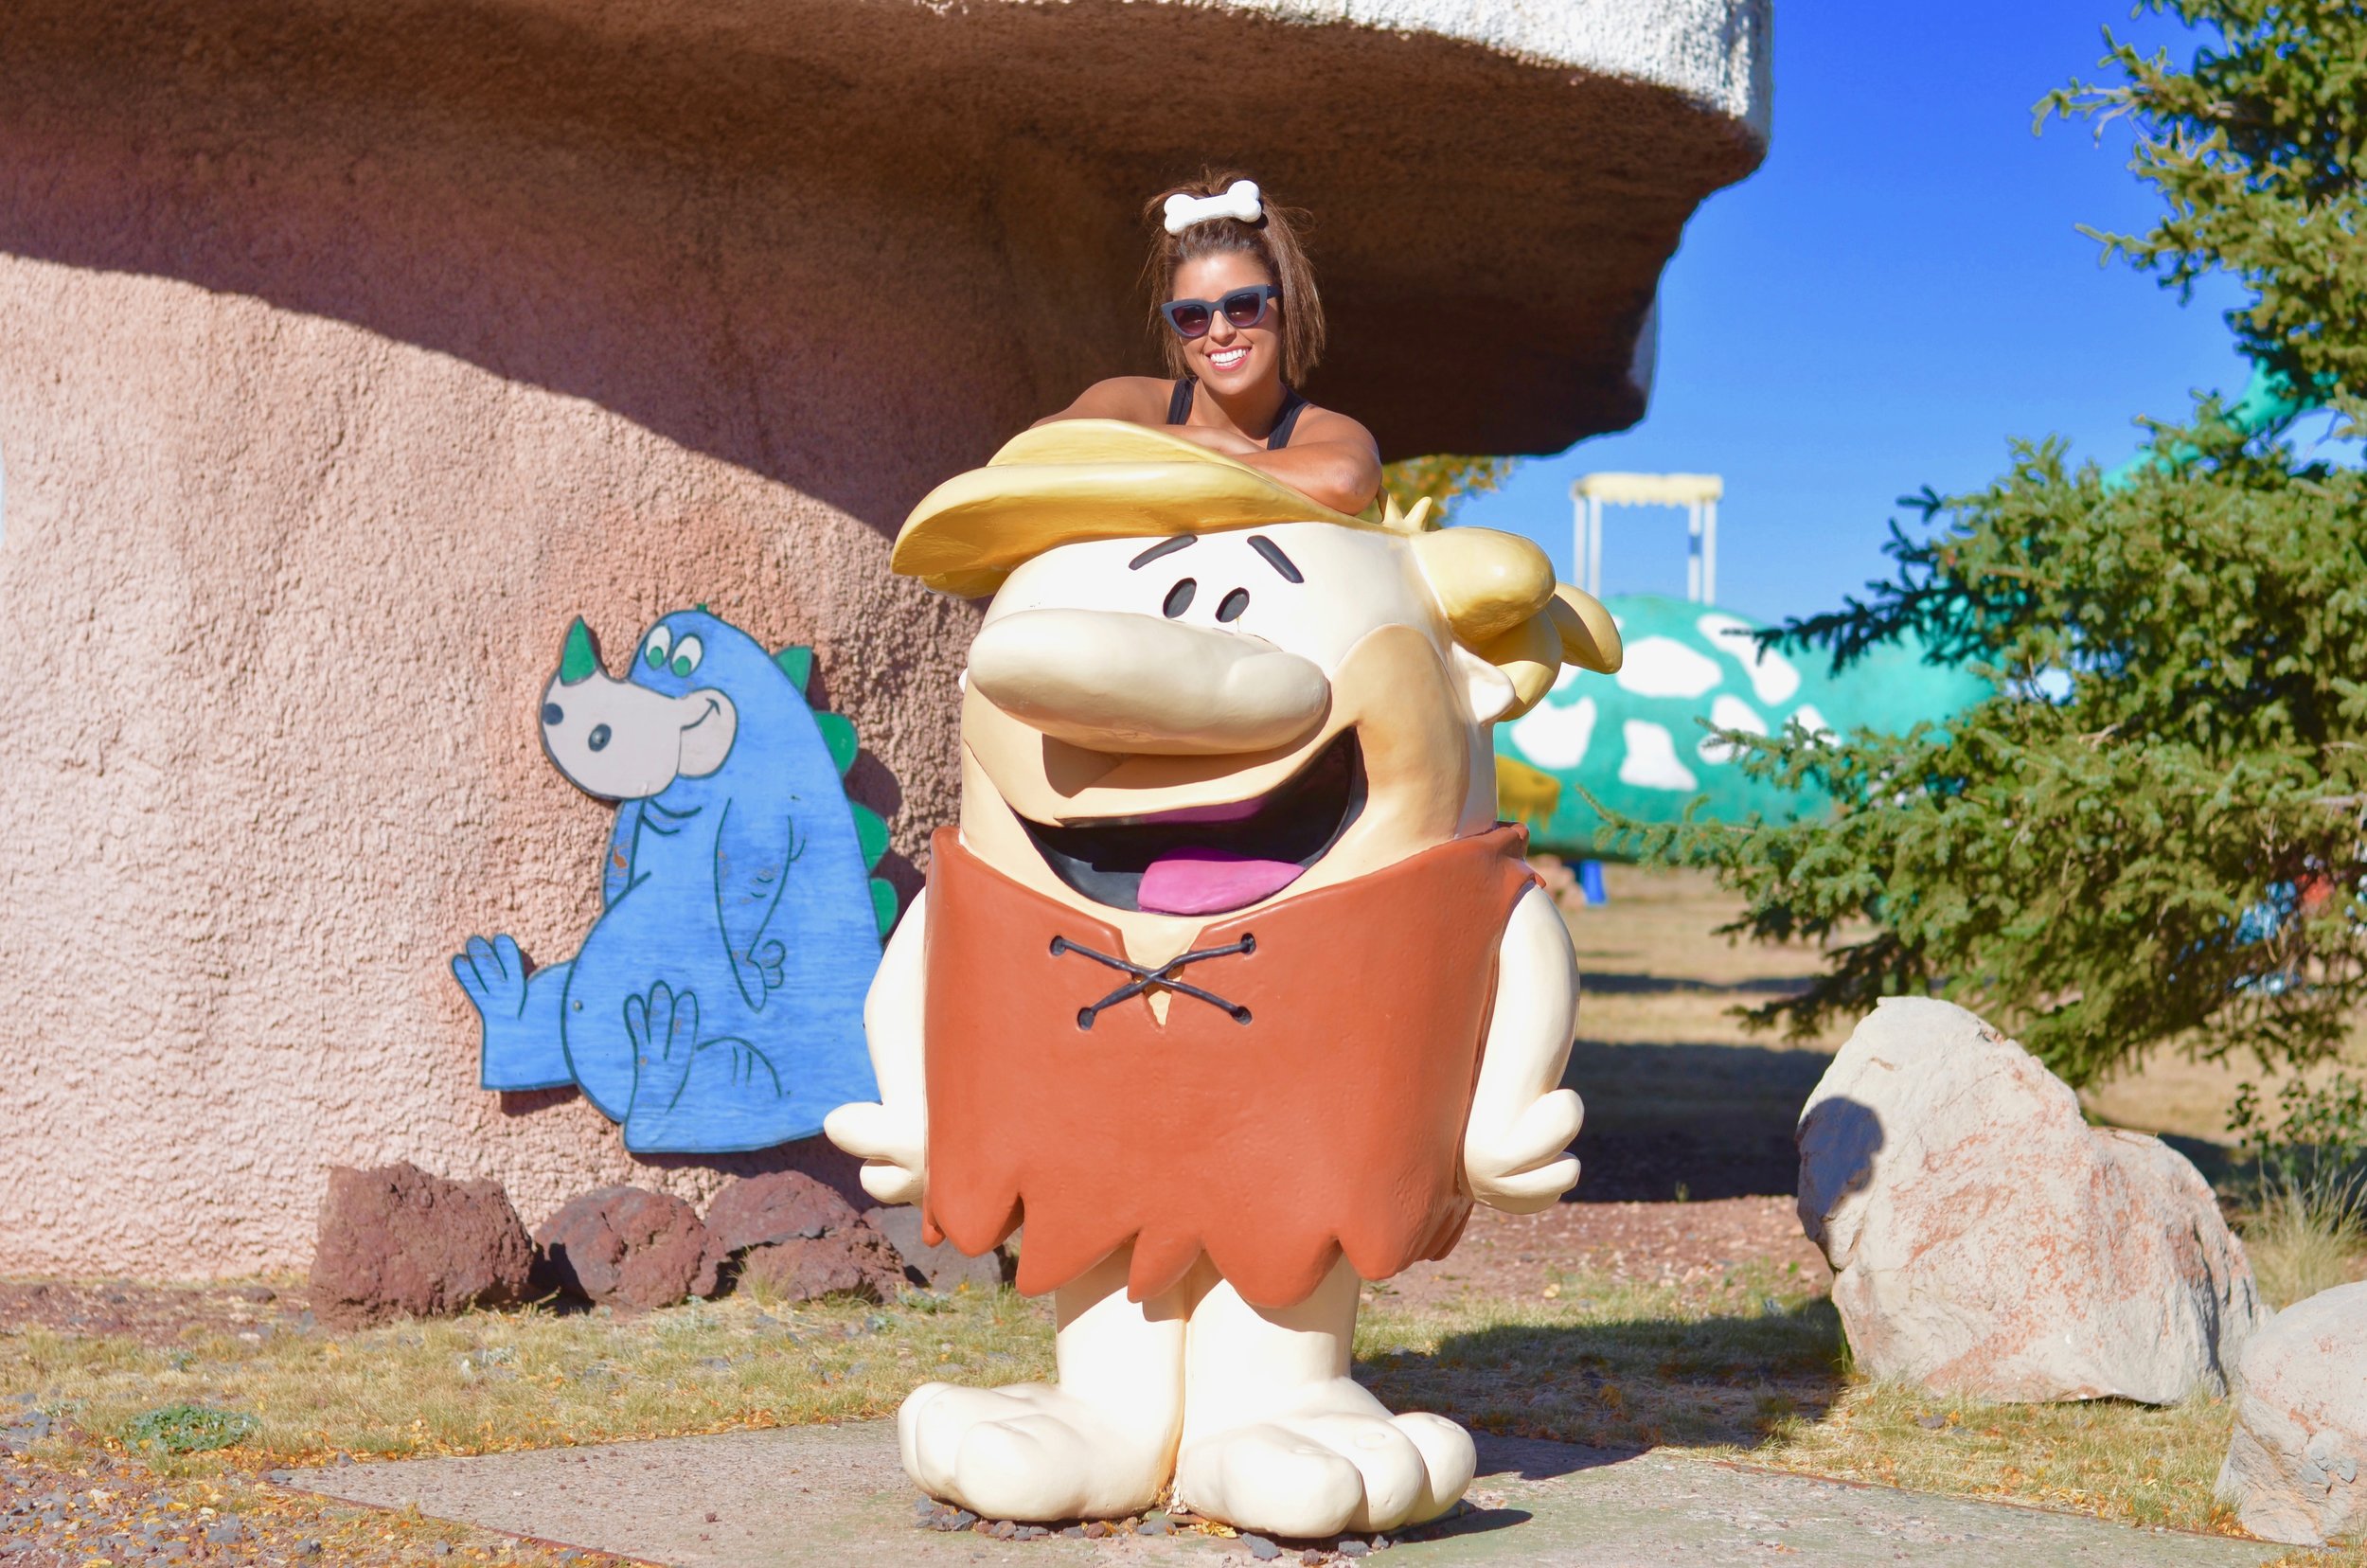
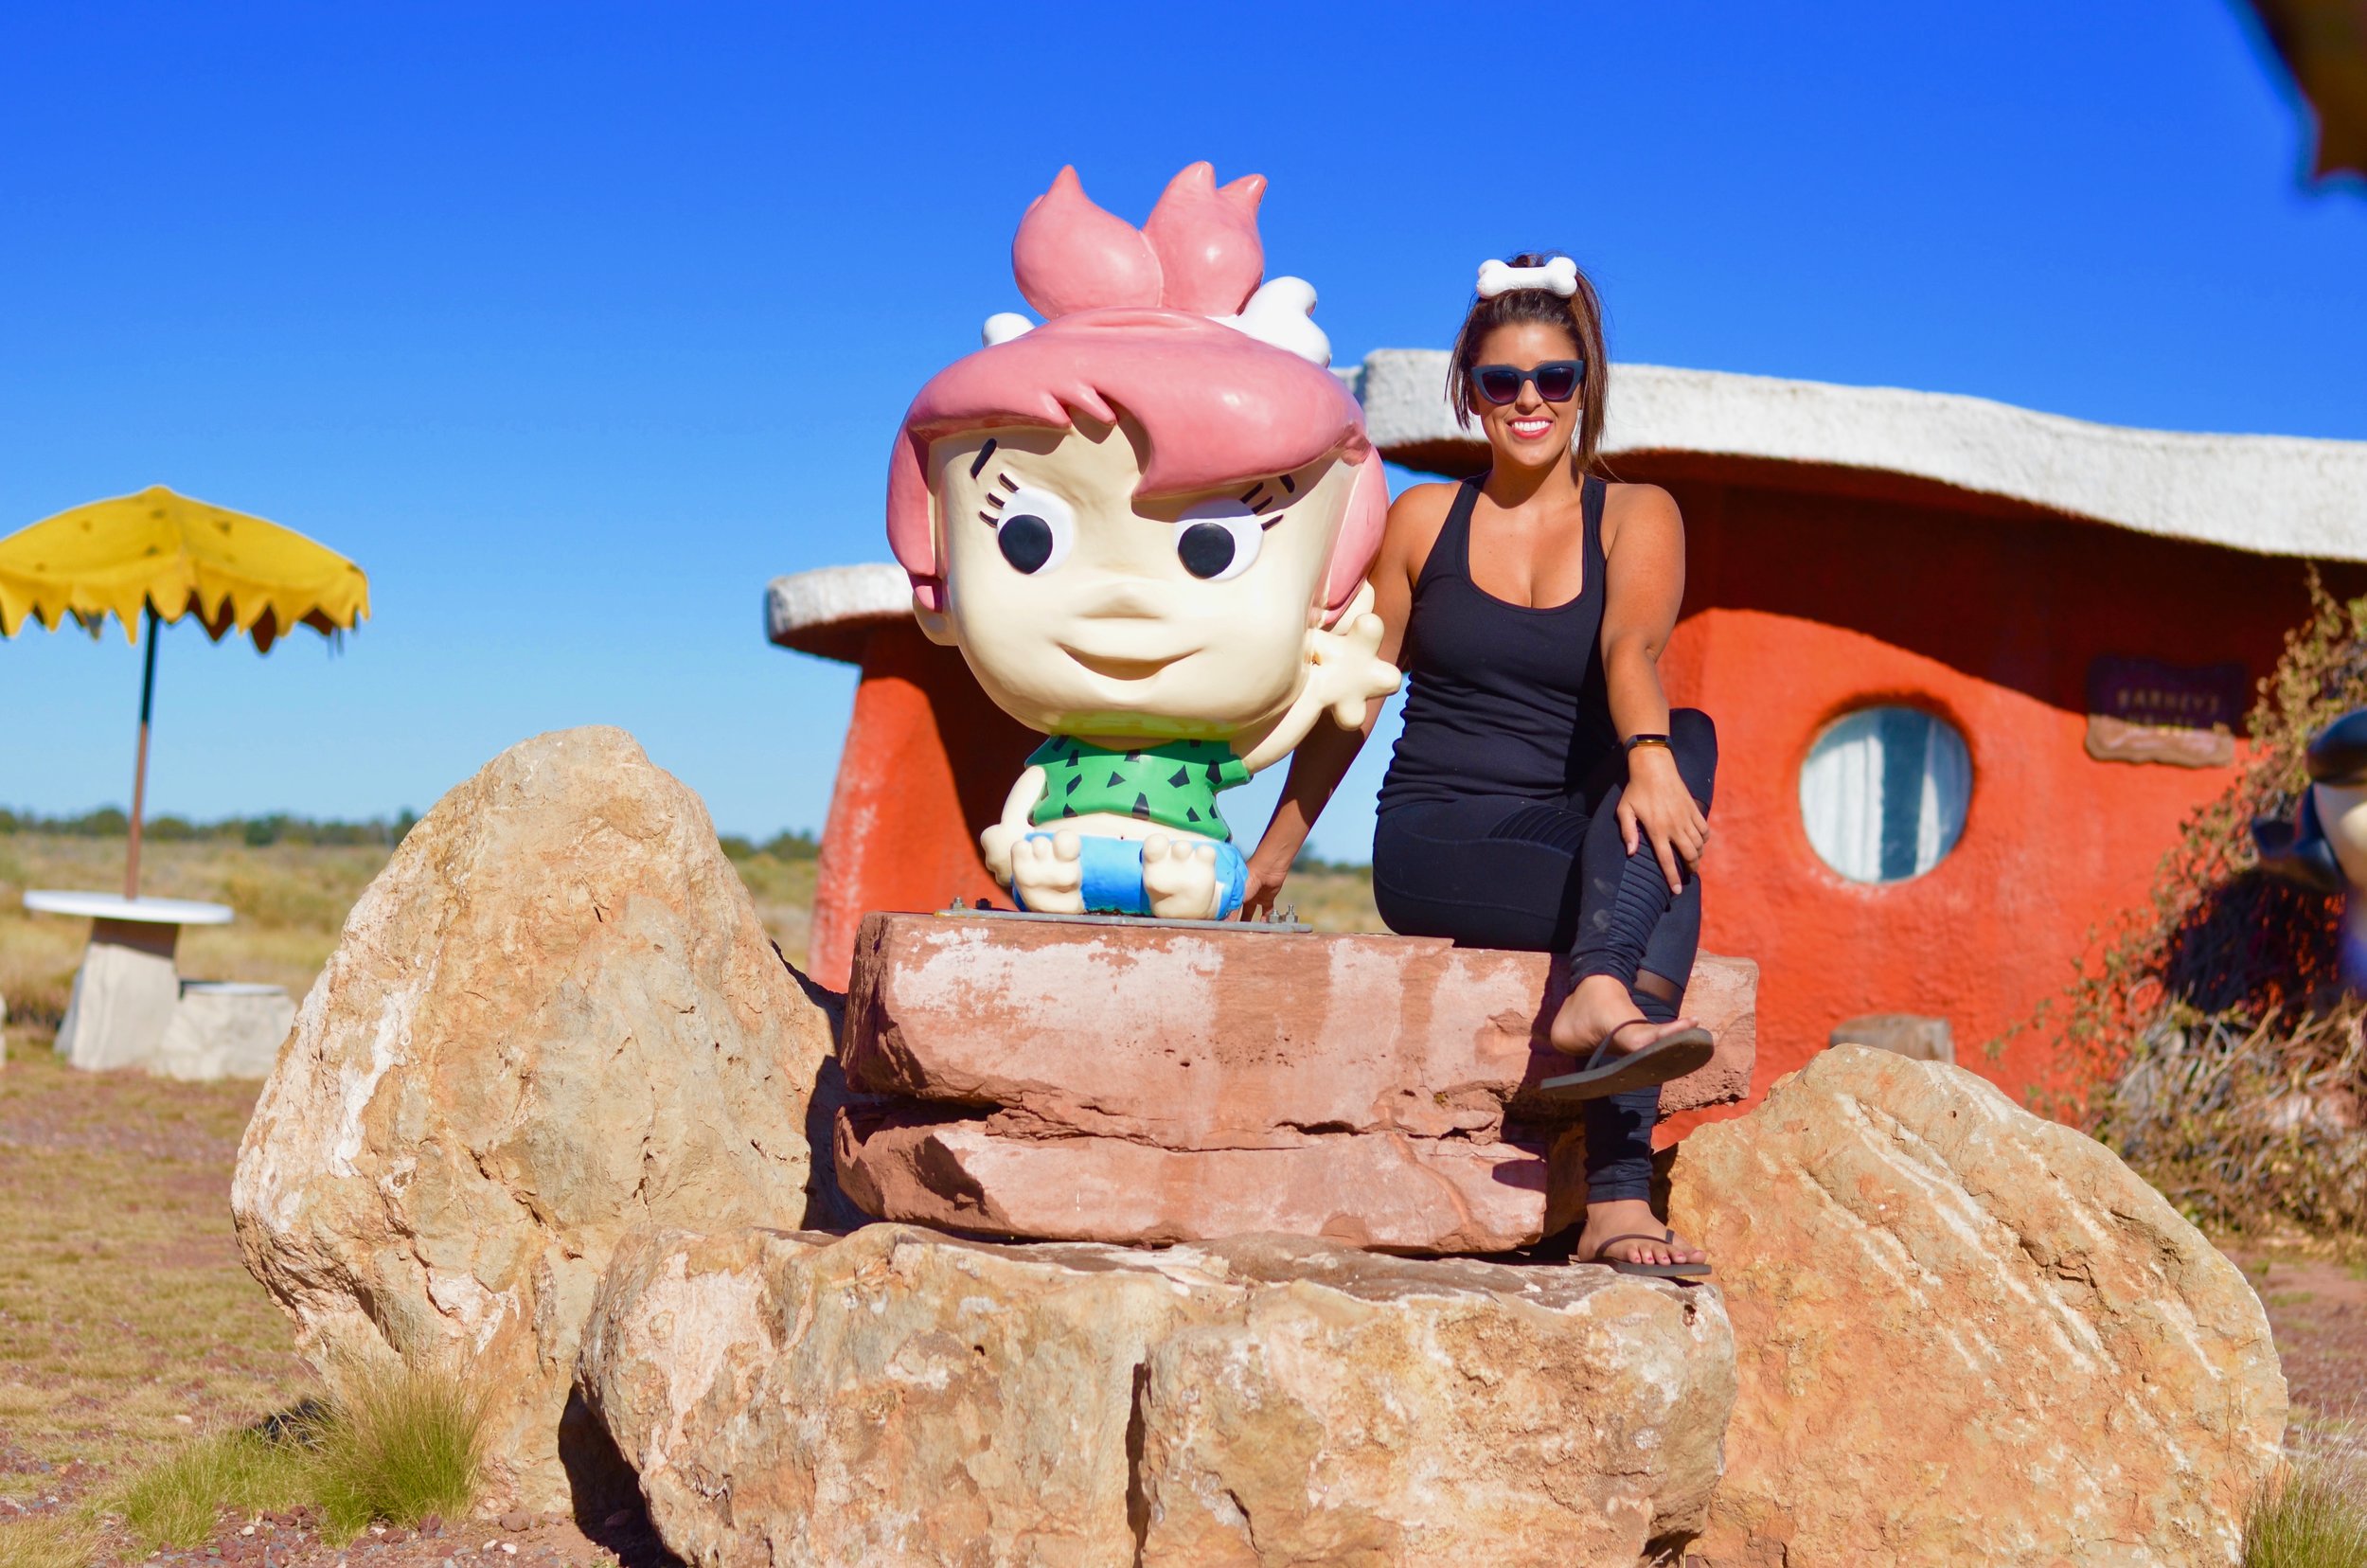
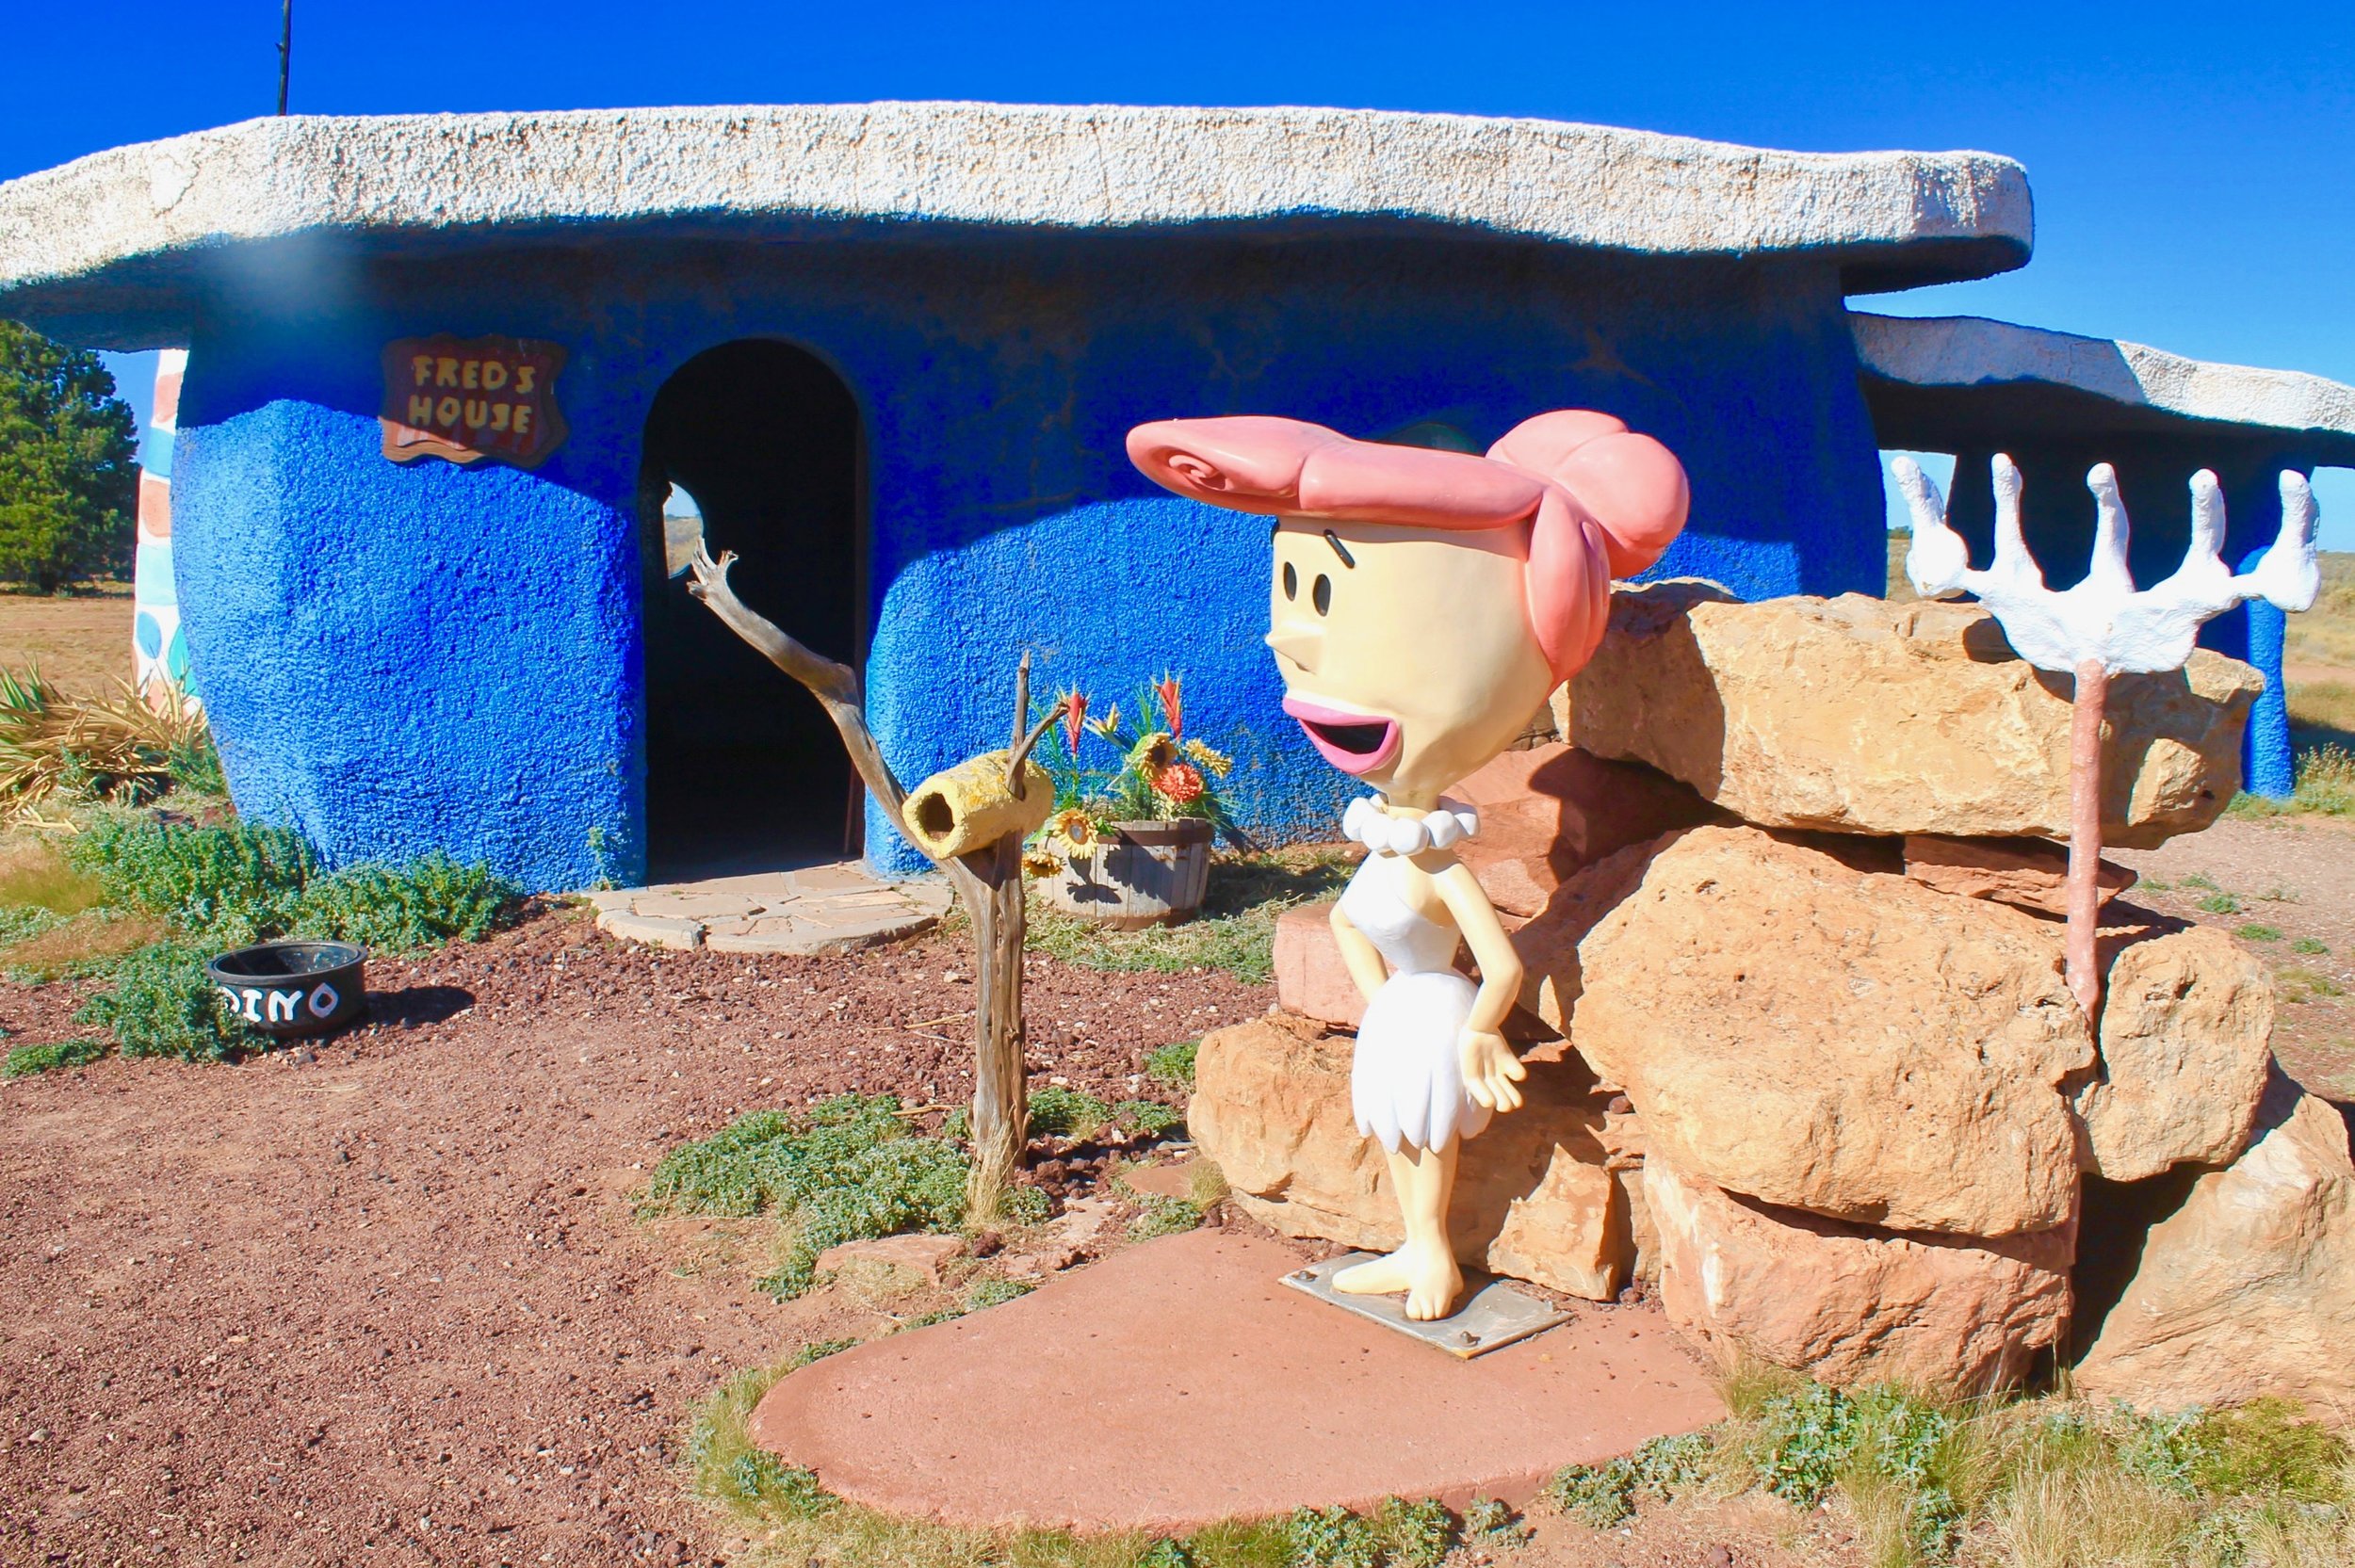
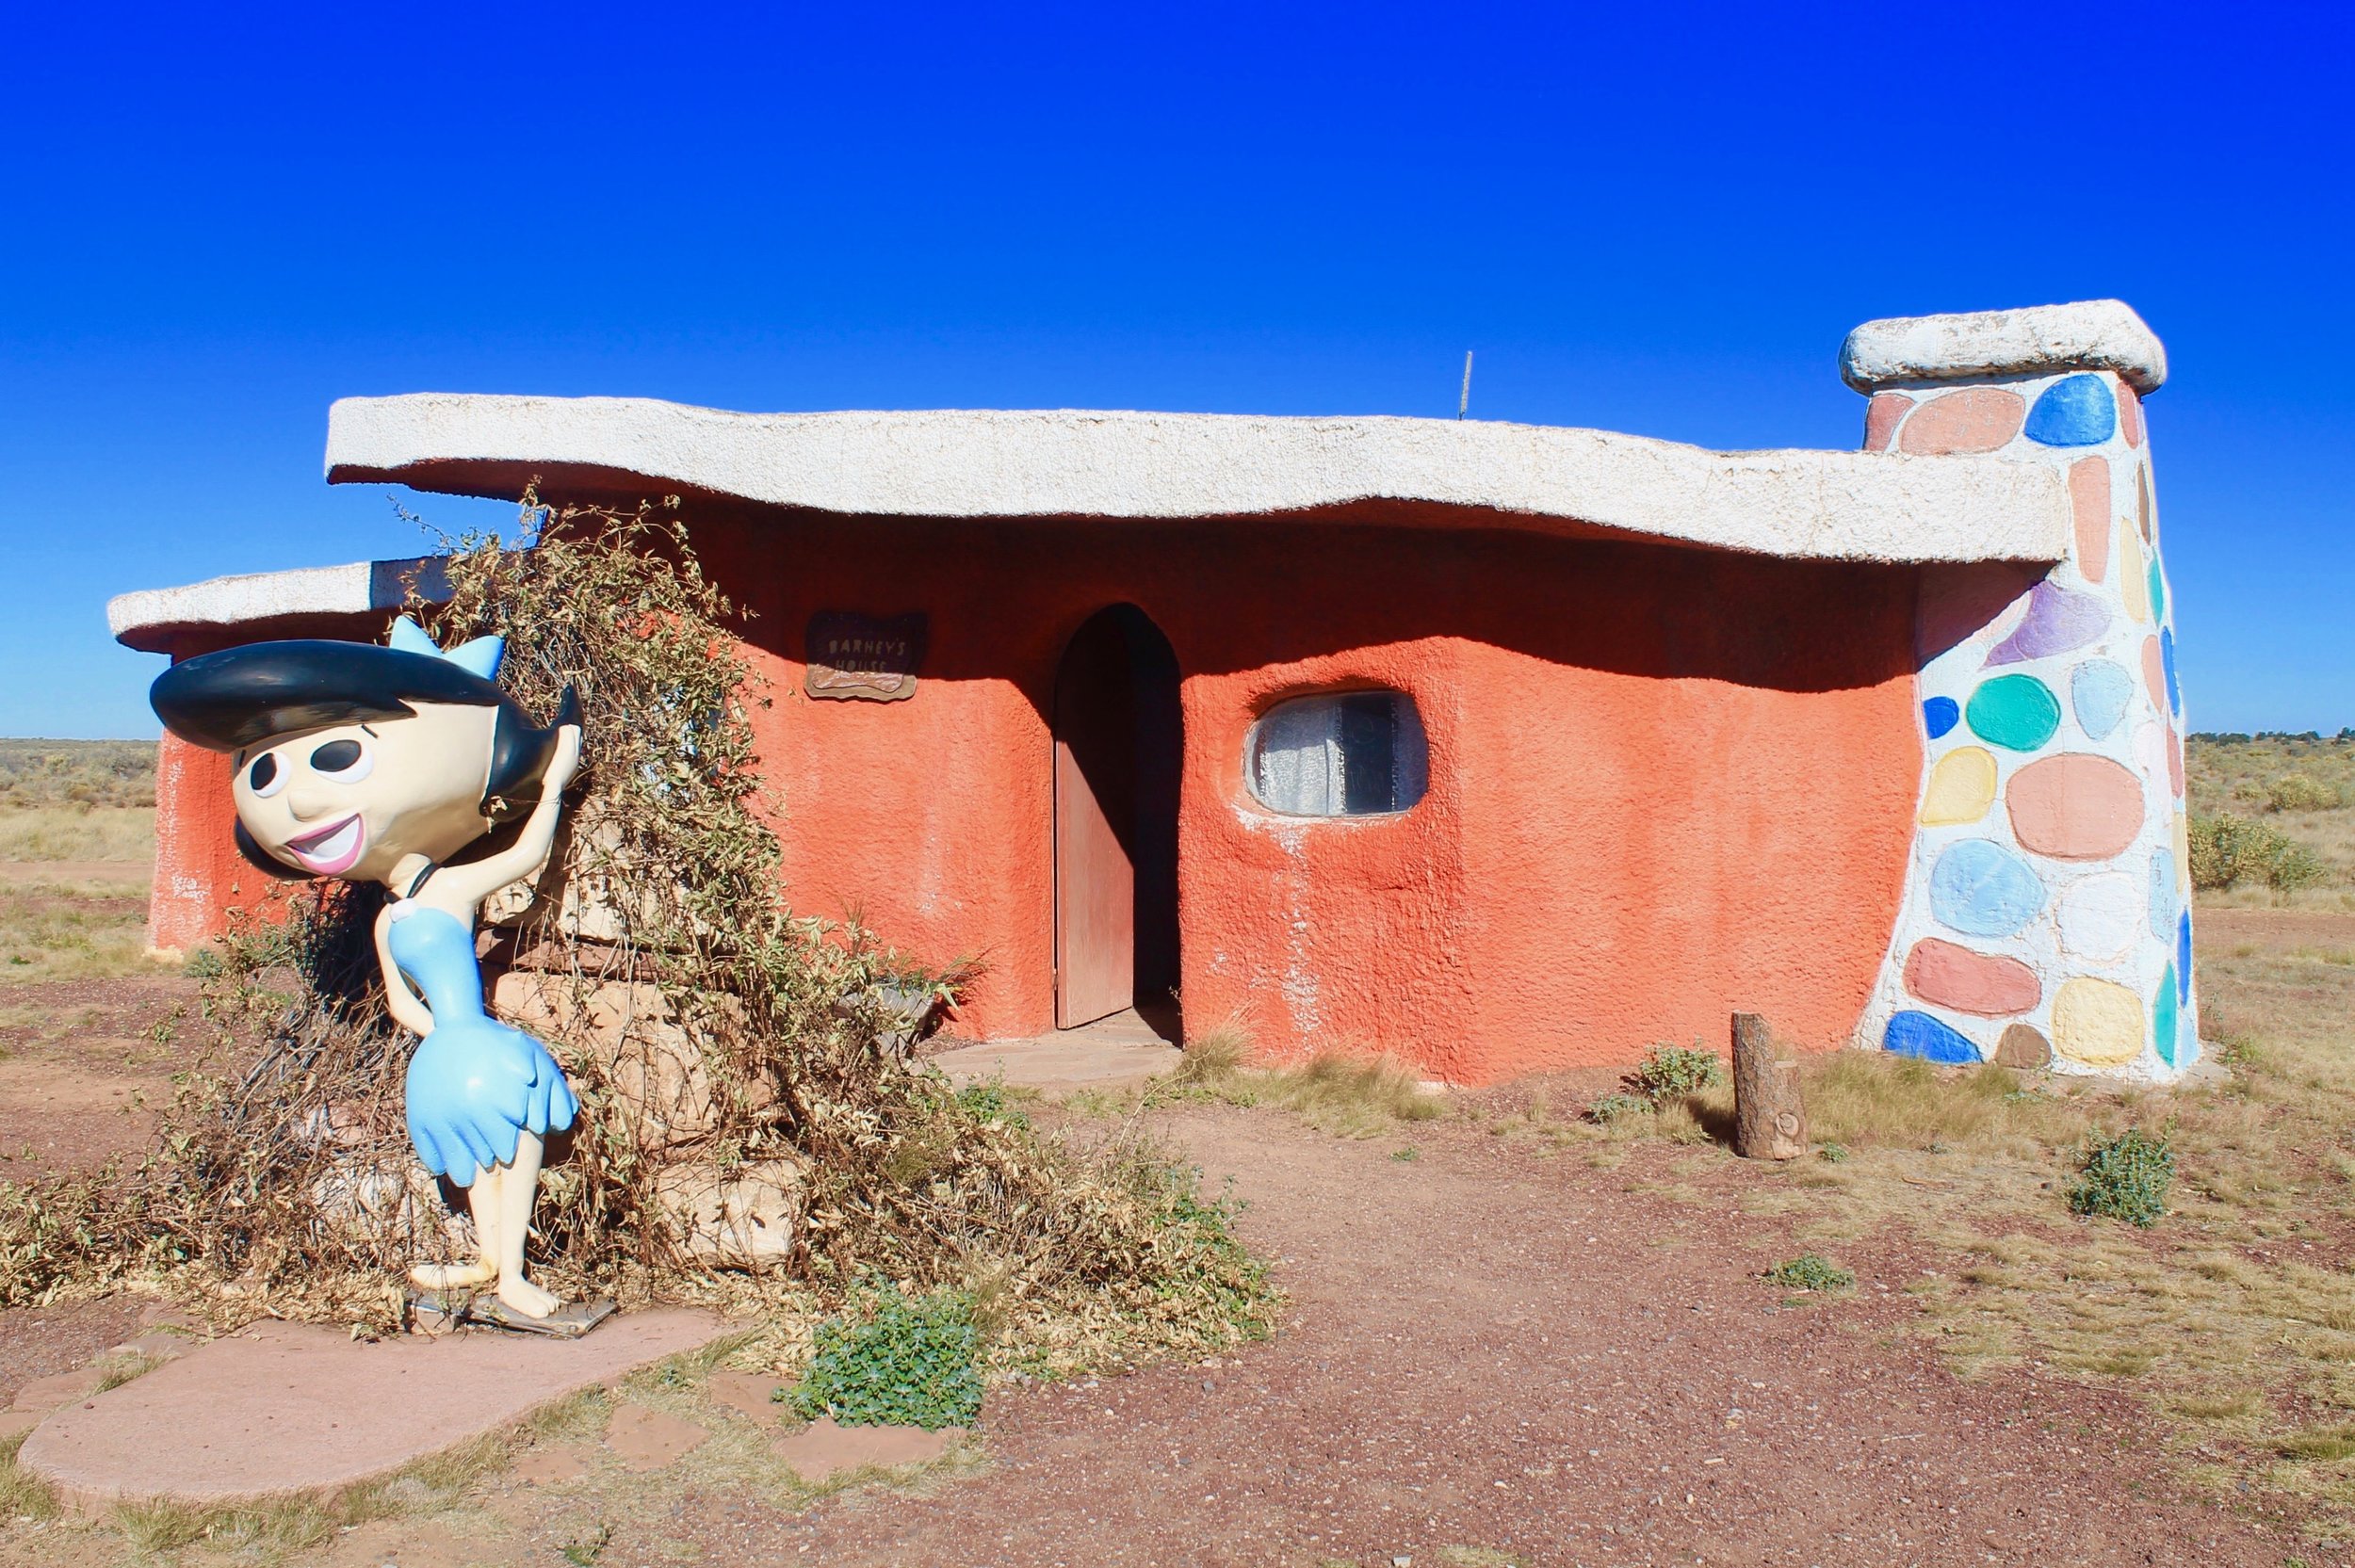
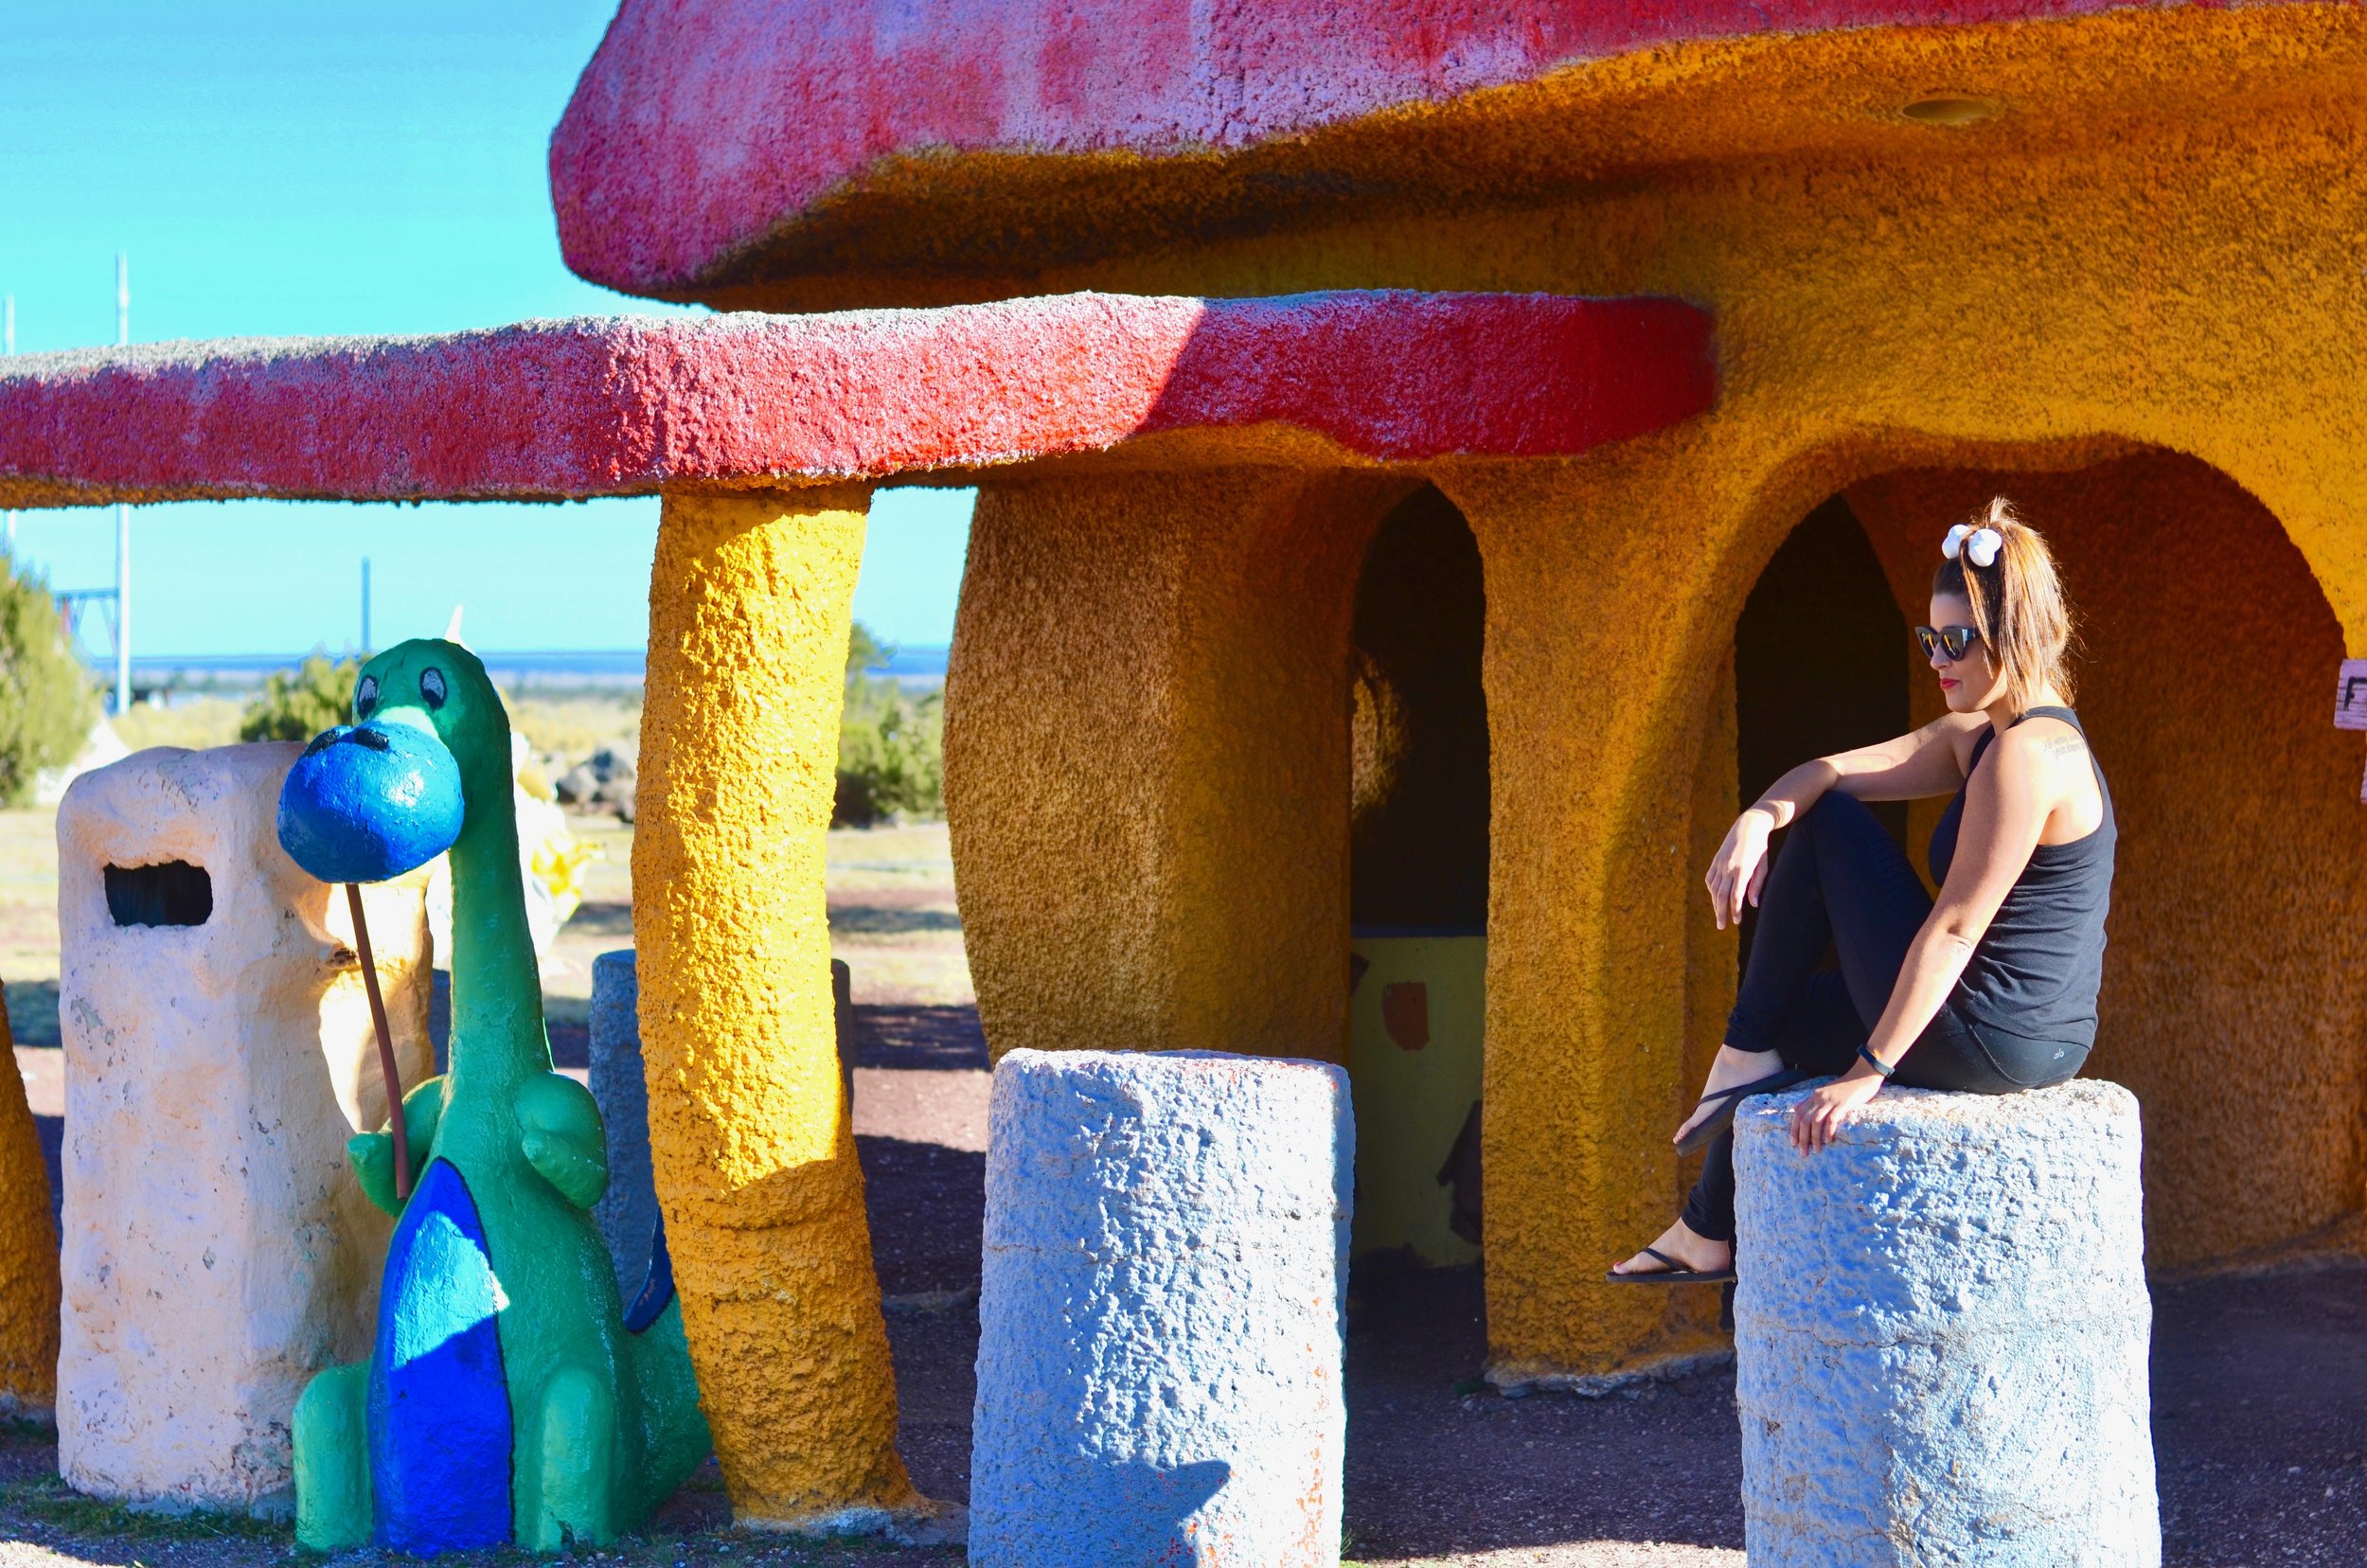
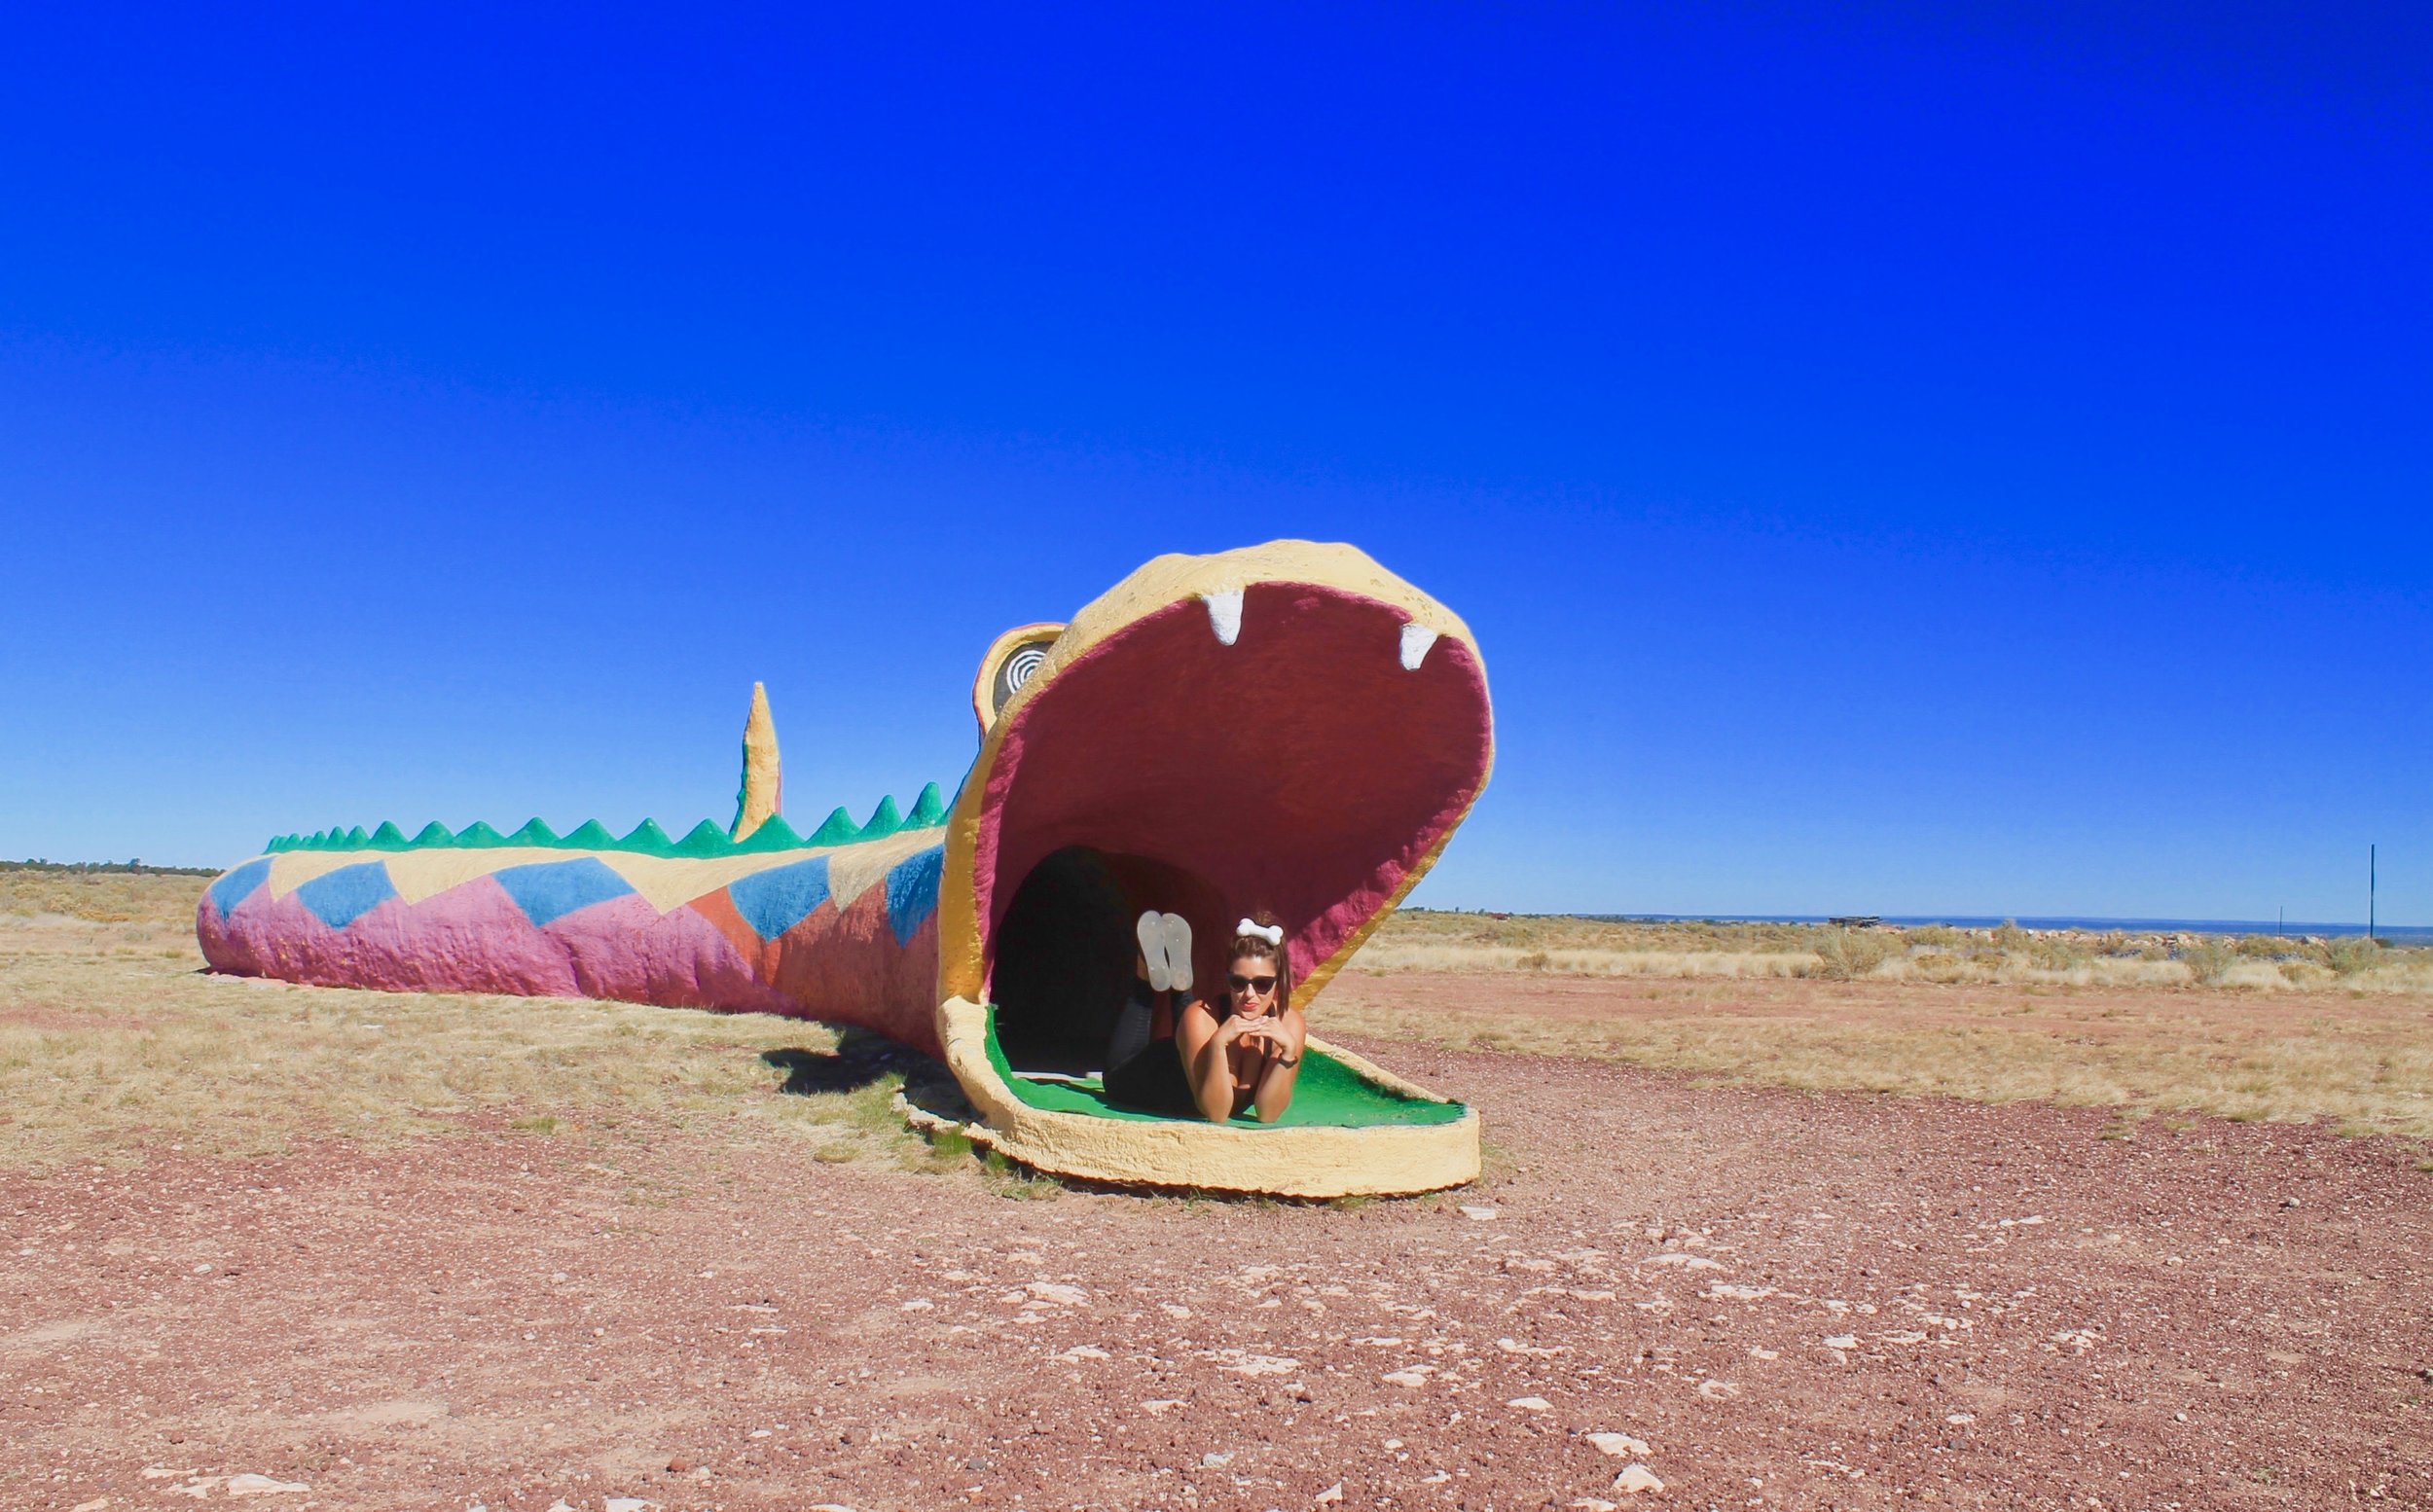
A quick stop at The Flintstone's Theme Park in Bedrock Arizona outside of the Grand Canyon.
We arrived to the Grand Canyon around 11am and the plan was to leave there by 4pm, as we were driving about 2 hours to Page, Arizona afterwards and didn't want to drive in the dark. Our first stop was the Mather Point/Visitor Center. We opted out of the 2 mile walk at the Rim Trail and instead decided to drive to The Village and Park. Parking is available near the Bright Angel Lodge and more available by the Maswik Lodge. We were told parking in this area fills since during this time of the year you cannot drive along the red line... you can only take the bus they have available.

Grand Canyon South Rim

Grand Canyon South Rim
We ate lunch at the Maswik Lodge which had plenty of grab-and-go options. We then rode the redline and stopped at Maricopa Point, Hopi Point, and then after seeing Mohave Point we got on at the turnaround point and headed back to the village. After getting back to the car we drove to the Desert View Area (on the way out) and stopped at Lipan Point, Navajo Point, and the Desert View Watch Tower. We were able to swing all of this and get out of The Grand Canyon by 3:30pm! Off to Page we went!

Grand Canyon South Rim

Grand Canyon South Rim
TIPS: Start the day early. Since The Grand Canyon was the first stop we had in which we could use The National Parks Pass we purchased it at the gate for $80. It is good at all the National Parks in the country for a year and two signatures are allowed on the pass. If you are going to 3 national parks on your trip or at all during the year this is your best bet! So worth it! The amount of cars at the entrance gets backed up since this time of the year is an insanely gorgeous time to see the park. The fall colors were out of this world. As for dining, The Maswik Lodge had affordable options and a lot of variety but if you are looking for more of a dining experience, there is a dining option at the El Tovar Hotel. During our time at The South Rim we didn't actually do any hikes, rather we drove my car and took the redline bus so that we could see as much as we could with a half day time frame.

Grand Canyon South Rim
MORE INFORMATION
- TOTAL TRAVEL TIME: about 4 hours
- TOTAL MILES: 215 miles
- GAS PRICES: $2.99/gallon
- EATS: The Canyon Country Inn Bed and Breakfast had a nice spread for us with some breakfast food which we started our day with. Then our quick pit stop at the Maswik Lodge in the Grand Canyon. I got a sandwich and chips but they also had pizza, bread bowls, burgers, salads...basically a little bit of everything. After we left the Grand Canyon we spotted a McCallister's at a gas station and had to make a stop! Giant stuffed Spuds...we couldn't resist. After arriving in Page, AZ we caved and went straight to the Taco Bell drive-thru.
- SLEEP: OKAY soooo.... we stayed at the America's Best Value Inn in Page, AZ which wasn't even much of a value. It was like $160 a night and I do not recommend this place at all! The parking lot and area seemed sketchy, the ceiling was crumbling and falling apart, the front desk was not answering our phone calls, and it just felt like a rip off since we really just needed a place to shower, sleep, and get ready. Most places in Page were pricey though so it was okay, we ended up being fine and we survived but I would try a different sleep option if I were you!
- WISH WE HAD TIME: I would have liked to hike at The Grand Canyon but since we were just there for 4-5 hours it just made most sense to drive to all the view points. I would also like to check out the El Tovar Lounge for lunch next time! The shuttle also goes further to Hermits Rest but we decided most of the viewpoints were extremely similar so we didn't ride until the end but I would like to check it out in the future.
- FINAL MUST-SEE LIST:
- Flinestones Theme Park in Bedrock City, AZ (ride the dinosaur slide too!)
- Mather Point at The Grand Canyon South Rim
- Ride the bus along the red line as far as you would like to go
- On the way out of the South Rim check out the other view points. The major ones include: Lipan Point, Navajo Point, and the Desert View Watchtower

Grand Canyon South Rim
DAY 4: LOWER ANTELOPE CANYON, HORSESHOE BEND, MONUMENT VALLEY, & MEXICAN HAT
Lower Antelope Canyon, Page, Arizona
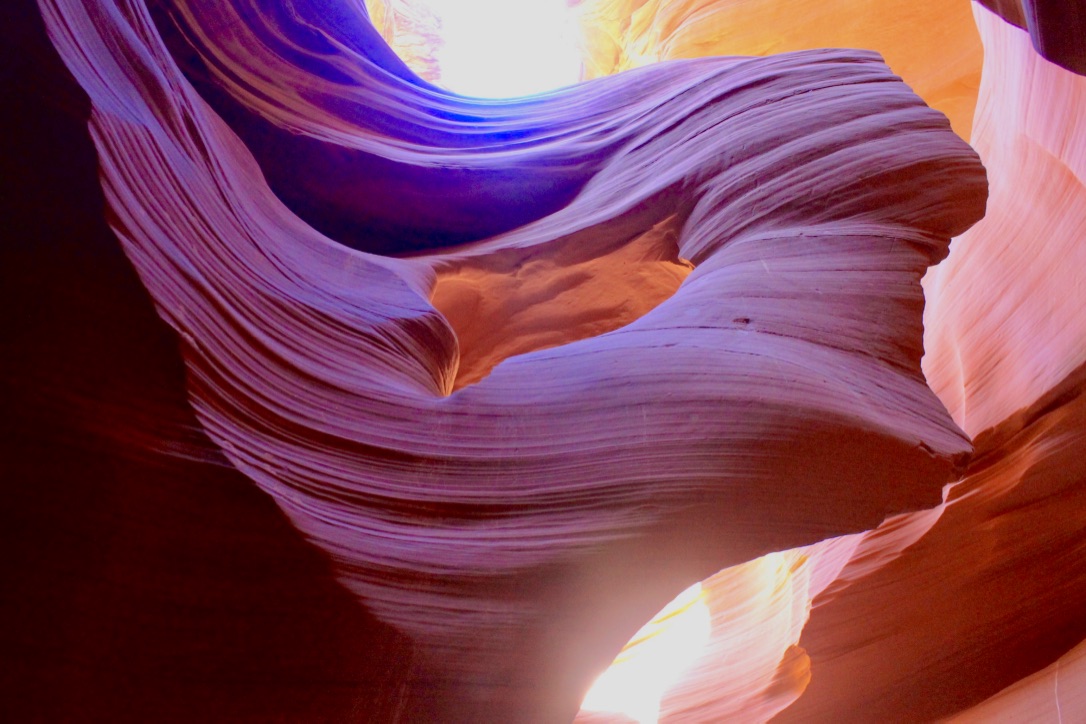
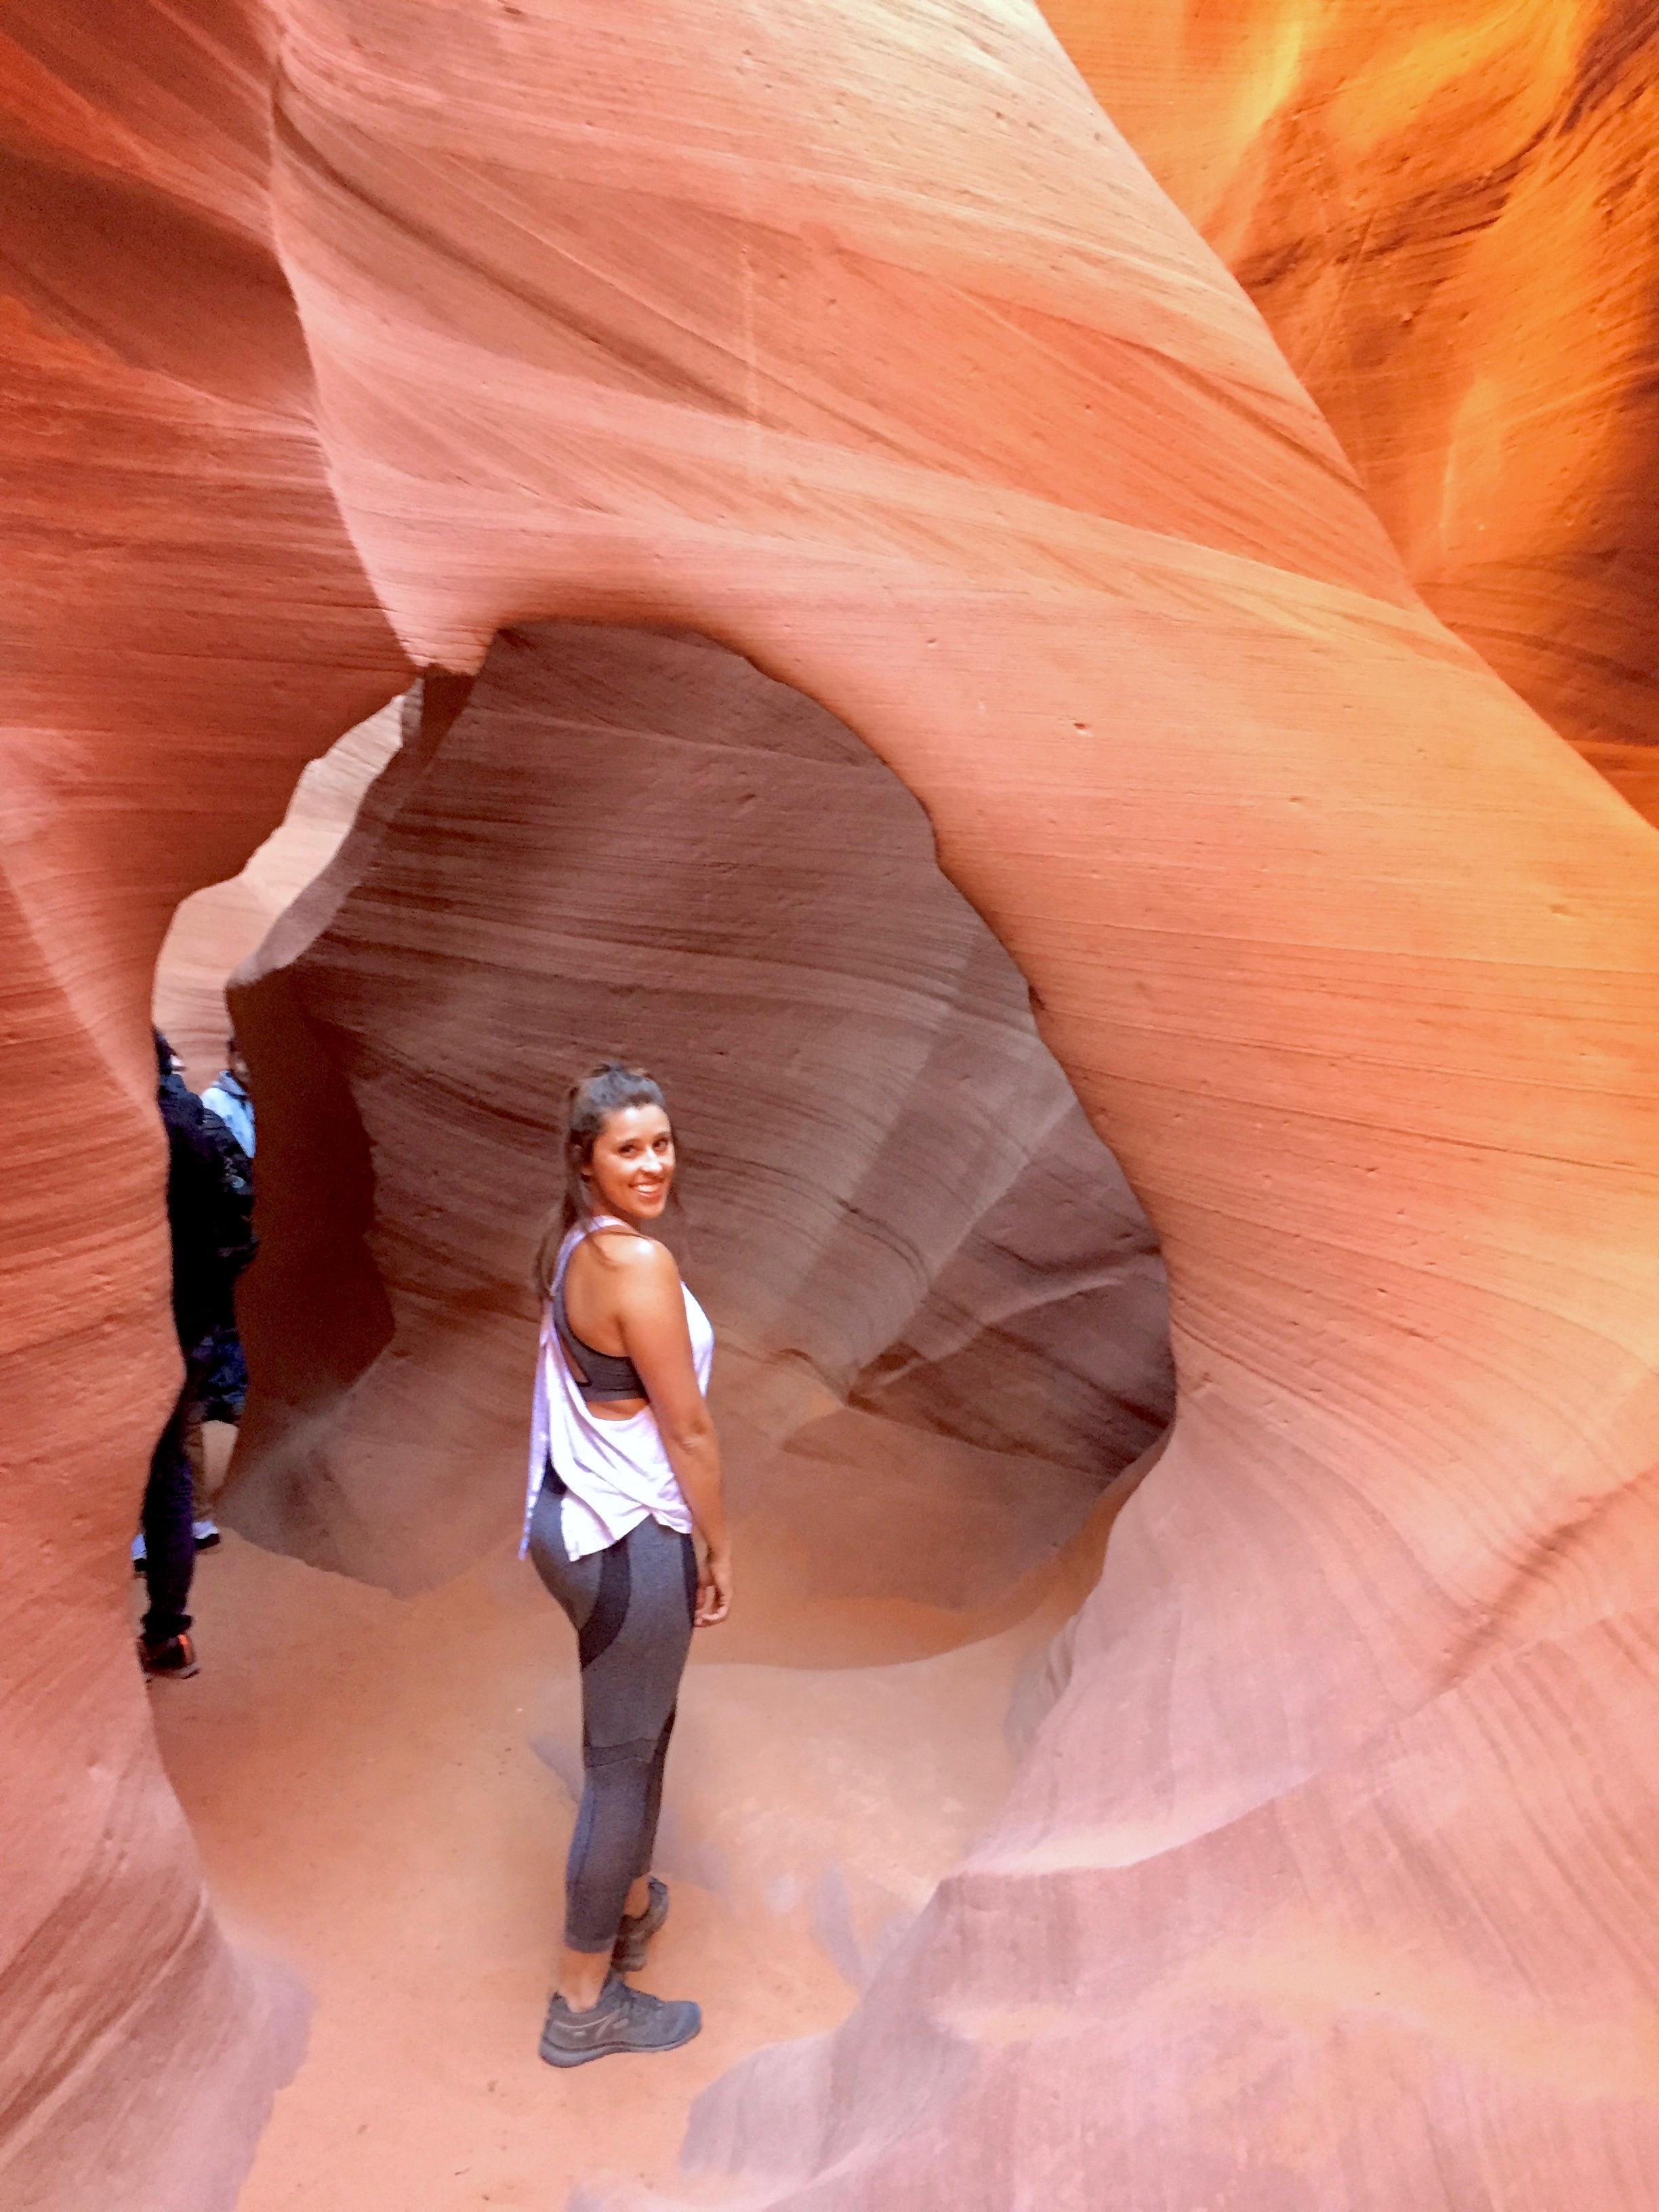
ADVENTURES: This was a day I was really looking forward to on our road trip! We got up early and headed to Ken's Tours for our pre-booked lower antelope canyon tour. Keep in mind that you cannot visit the lower or upper canyons on your own, you are required to be part of a guided tour in order to see it. This particular tour was $25 a person, (I believe the price has been raised to $40/person) with a $1 card fee, and an $8 Navajo entrance fee per person in CASH ONLY. Ken's required one payment per reservation so I charged the 3 tickets to my card AND I was not charged until the day of the tour. We also gave our tour guide a $15 cash tip after the tour. We spent about an hour and a half in the lower canyon and it was seriously GORGEOUS! I highly recommend the lower canyon. My best friend had done the upper canyon previously and said the lower was better. You legitimately go down under the ground into the canyon! Pretty spectacular!

Lower Antelope Canyon, Page, Arizona

Lower Antelope Canyon, Page, Arizona

Lower Antelope Canyon, Page, Arizona

Lower Antelope Canyon, Page, Arizona
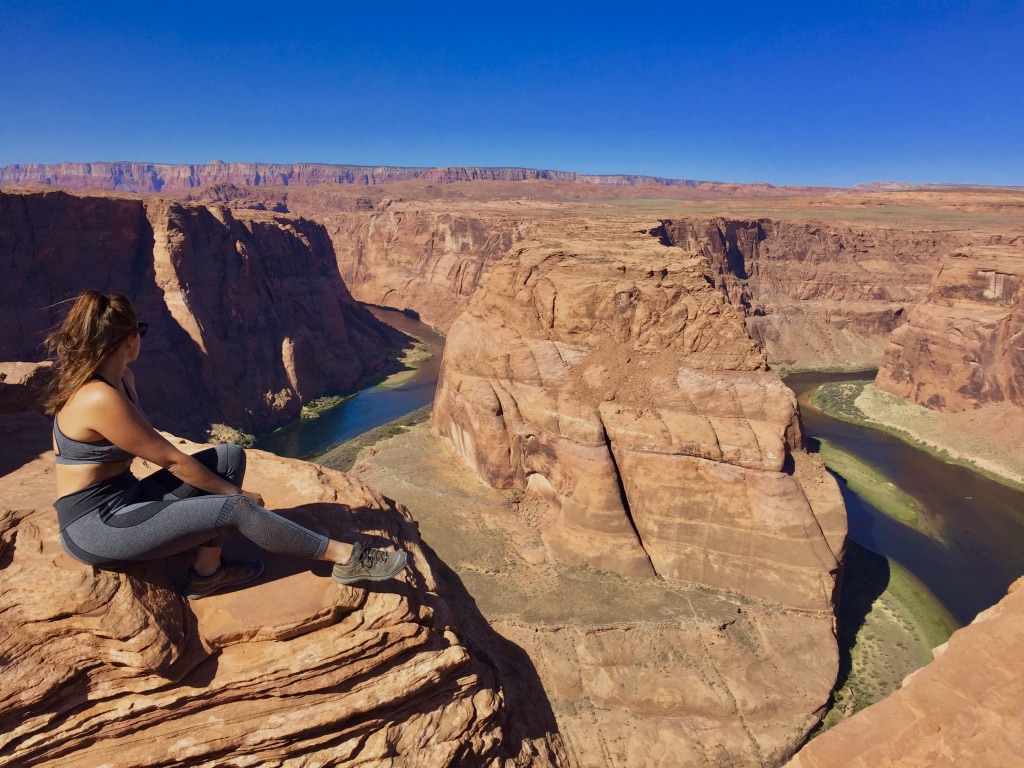
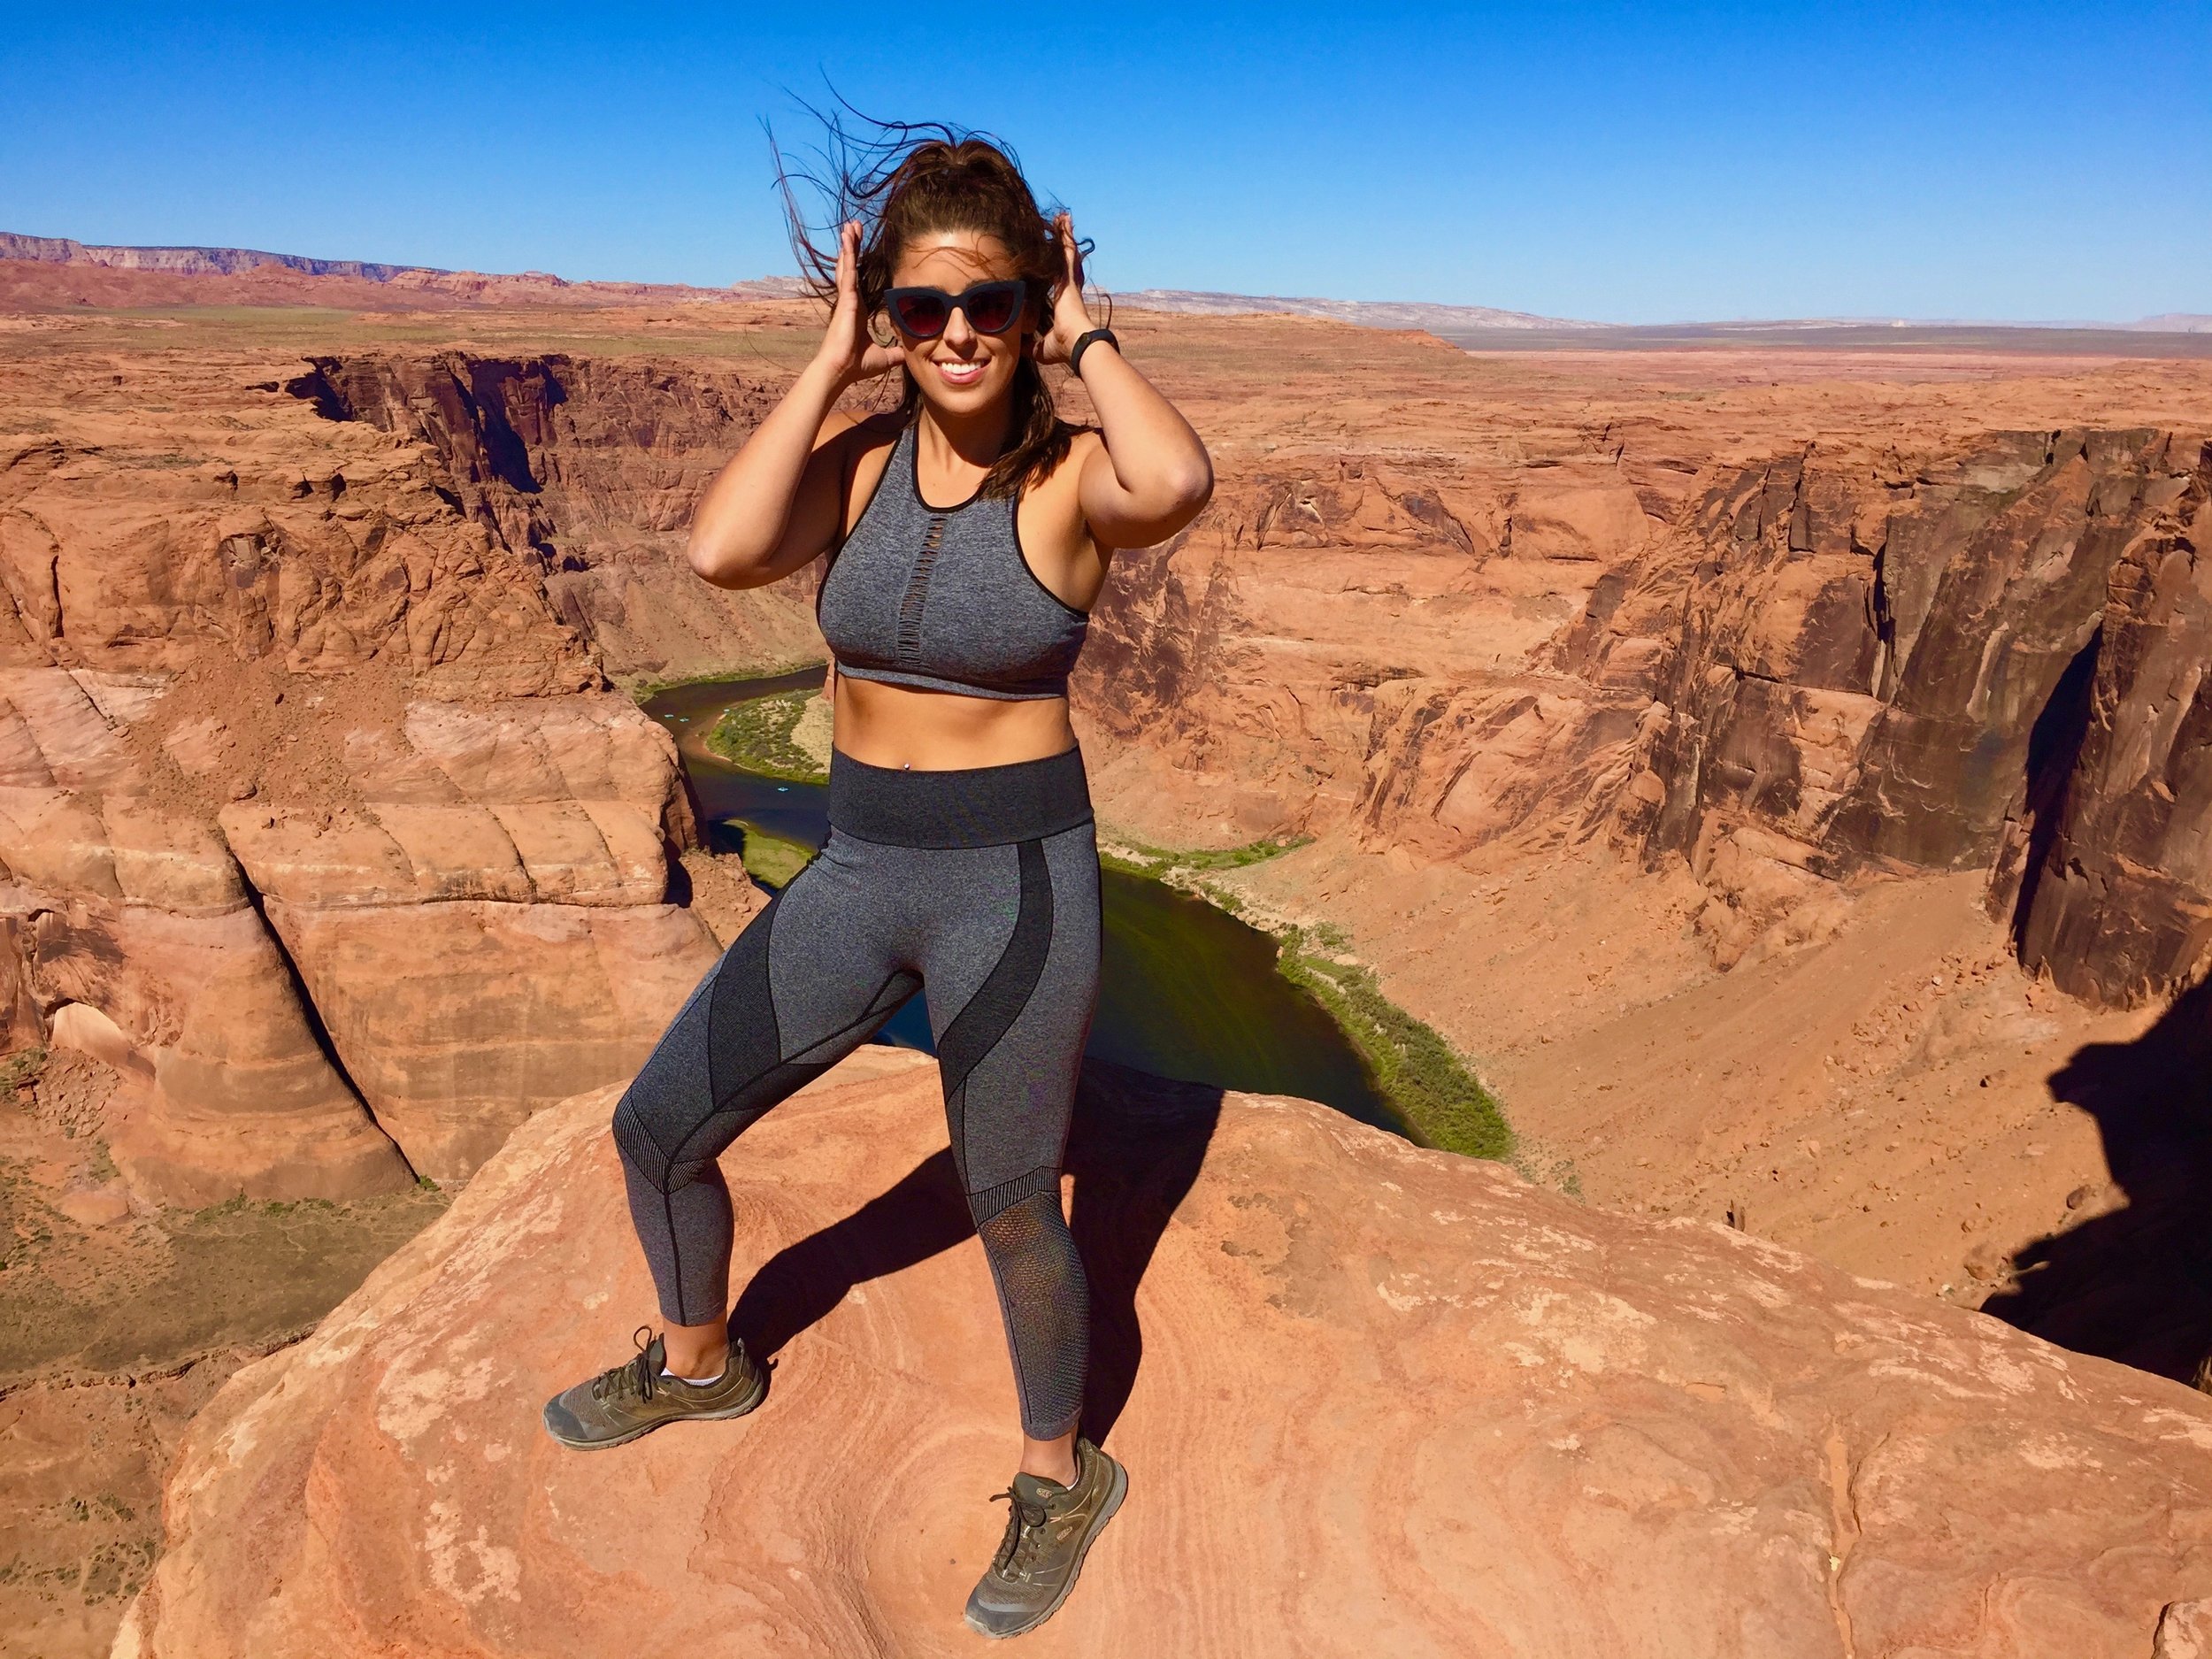
After the lower canyon experience we drove to the Horseshoe Bend which was about a 15 minute drive from Ken's Tours. I wouldn't consider the Horseshoe Bend a hike, however, it did take about 35 minutes roundtrip. You have to walk up an incline on a dirt path and walk down at a decline so just keep that in mind for whoever is in your group. At the view point it was VERY crowded and super WINDY. I am not sure if it is normally windy there but I can say expect it to be crowded as it has become an extremely popular Instagrammable spot. We were there on a Friday morning so I can't imagine the crowds on Saturdays and Sundays!

Horseshoe Bend, Page, Arizona
Horseshoe Bend, Page, Arizona
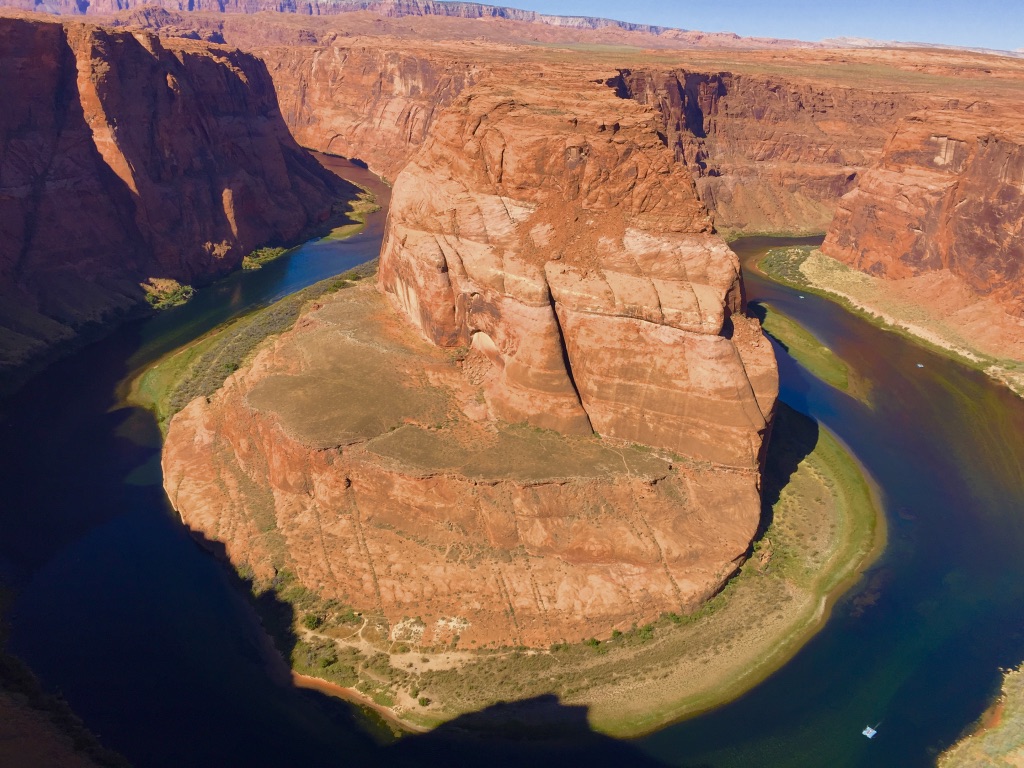
Horseshoe Bend, Page, Arizona

Monument Valley, Utah
From here we planned to stop at a Starbucks for a breakfast sandwich and coffee, however, there is only one Starbucks that we were able to find, the line was so long, the service was not good, it was located inside a grocery store, AND they do not serve sandwiches at this location. It was all thumbs down! BOO! So we got in the car and headed to Monument Valley which took a little over 2 hours. Okay so listen up because this is where we messed up! We THOUGHT that the famous Forest Gump scene was in Monument Valley. We also did not know that Monument Valley has a $20 entrance fee per car. (Not covered by the National Parks Pass) Not a big deal! We paid, parked, stopped in the visitor center only to find out that Monument Valley is a 17 mile loop trail that you drive along on a dirt road and stop at various viewpoints...okay sounds cool... So at which viewpoint is the Forest Gump Scene? NONE OF THEM. The Forest Gump scene is NOT in Monument Valley despite what you read online. It is on a road leading to Monument Valley. If you are specifically wanting to take a photo where Forest Gump was shot DO NOT pay to enter Monument Valley. It will be a waste... that is, unless you want to check it out, but we personally didn't find it too interesting.

Forest Gump Scene, Mile Marker 13

Mexican Hat, Utah
Having fun exactly where Forest Gump shot the scene of him running on a road to Monument Valley!
Forest Gump is in fact ON THE WAY to The Mexican Hat Rock (exactly what it sounds like a rock shaped like a Mexican Hat). The photo op for Gump is located at Mile Marker 13 to be exact AND the Forest Gump sign is not there anymore. But it was still fun and worth stopping. Not far from here was The Mexican Hat Rock. Apparently you can hike up the rock BUT we just wanted a photo from far away and don't judge us but we had a day old Taco Bell Taco as a photo prop! After this fun filled day of photos and adventure we cranked the jams up and drove 2 hours to Monticello, Utah where we crashed for the night.****
****NOTE: If you decide you do NOT want to see Four Corners Monument SKIP DAY 5 and head straight from Monument Valley to Moab Utah. (146 miles) If you ARE planning on seeing Four Corners Monument check out your options for sleeping, as there are not many towns nearby BUT I do believe there were some closer spots than Monticello, Utah such as Red Mesa, Utah and Cortez, Colorado.

Welcome To Utah
TIPS: Make Antelope Canyon reservations as soon as you know you are going! I looked into booking about 3-4 weeks before our trip and Ken's Lower Canyon was the only availability I found out of all the companies. Everything else was completely booked up and sold out. I also suggest going on the earliest tour as well. When our tour let out (around 10:30/11am) the entire place and parking lot was jam packed with people. In terms of shoes and gear, wear shoes with traction and flat bottoms. To get down into the canyon you will walk on a dirt path, down slippery rock declines, and down steep staircases. Bring water too! Plan to also wear proper shoe attire for the Horseshoe Bend. It can be very unsafe at these places without the right shoe. Monument Valley is not covered on the National Parks Pass, so keep in mind if you decide to drive that 17 mile scenic stretch it will cost $20 cash or card. If the Forest Gump photo op is of interest to you BE SMART and BE SAFE. We wanted to take photos in the middle of the road, but keep in mind this is in the middle of nowhere so cars come up out of nowhere and they come up at fast speeds. We took turns taking photos and put one person in charge as the car spotter. In terms of the Mexican Hat if you want to bring photo props such as a sombrero or taco (like we did haha) plan ahead because this is LITERALLY in the MIDDLE OF NOWHERE.
MORE INFORMATION
- TOTAL TRAVEL TIME: about 4.2 hours
- TOTAL MILES: 229 miles
- GAS PRICES: $2.55/gallon
- EATS: Had a quick small bite at the America's Best Value Inn for breakfast. I guess that was about the only good thing about our hotel. Before leaving to Page we had a Starbucks coffee and Subway sandwich for the road. Once we arrived in Monticello, Utah there wasn't many options for dinner but one thing we knew for certain was we wanted pizza! Feeling tired and lazy we got delivery from Thatzza Pizza Company and it was yummy and filling! We really enjoyed the stuffed cheezy bread more than the pizza actually.
- SLEEP: Slept at the Blue Mountain Horsehead Inn. Even though it was a motel we felt safe, it was clean, and totally affordable for what we needed that night which was basically somewhere to sleep and shower! If you are considering going to the Four Corners Monument maybe consider staying a little closer for the night... A suggestion I have is Cortez, Colorado depending on what is doable for you and the amount of drivers you have awake and available!
- WISH WE HAD TIME: I would have loved to have spent more time near Page, Arizona and explore Lake Powell. The Rainbow Bridge is there as well as the Natural Bridges National Monument which both seemed so cool but we didn't have the time. I also think the Rainbow Bridge was a little pricey when I looked into it.
- FINAL MUST-SEE LIST:
- Lower Antelope Canyon Guided/Reserved Tour
- Horseshoe Bend
- Monument Valley (if you want)
- Forrest Gump Photo Op
- Mexican Hat Rock
DAY 5 (OPTIONAL): FOUR CORNERS MONUMENT, MESA VERDE NATIONAL PARK, AND NEWSPAPER ROCK

Four Corners Monument, Colorado, Arizona, Utah, New Mexico
As I mentioned above if Four Corners Monument is not on your list of things to see then skip this day of plans completely and head straight to Moab, Utah after your time in Monument Valley! Four Corners Monument requires a drive OUT OF THE WAY pretty much regardless of how you plan this trip! Just be aware of that!
ADVENTURES: So Four Corners Monument is going to be out of the way no matter where you decide to stay. BUT with that being said we had decided as a group this was something we really wanted to see. So staying in Monticello, Utah put us 1.5 hours away from the monument. The Four Corners Monument was really cool to see and be in four states at once... Colorado, Arizona, Utah, and New Mexico! However, there is nothing close by at all. We didn't spend much time there because there is nothing really to do but take photos and shop around some little stands set up with art work and souvenirs. We noticed there was a National Park close by in Colorado and we figured since we had the National Parks Pass why not check it out before heading to Moab, Utah where we would be staying for 3 nights.

Mesa Verde National Park, Colorado
Mesa Verde National Park, Colorado
Since I had never been to Colorado before I was a little excited to make a pit stop at Mesa Verde National Park. This park was so beautiful and filled with fall colors and foliage. Most of this park was just view points because we had not planned for this stop and did not know that the main sites required tickets ahead of time to actually go into the structures with a guided tour. The structures that required tickets ahead of time included: Cliff Palace, Balcony House, and the Long House. Only a 5pm time slot was available for a tour and we were unable to stay that late so unfortunately we didn't get to see and do much at this park. After leaving the Mesa Verde National Park we drove off to Moab, Utah. On the way we pulled over at the Newspaper Rock. Pretty neat site to see and what amazes me most is apparently no one knows if the artwork on the rock was a warning from back in the day, tells a story, or is simply random. Kinda creepy!

Mesa Verde National Park, Colorado

Mesa Verde National Park, Colorado

Mesa Verde National Park, Colorado
TIPS: On our way from Monticello, Utah to the Four Corners Monument there was some sort of time change. I believe we gained an hour. Just something to be aware of and look into if you are looking to arrive somewhere when it opens! It also was much cooler in the AM, around 40 degrees. If you plan on visiting Mesa Verde National Park definitely look into booking tours ahead of time. It is also worth noting there is a Starbucks in a grocery store in Cortez, Colorado which I really needed! This town Cortez was honestly the only town I remember all day for food and gas before we made it to Moab so get everything you need here before getting on the road. At the Newspaper Rock the rock itself was blocked off and we couldn't get too close for photos, but we worked a little magic, were safe about it, and didn't damage anything. Also we just drove right up to it. Seeing the rock does not require a hike of any sort.

Newspaper Rock Petroglyph, San Juan County, Utah (outside of Canyonlands National Park)
MORE INFORMATION
- TOTAL TRAVEL TIME: about 5.5 - 6 hours
- TOTAL MILES: 342 miles
- GAS PRICES: $2.79/gallon
- EATS: This was one of those mornings when the granola bars and snacks we brought came into play to hold us over until we got to civilization. Civilization ended up being a breakfast sandwich and coffee at the Starbucks in Cortez, Colorado. YES this Starbucks in a grocery store actually had sandwiches. After our short few hours at Mesa Verde National Park we stopped at a Wendys for lunch. Then upon arriving in Moab, Utah we wanted a real meal! Decided on Pasta Jay's and it was an incredible decision! I ordered the Hogan option, which you can choose 3 homemade pastas. I opted for the chicken parm, gnocchi, and Jay's Famous Jumbo Shells. You better believe we were coming back for more!
- SLEEP: The Super 8 in Moab, Utah. LISTEN! This was such a nice Super 8! Honestly the nicest I have ever seen! Hotels were pricey in this area due to all the attractions : Arches, Canyonlands, and Dead Horse State Park BUT this Super 8 was recently renovated and so worth it!
- WISH WE HAD TIME: Hovenweep National Monument and white-water rafting on the Colorado River in Moab, Utah
- FINAL MUST-SEE LIST:
- Four Corners Monument
- Mesa Verde National Park (optional)
- Newspaper Rock
DAY 6: CANYONLANDS NATIONAL PARK & DEAD HORSE STATE PARK

Mesa Arch, Canyonlands National Park, Utah
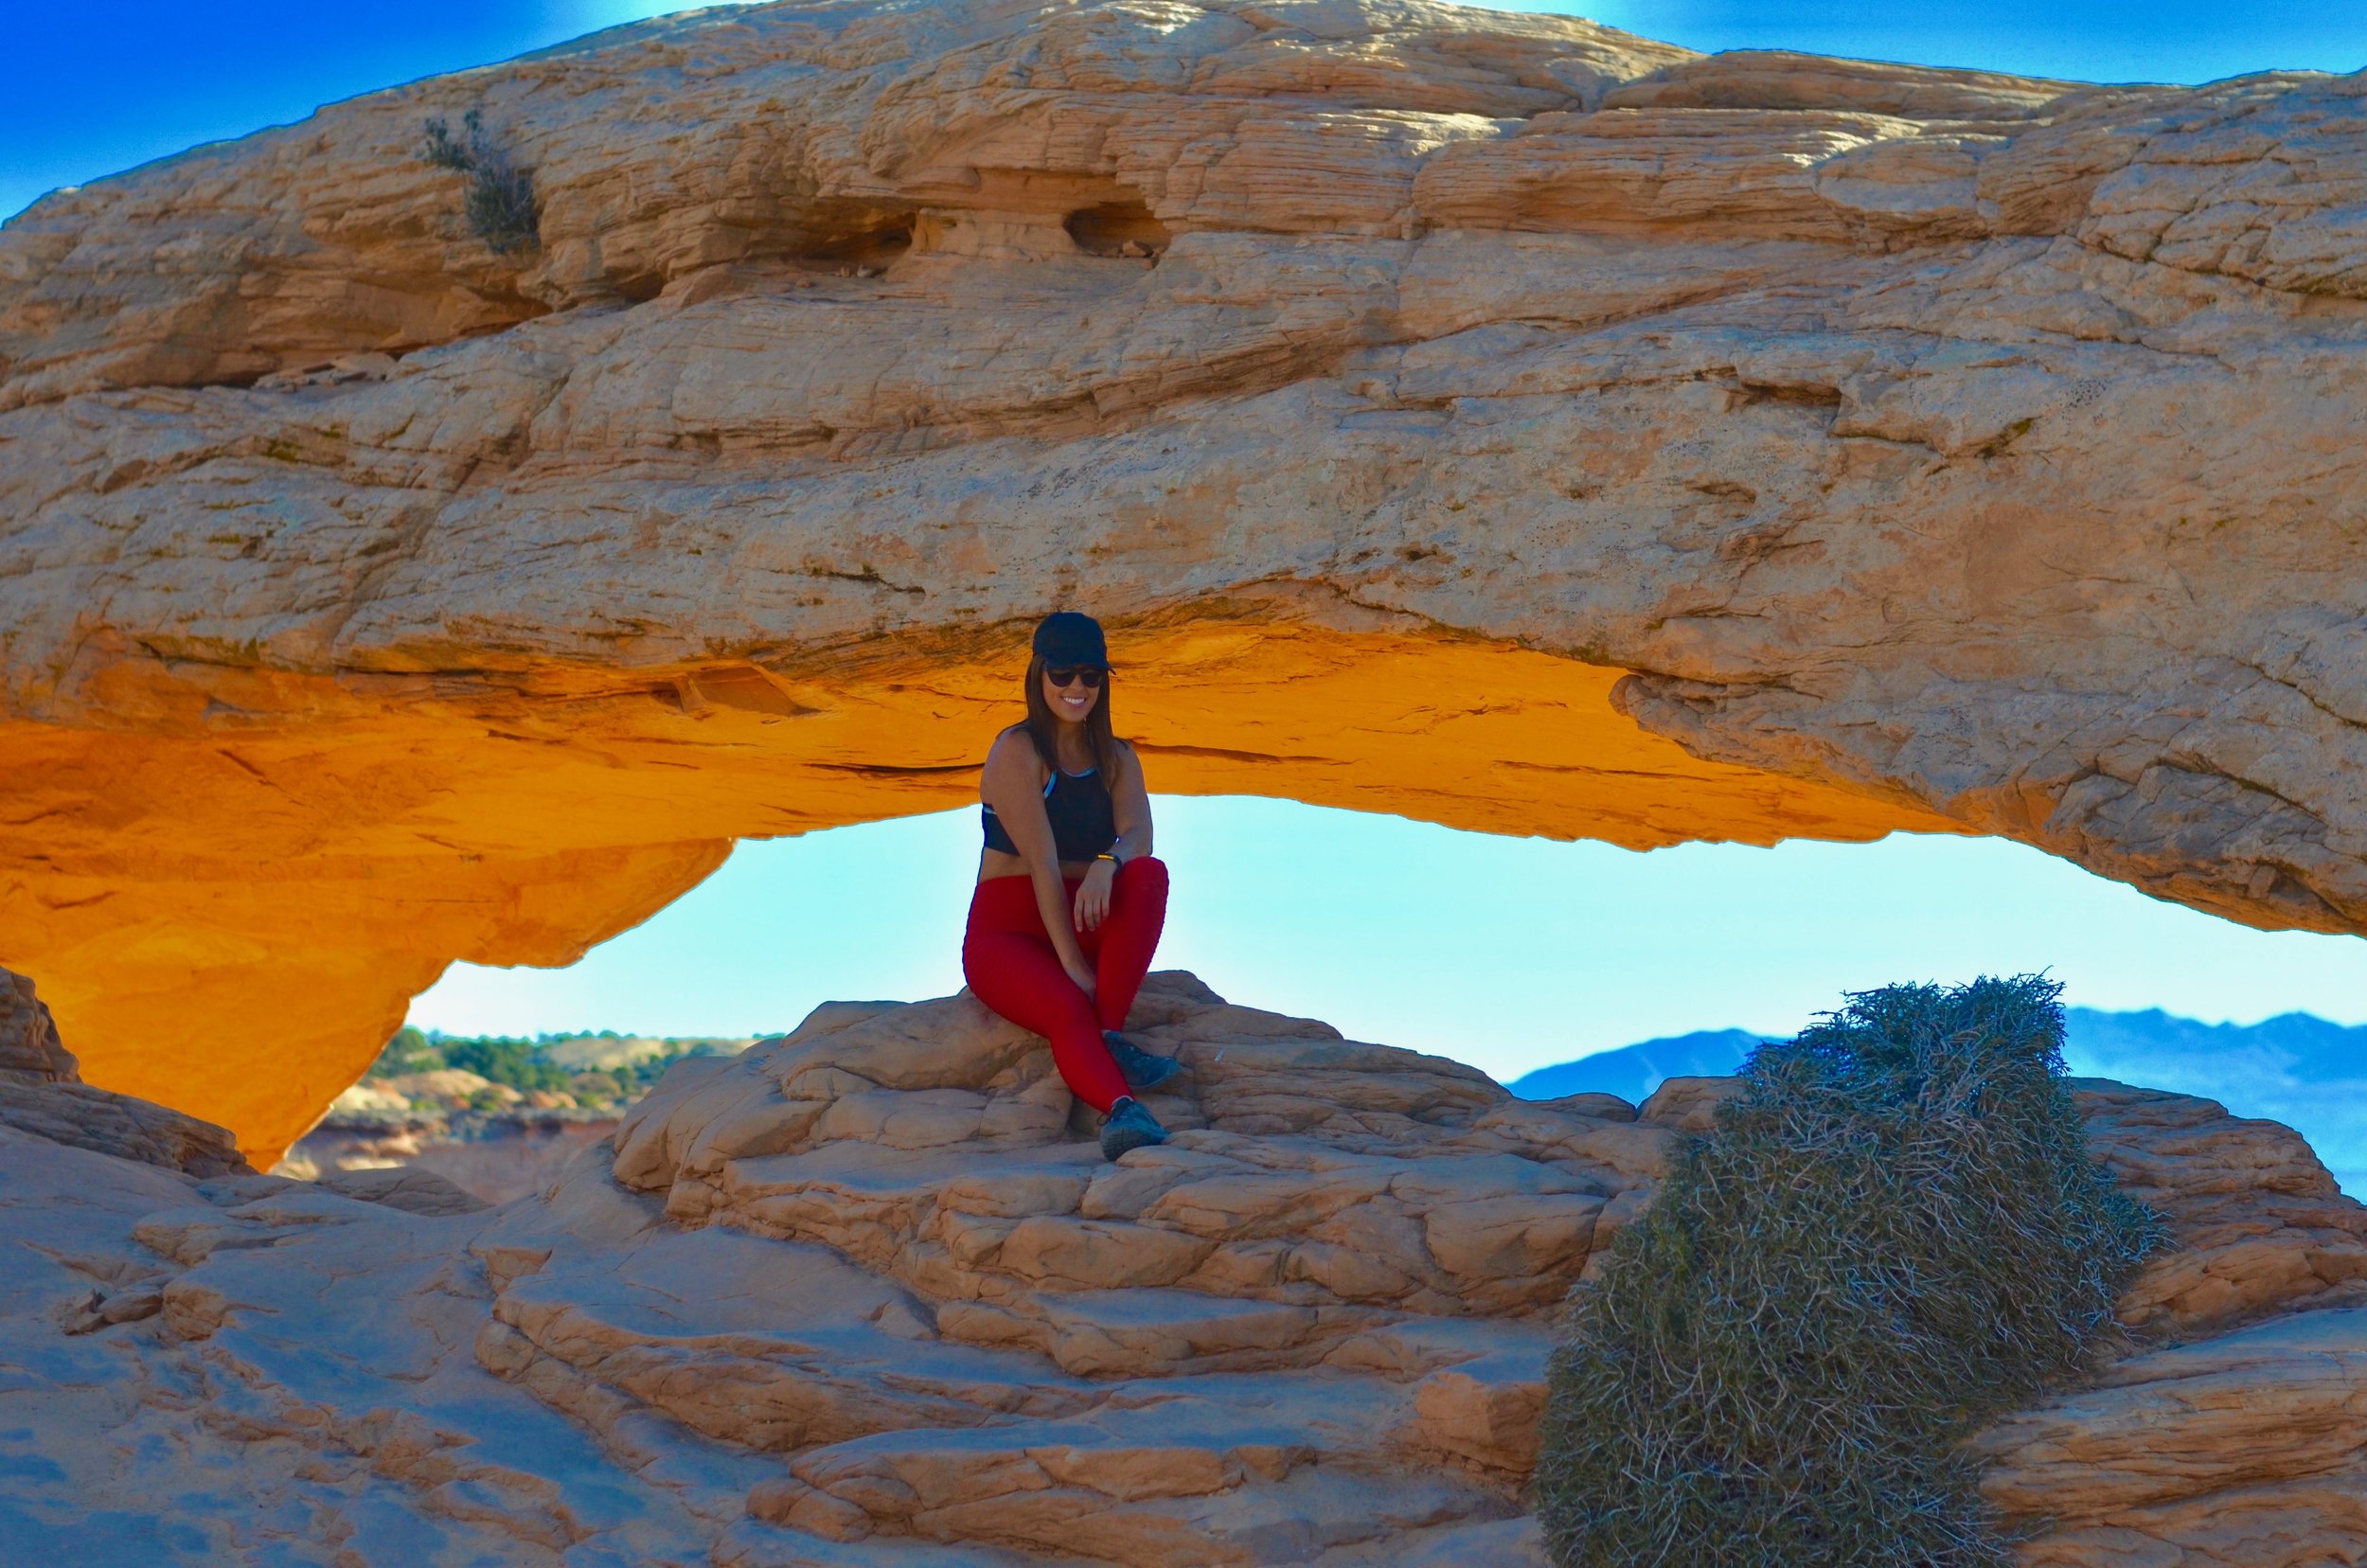
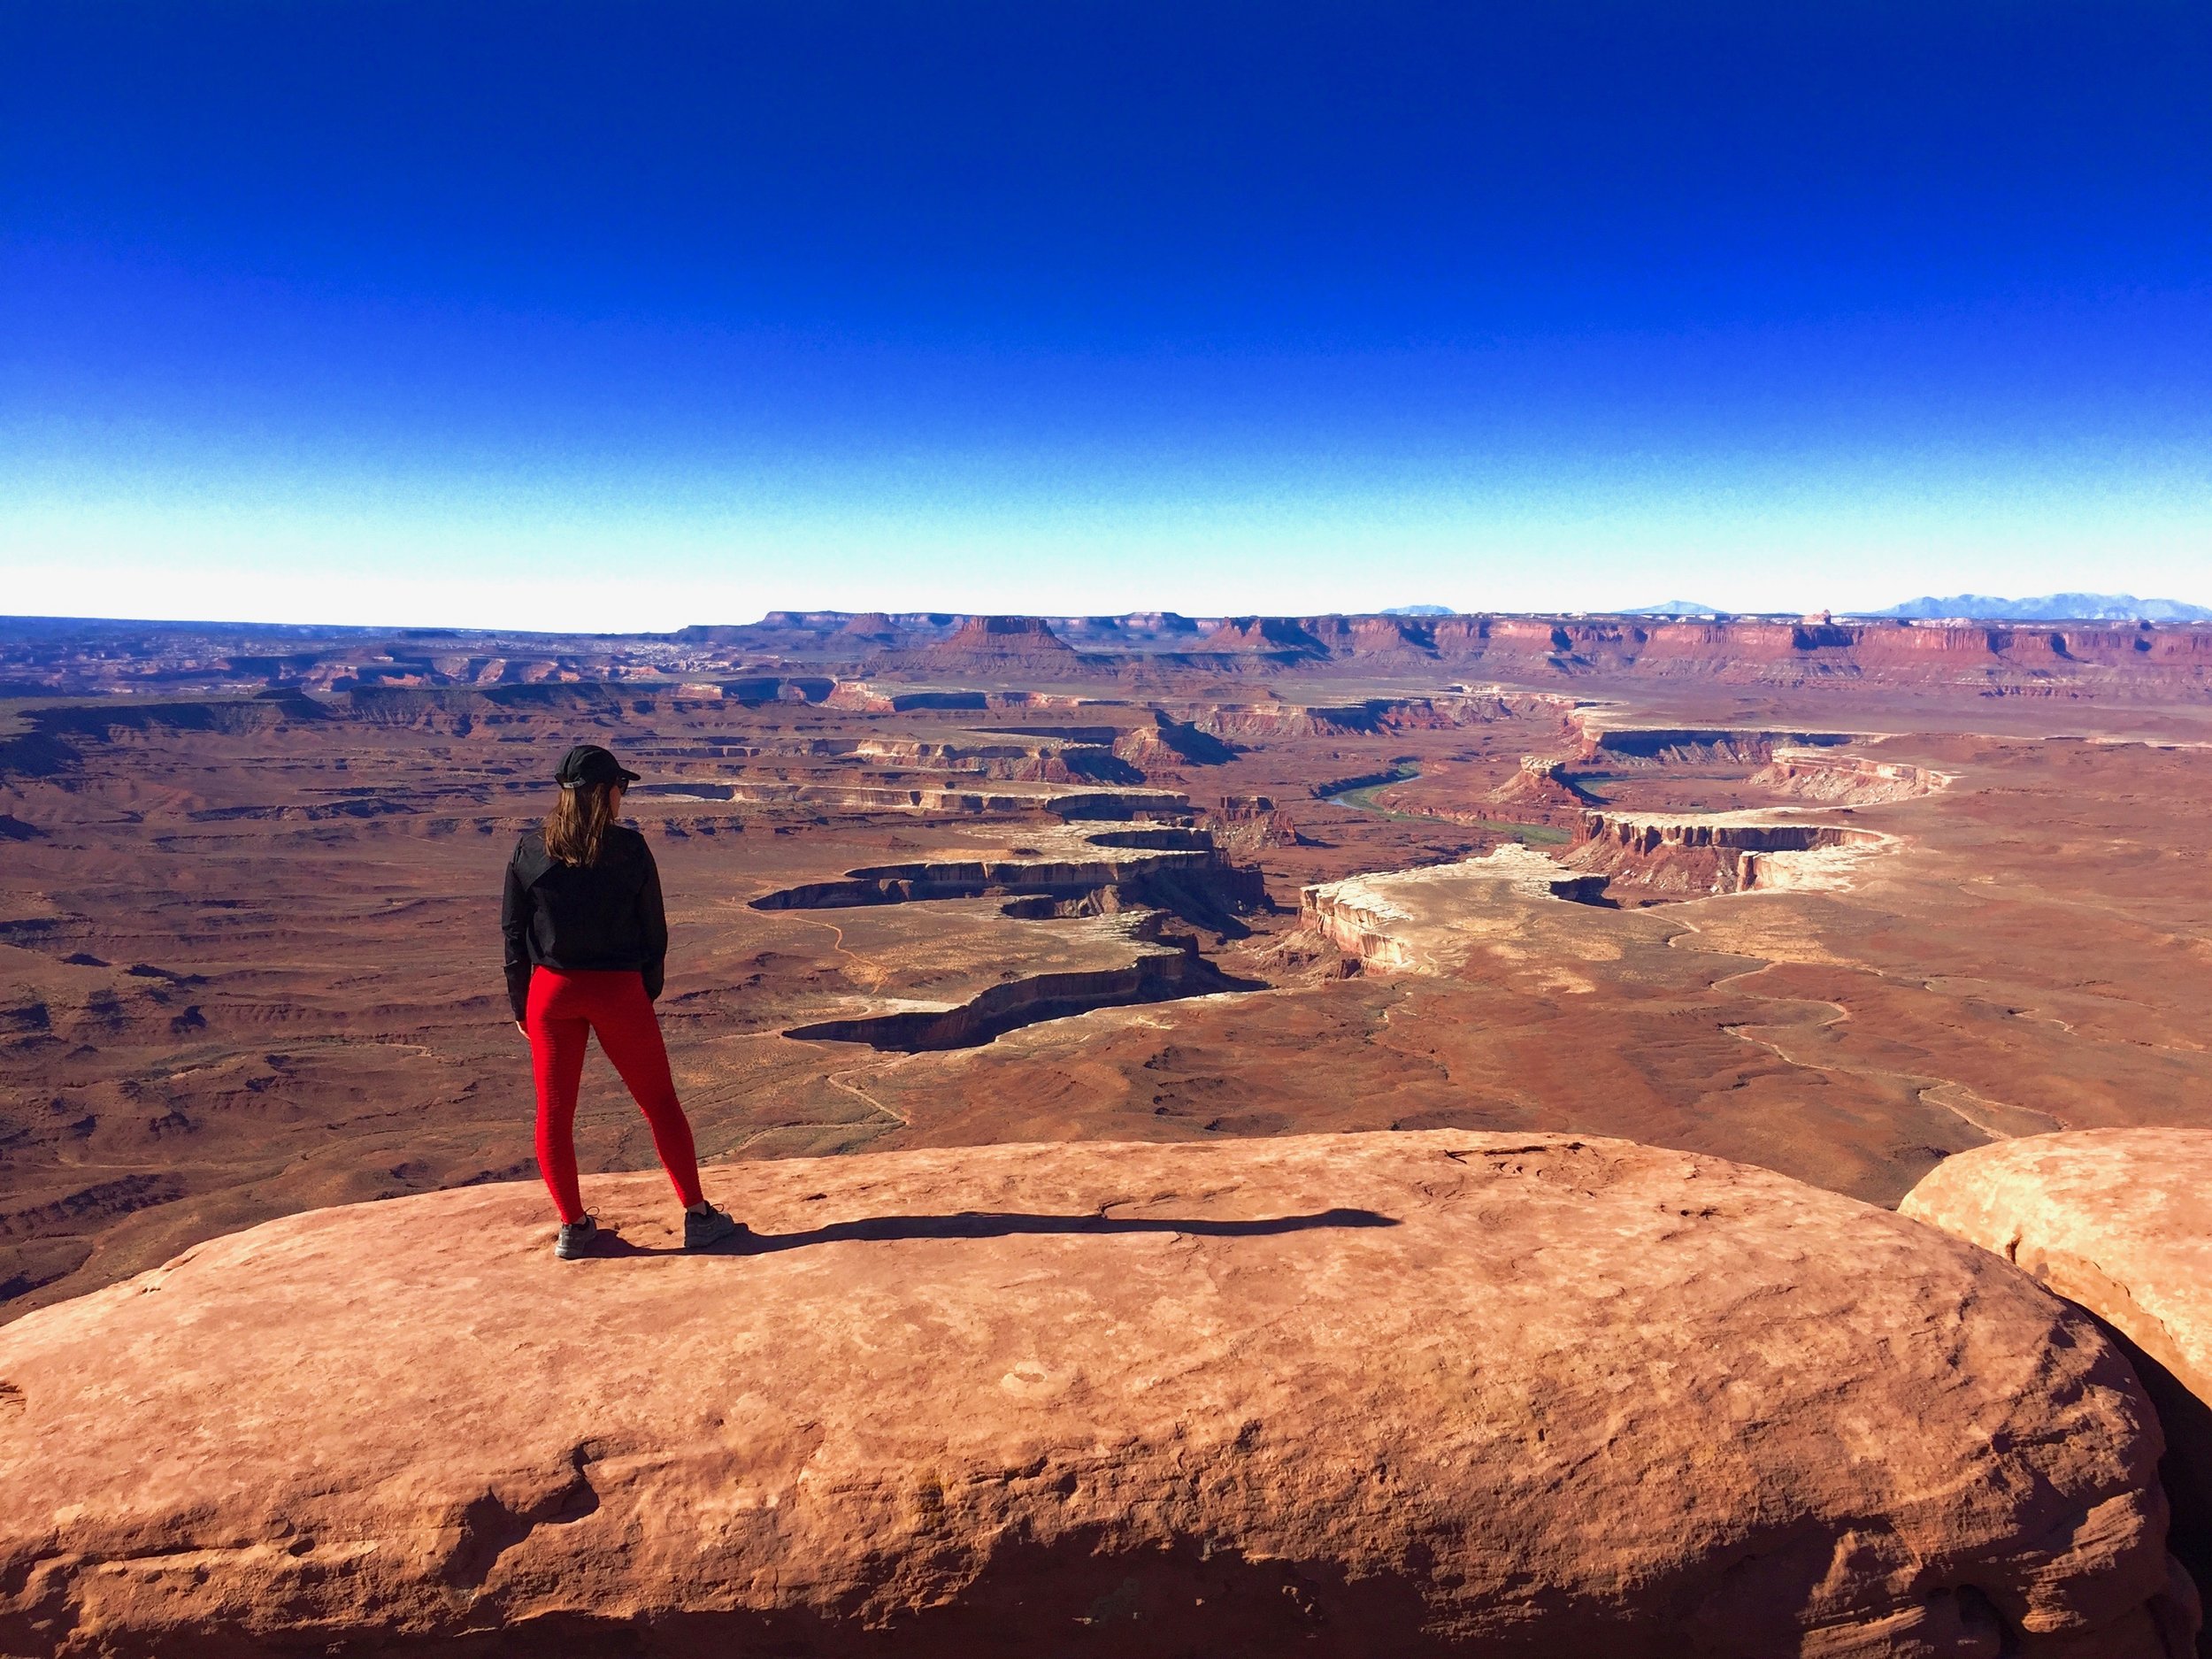
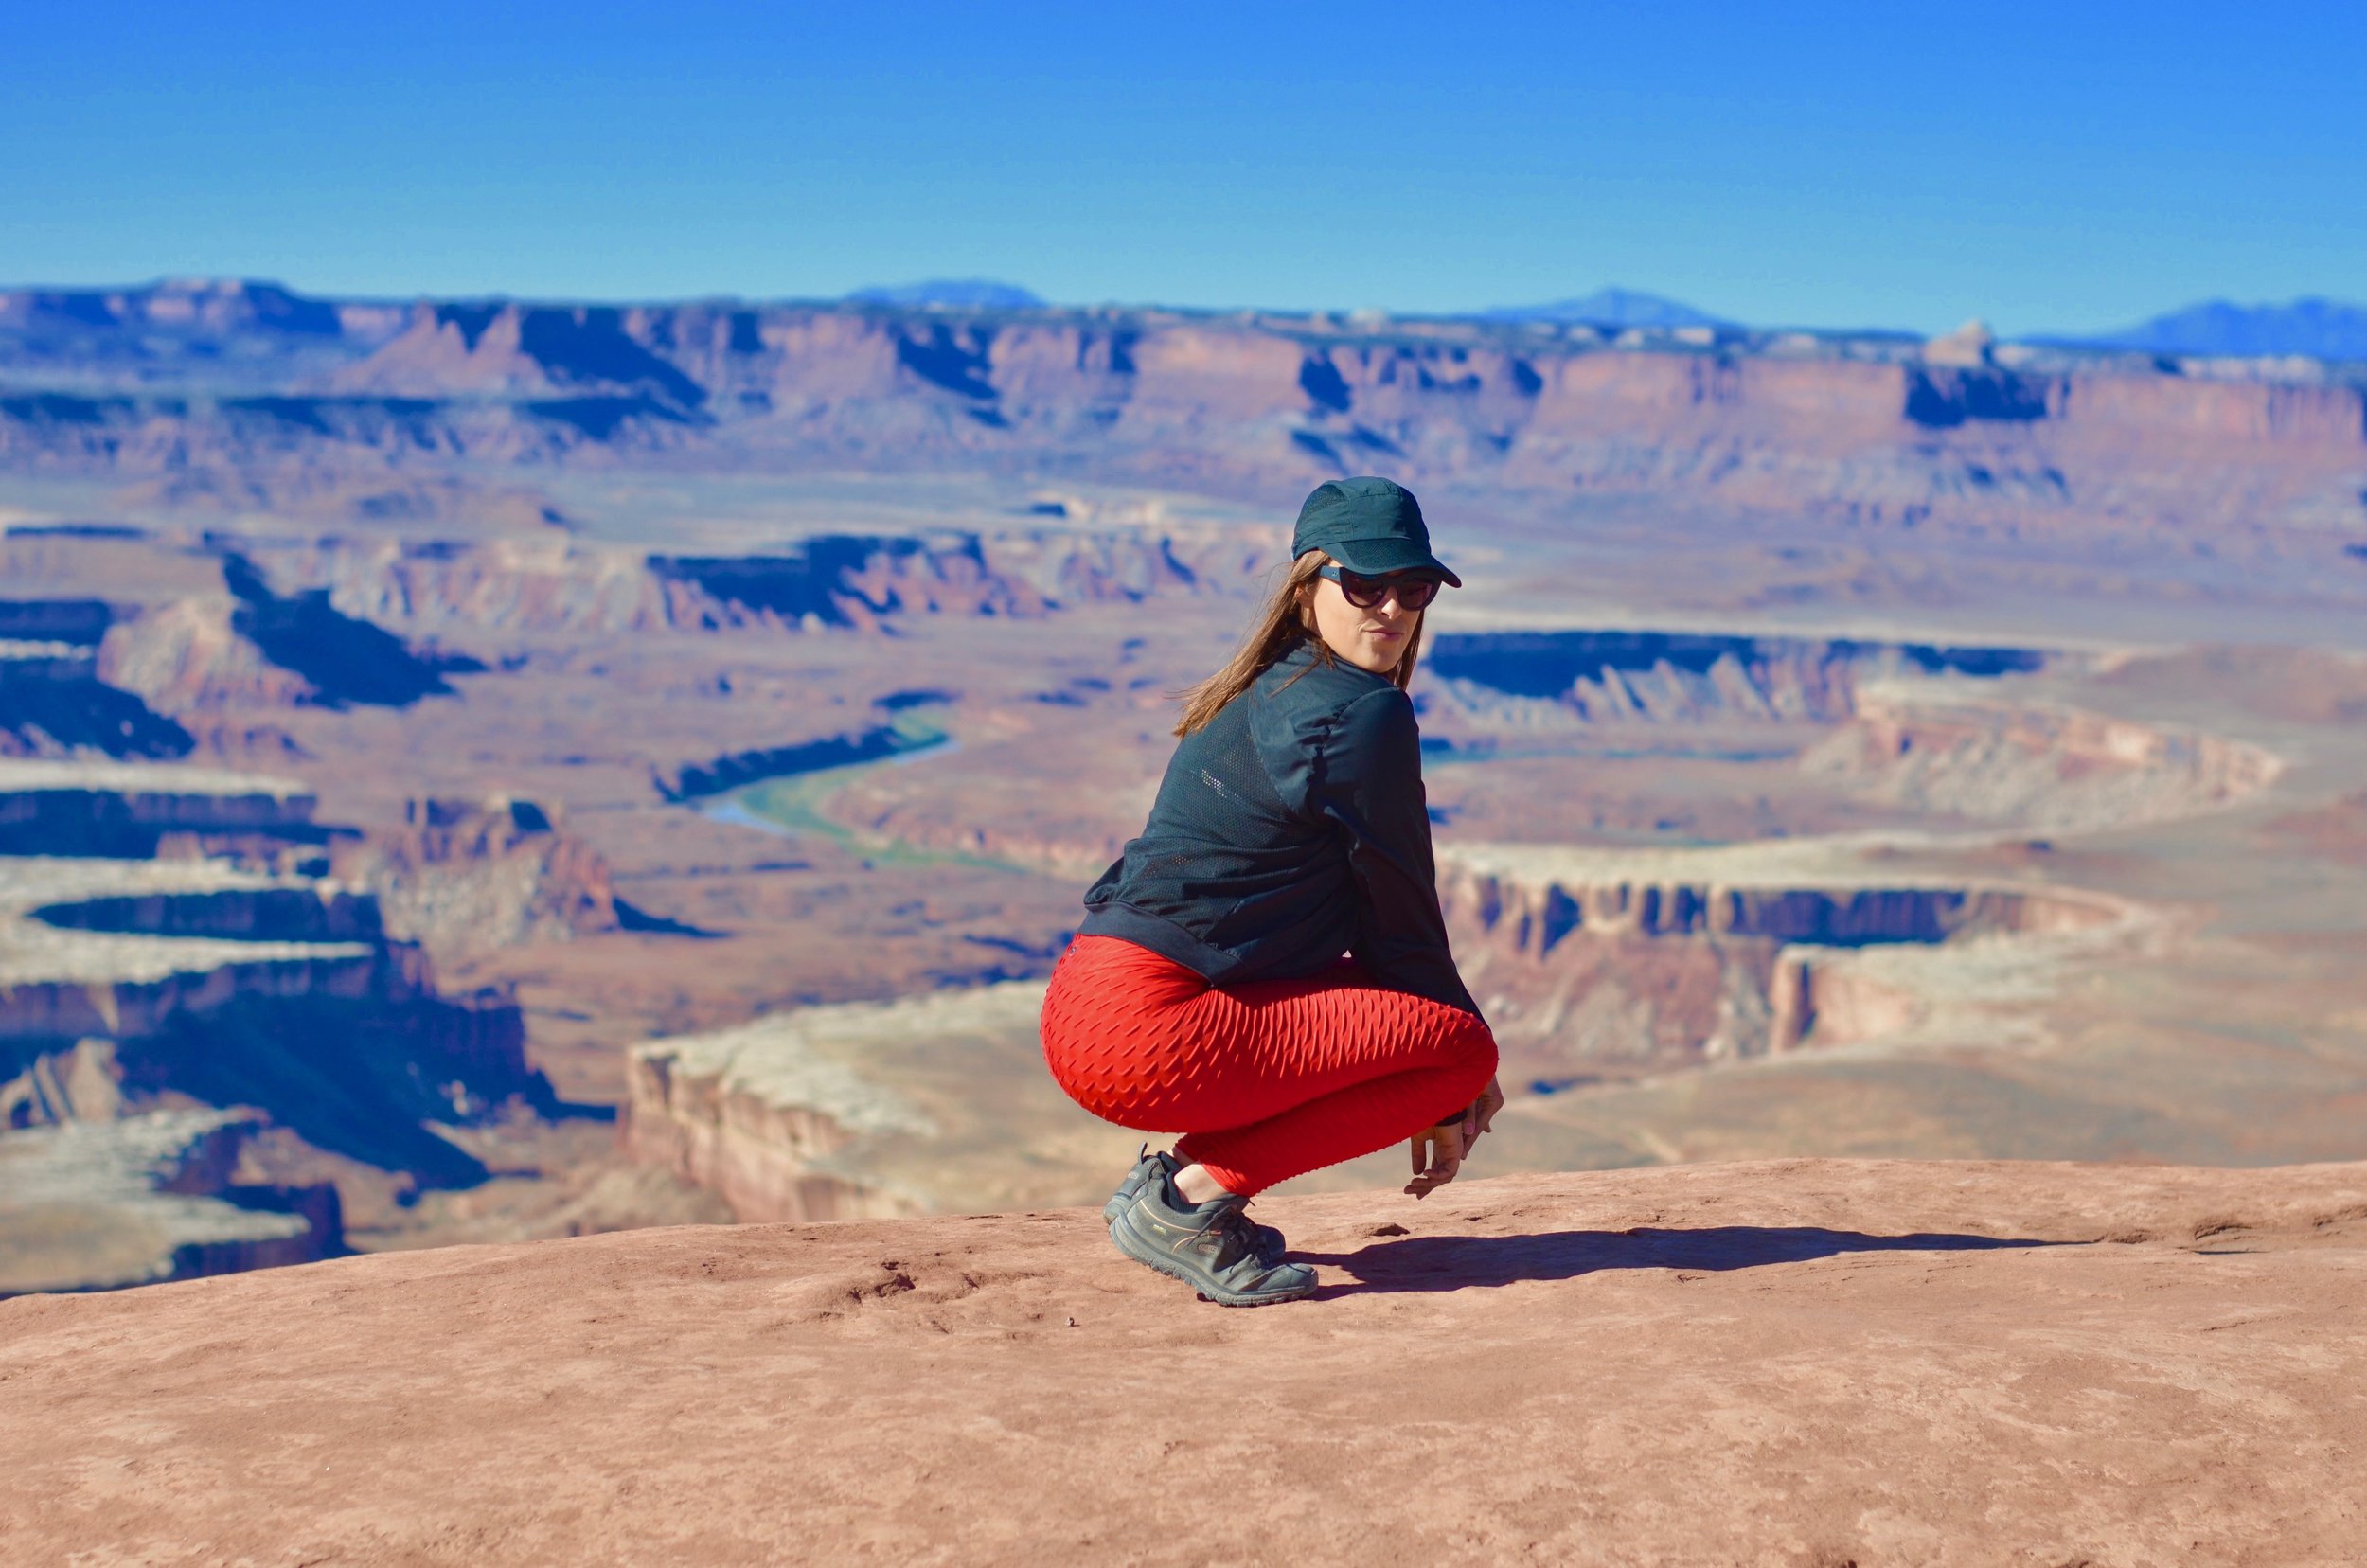
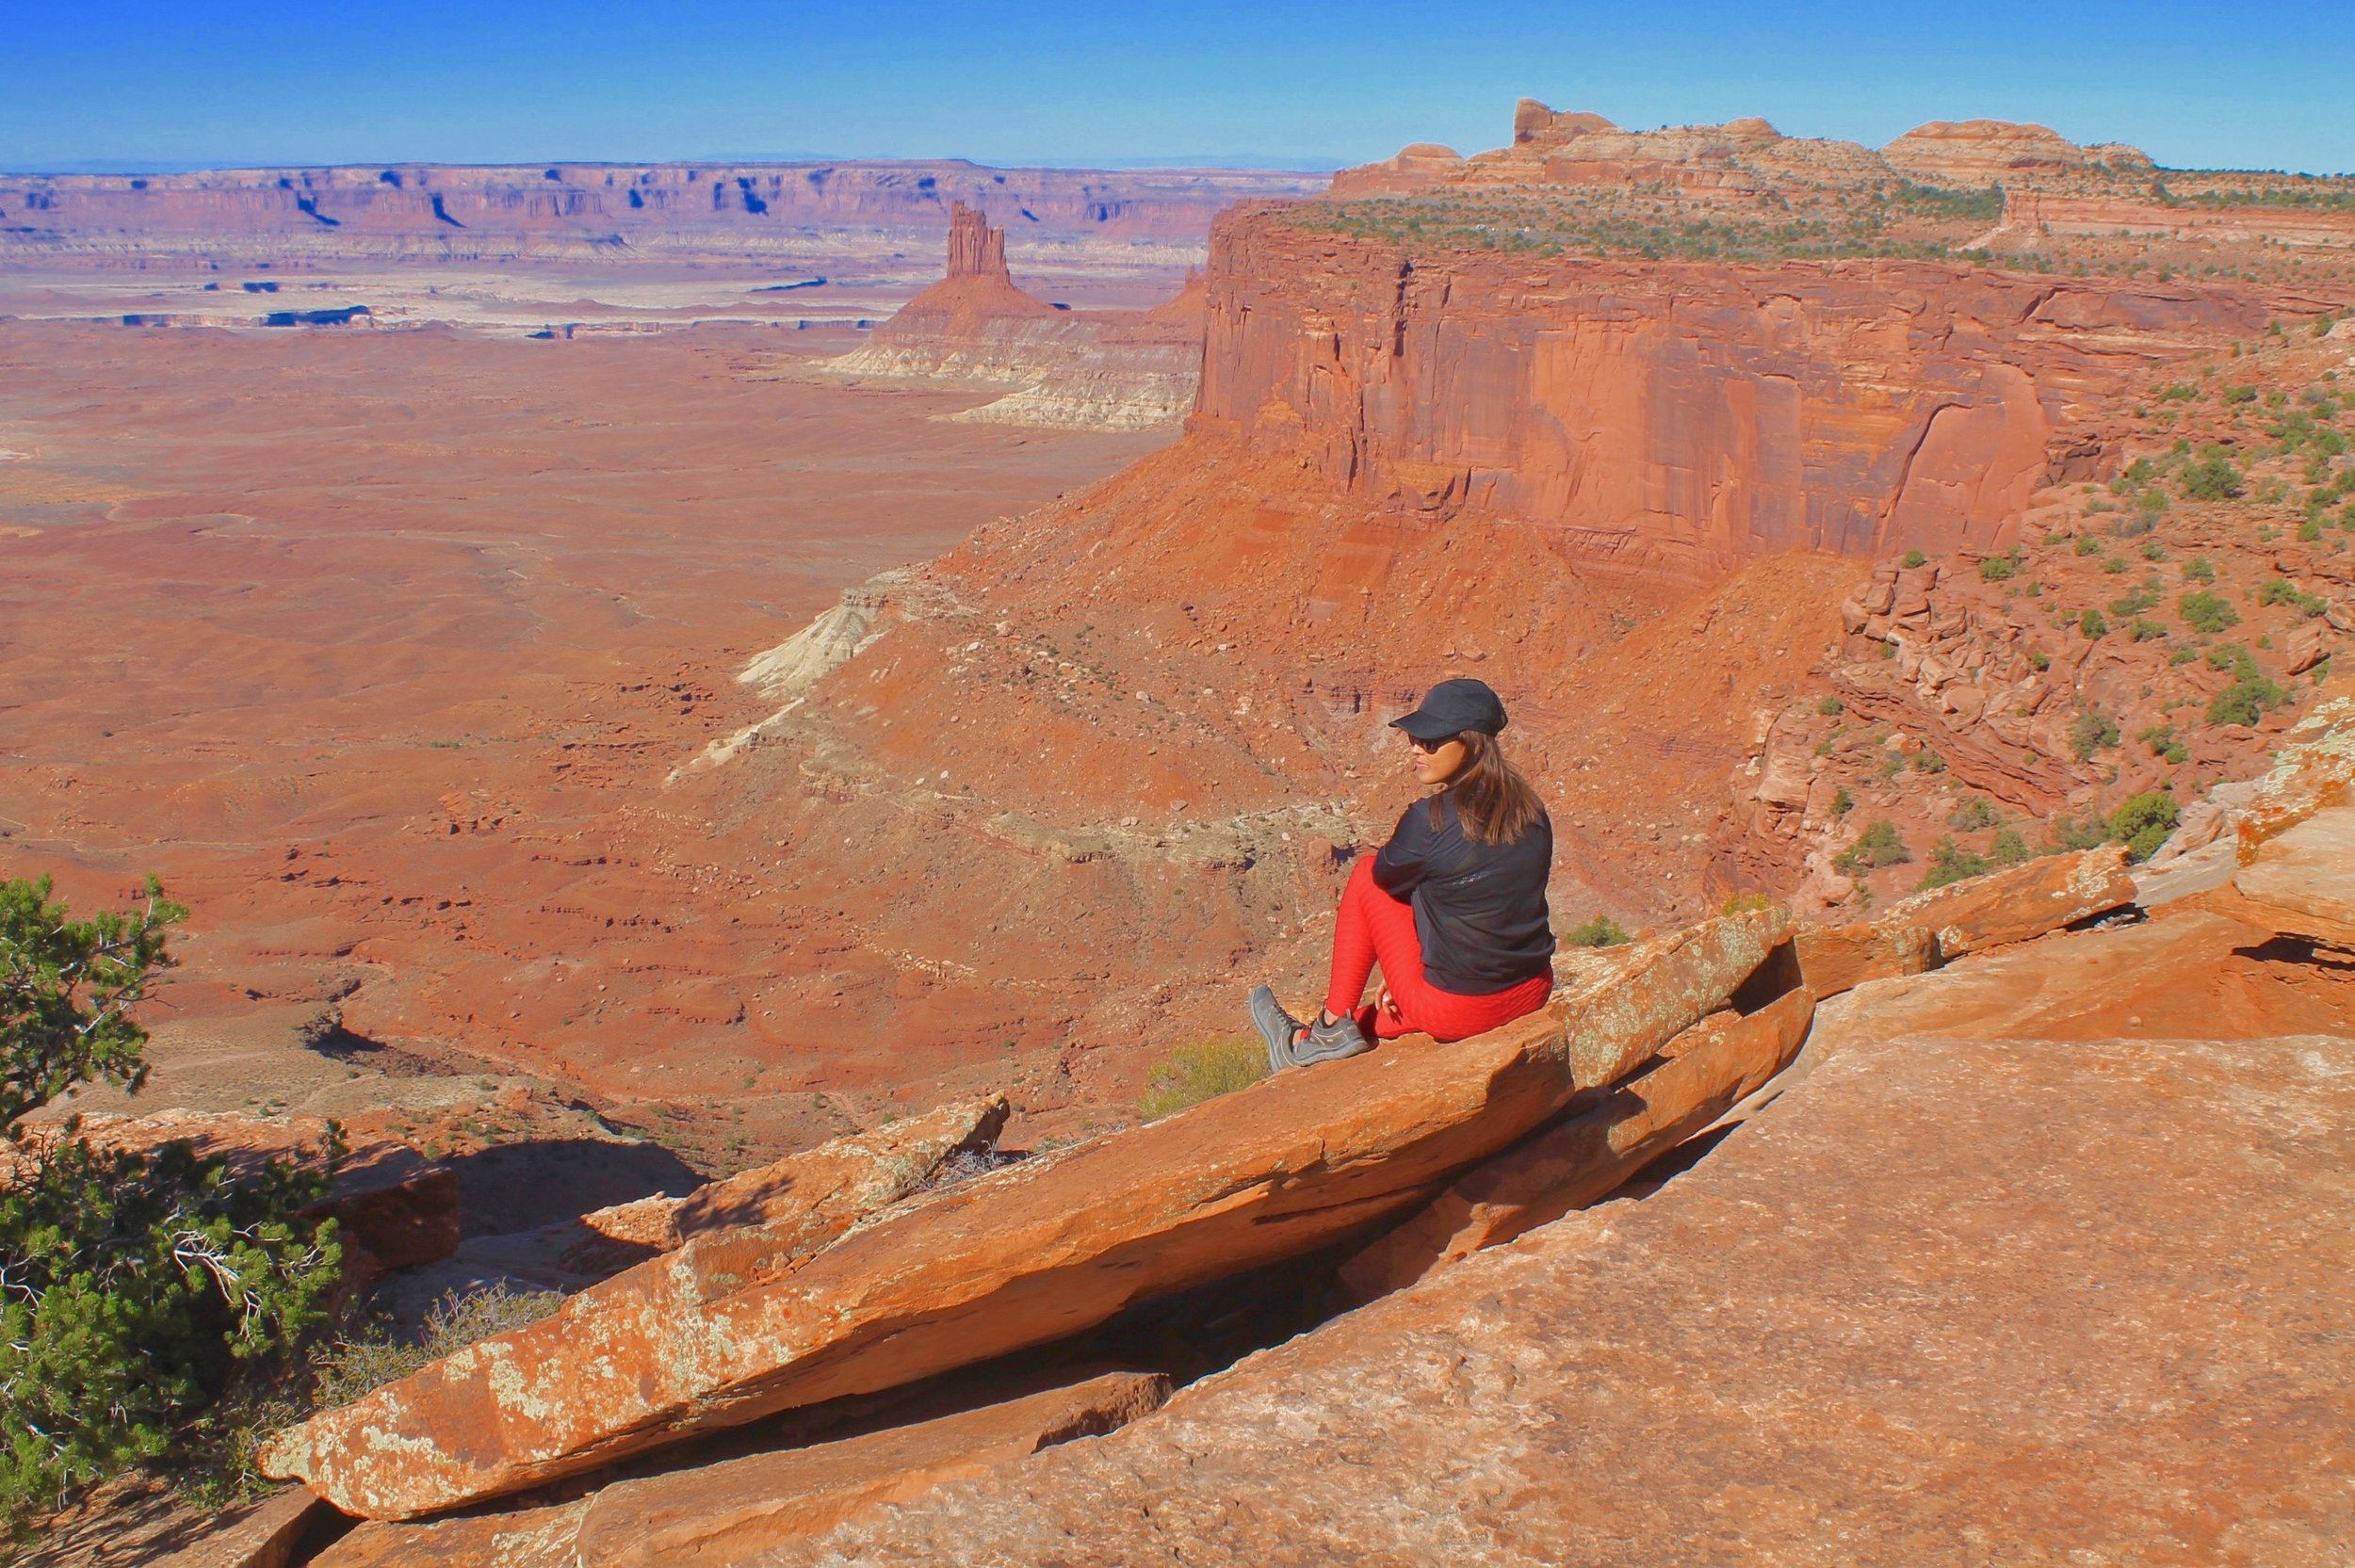
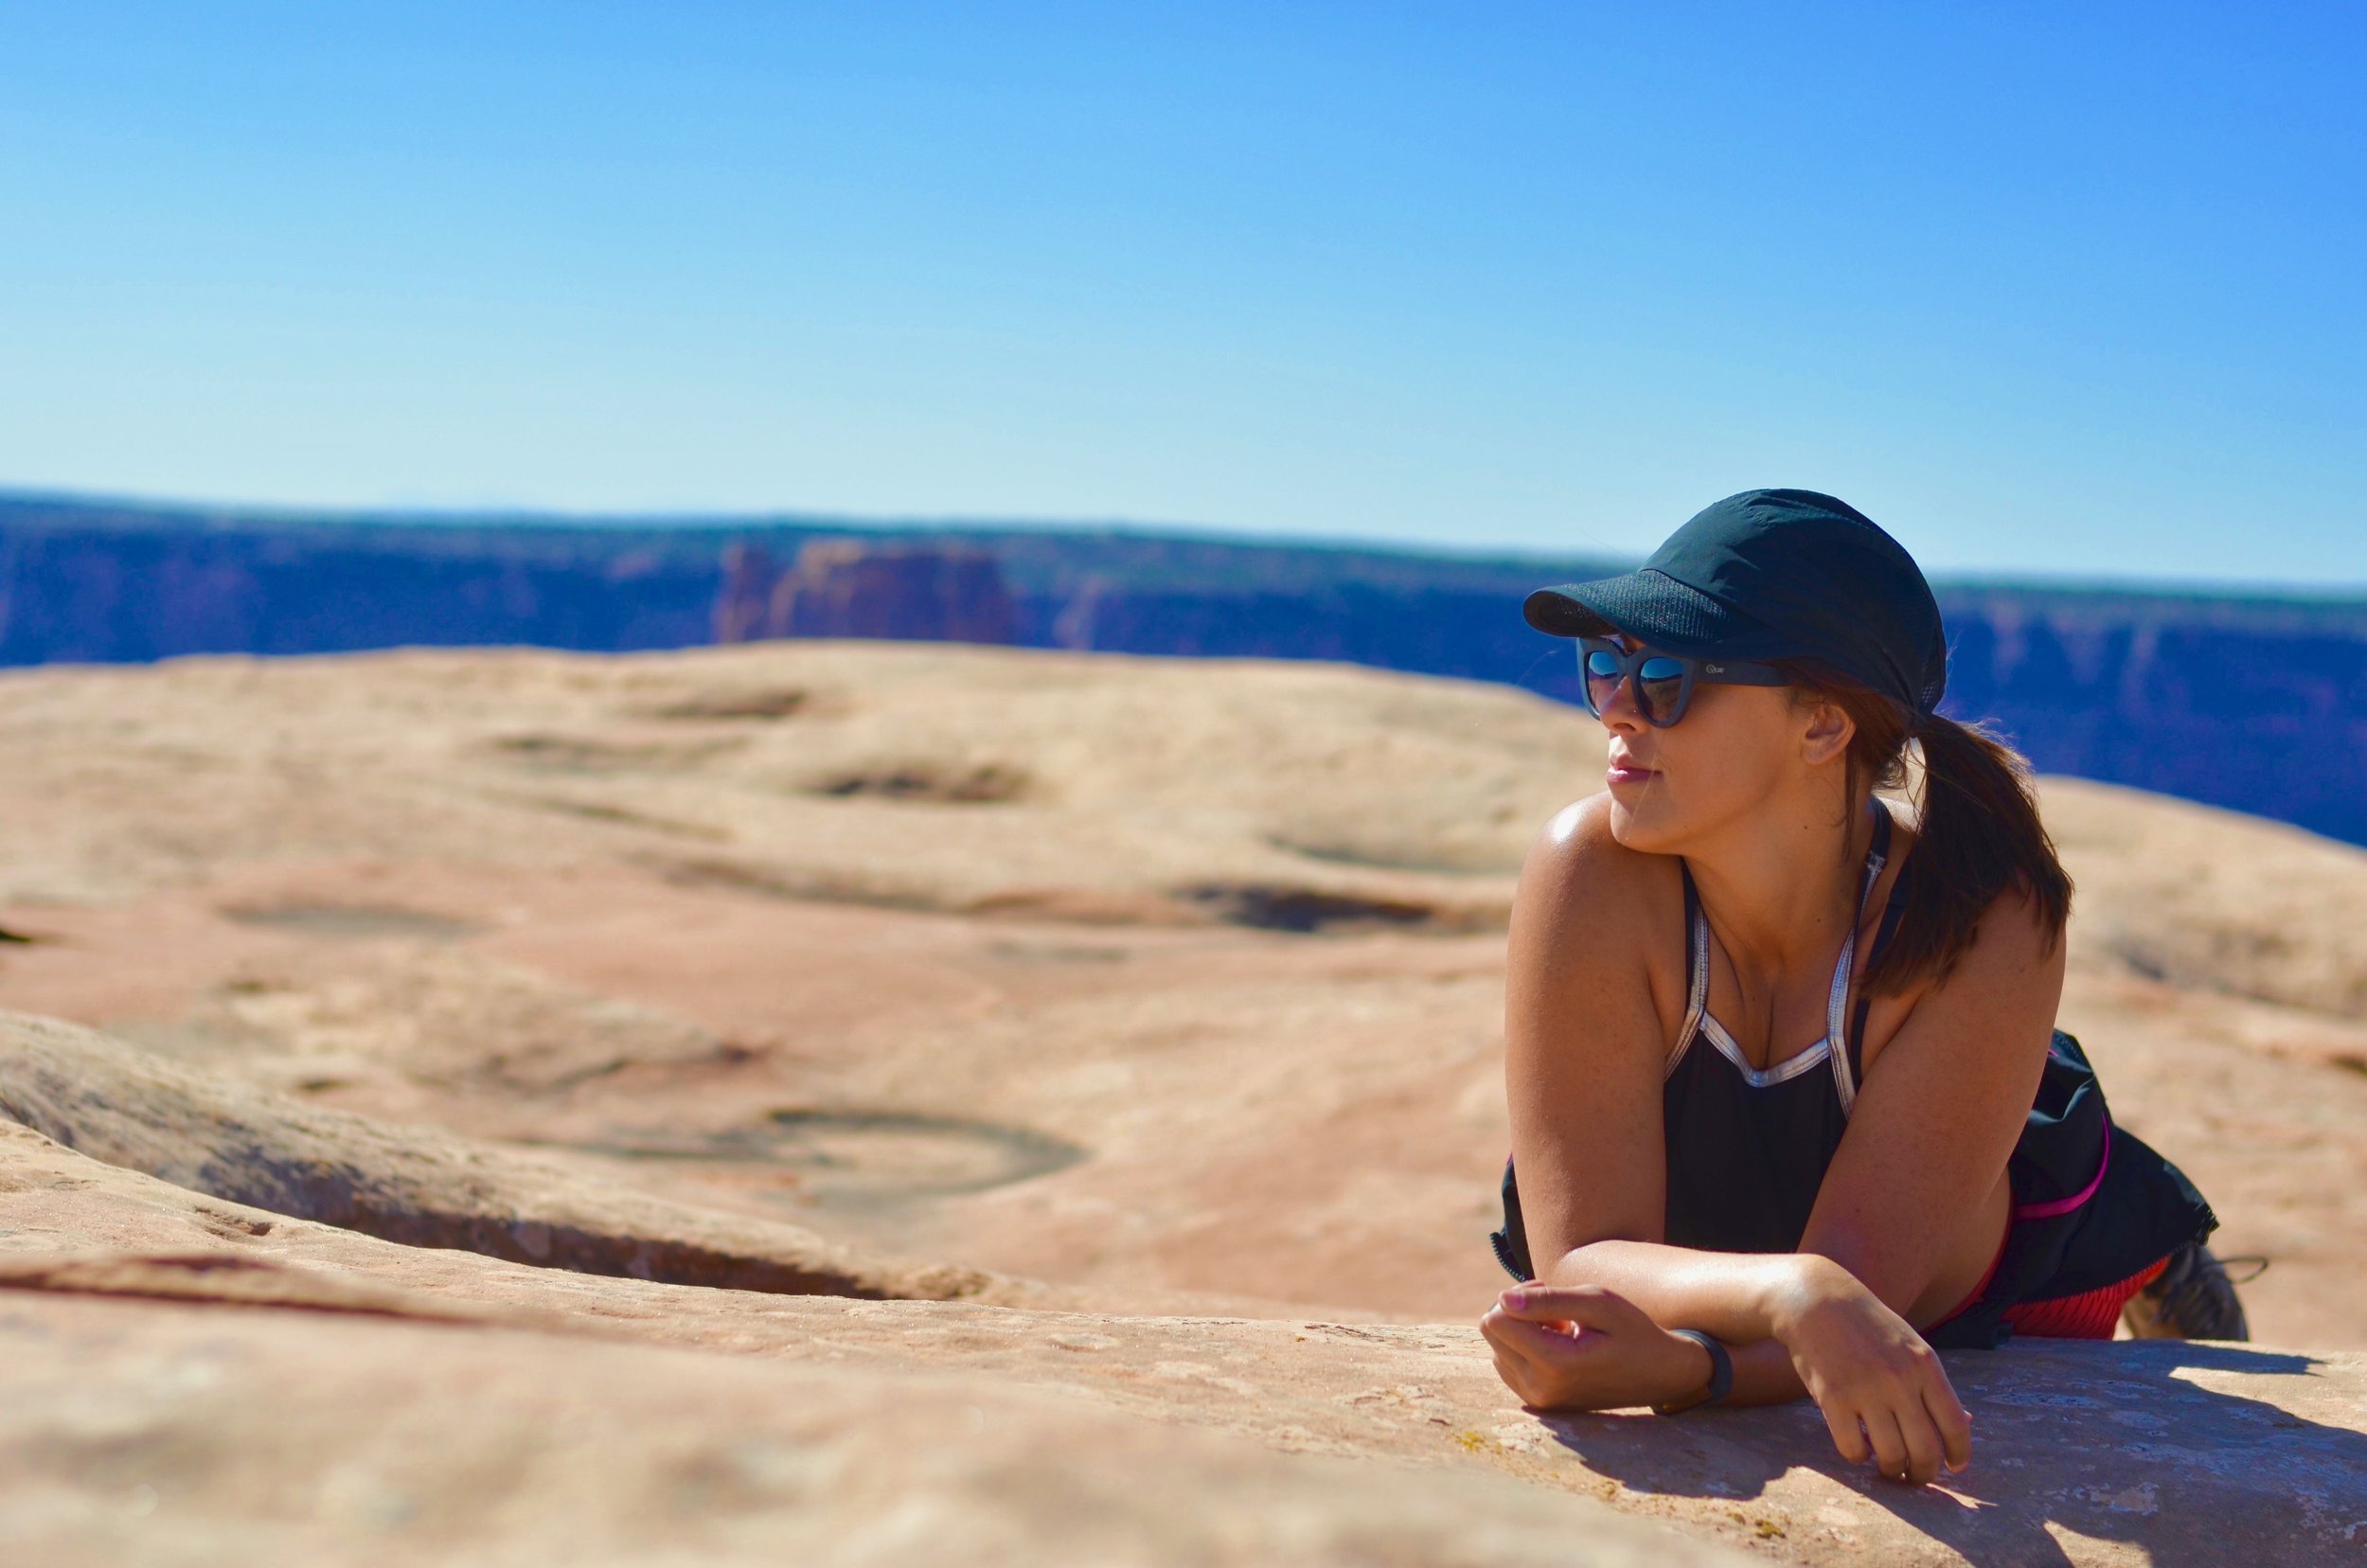
ADVENTURES: Started the day off early and switched up the plan a little bit. Initially this was supposed to be our day spent at Arches National Park...BUT with it being a Sunday we decided to head to Canyonlands instead hoping Arches would be less crowded that Monday...even though that Monday was Columbus Day. What we did know was that the hotels were at capacity and booked solid that entire weekend! Once we got to Canyonlands we went straight for it's main viewpoint, the Mesa Arch located in the Island in the Sky District. This was about a 1 mile walk to get to, not much of a hike but I still suggest hiking shoes as the rock is slippery at all these National Parks. We then continued to the following driving points: Green River, Buck Canyon, Orange Cliffs, Grand Point View Overlook, and Shaffer Canyon Overlook. At the Orange Cliffs we had a picnic (handful of picnic tables) and at the Grand Point View Overlook we went on a flat walk along the perimeter which is a 1 mile long stretch of views.
Canyonlands honestly didn't take very long to see and enjoy so it could have easily been combined with another day of festivities but I personally enjoyed having the entire day to explore each park. Located right next to Canyonlands is Dead Horse State Park. This park is not covered on the National Parks Pass, as it is a state park and it cost $15 a car. Dead Horse is cool because of it's unique history, (you must go to get the story) and it is for sure worth seeing! There are multiple hikes at Dead Horse State Park as well as viewpoints you can drive to. We drove to the Dead Horse Point Overlook (the main viewpoint) but then also decided to hike to the Bighorn Overlook which provided us with some really cool photos and cannot be accessed by car. The Bighorn Overlook hike was relatively easy and about 2.5 miles roundtrip. I suggest this hike because it was quiet, peaceful, and the views were breathtaking and unique. After this fun-filled day of adventures we were pretty worn out and ready to head back for dinner and some rest.

TIPS: Moab was by far the coolest area (temperature) of all the places we visited on our road trip. I am not sure if it is always like that but just be prepared with layers in case. Again I suggest getting to Canyonlands early if you want to attempt to get a photo at the Mesa Arch without a million people in it. Since this is basically an easy walk to get to a lot of people go to it. Be aware of that. Canyonlands also has no gas, food, and if I remember correctly there was one or no water fill stations. Make sure to bring some food and enough water. We stopped at the grocery store beforehand and grabbed some subs, chips, and filled a cooler with ice to leave in the car. That handy-dandy cooler bag was put to use!

Canyonlands National Park, Utah

Dead Horse State Park, Utah
As for Dead Horse State Park, the entrance is right before Canyonlands if you are going towards Canyonlands OR if you are exiting Canyonlands you will see it on the way out. This park had a little station to get some coffee, snacks, food, and ice-cream from but for this day of adventure I strongly suggest a picnic. We also stopped in the Visitor Center to play a game of giant Jenga! Then it was hiking time. The Bighorn Overlook hike consisted of dirt paths and slick rock so make sure your shoes have a good grip. This hike was also pretty easy to get off-trail so pay attention to the little stacks of rocks that are set-up alongside the trail. We started this hike at the Visitor's Center on the West Rim Trail and then shortly after we saw a turn-off for Bighorn's official start point. Grab a map and take enough water! After the hike we made a quick pit stop at Arches National Park to stop at the Visitor's Center and grab a map to get prepared for the following day BUT we arrived at 4:15pm and apparently the center closed at 4:00pm. Not entirely sure if that is because of seasonal hours or because it was a Sunday but just something to be aware of if you like to plan ahead like me.
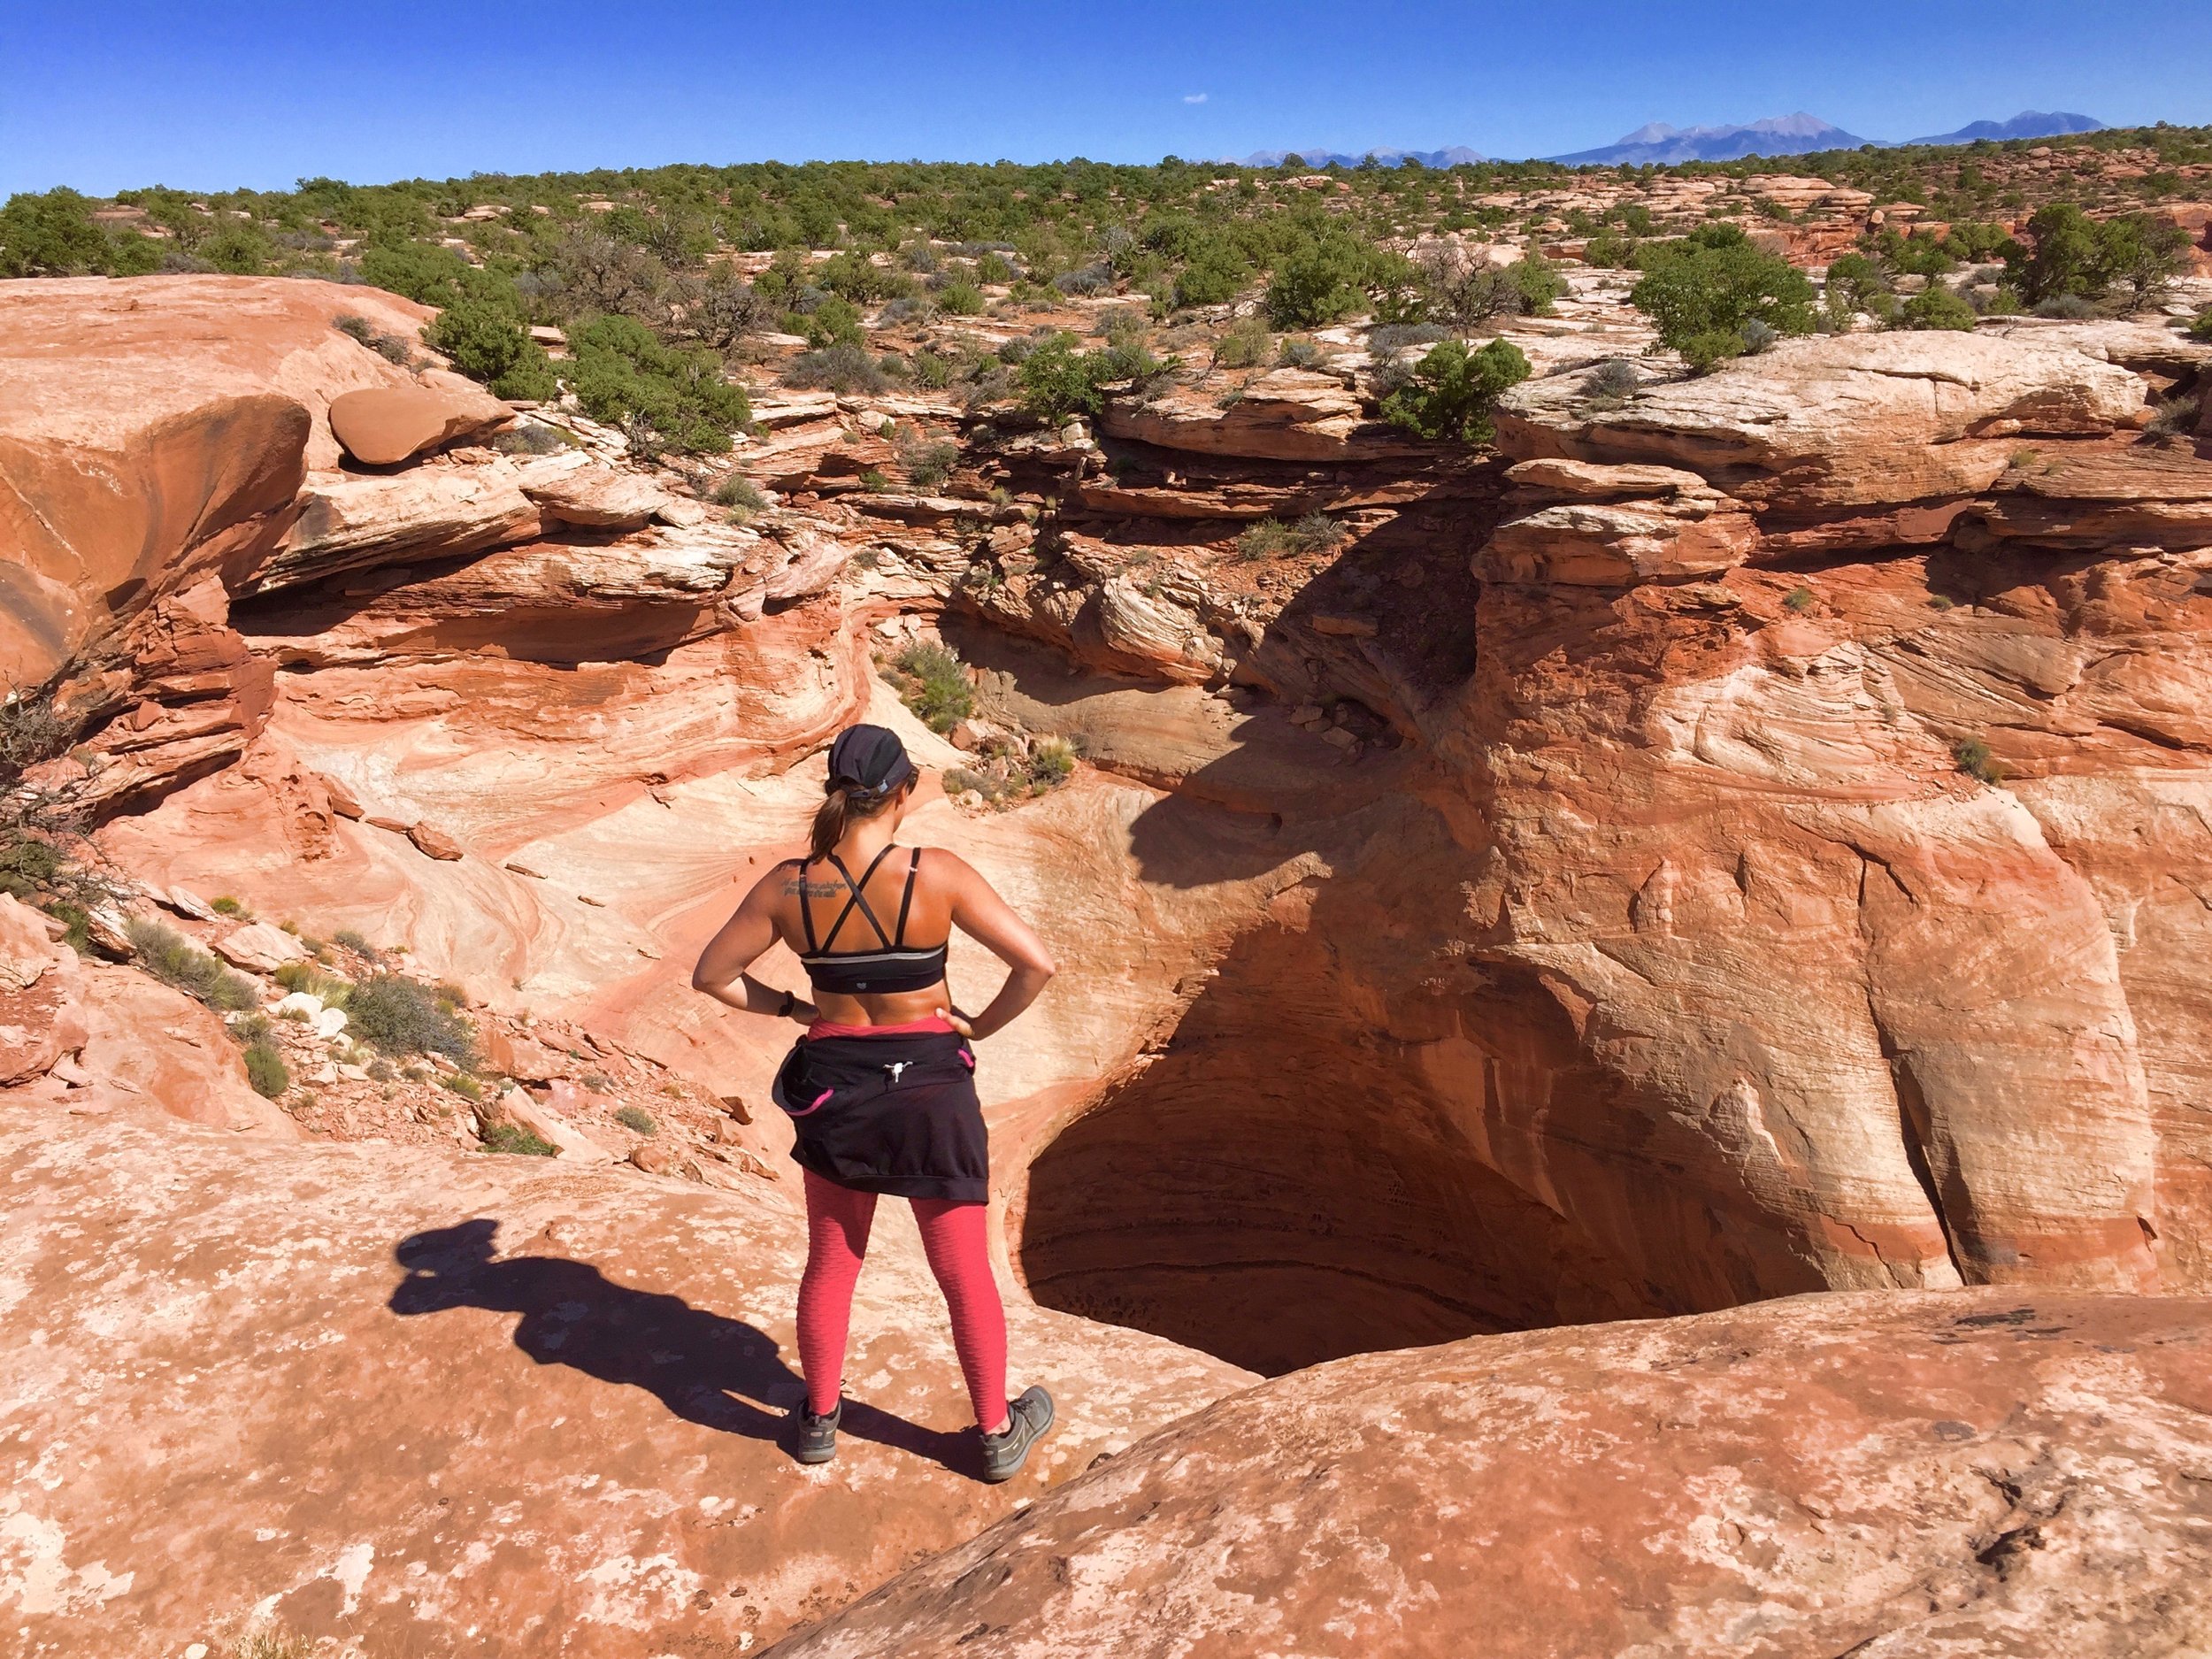
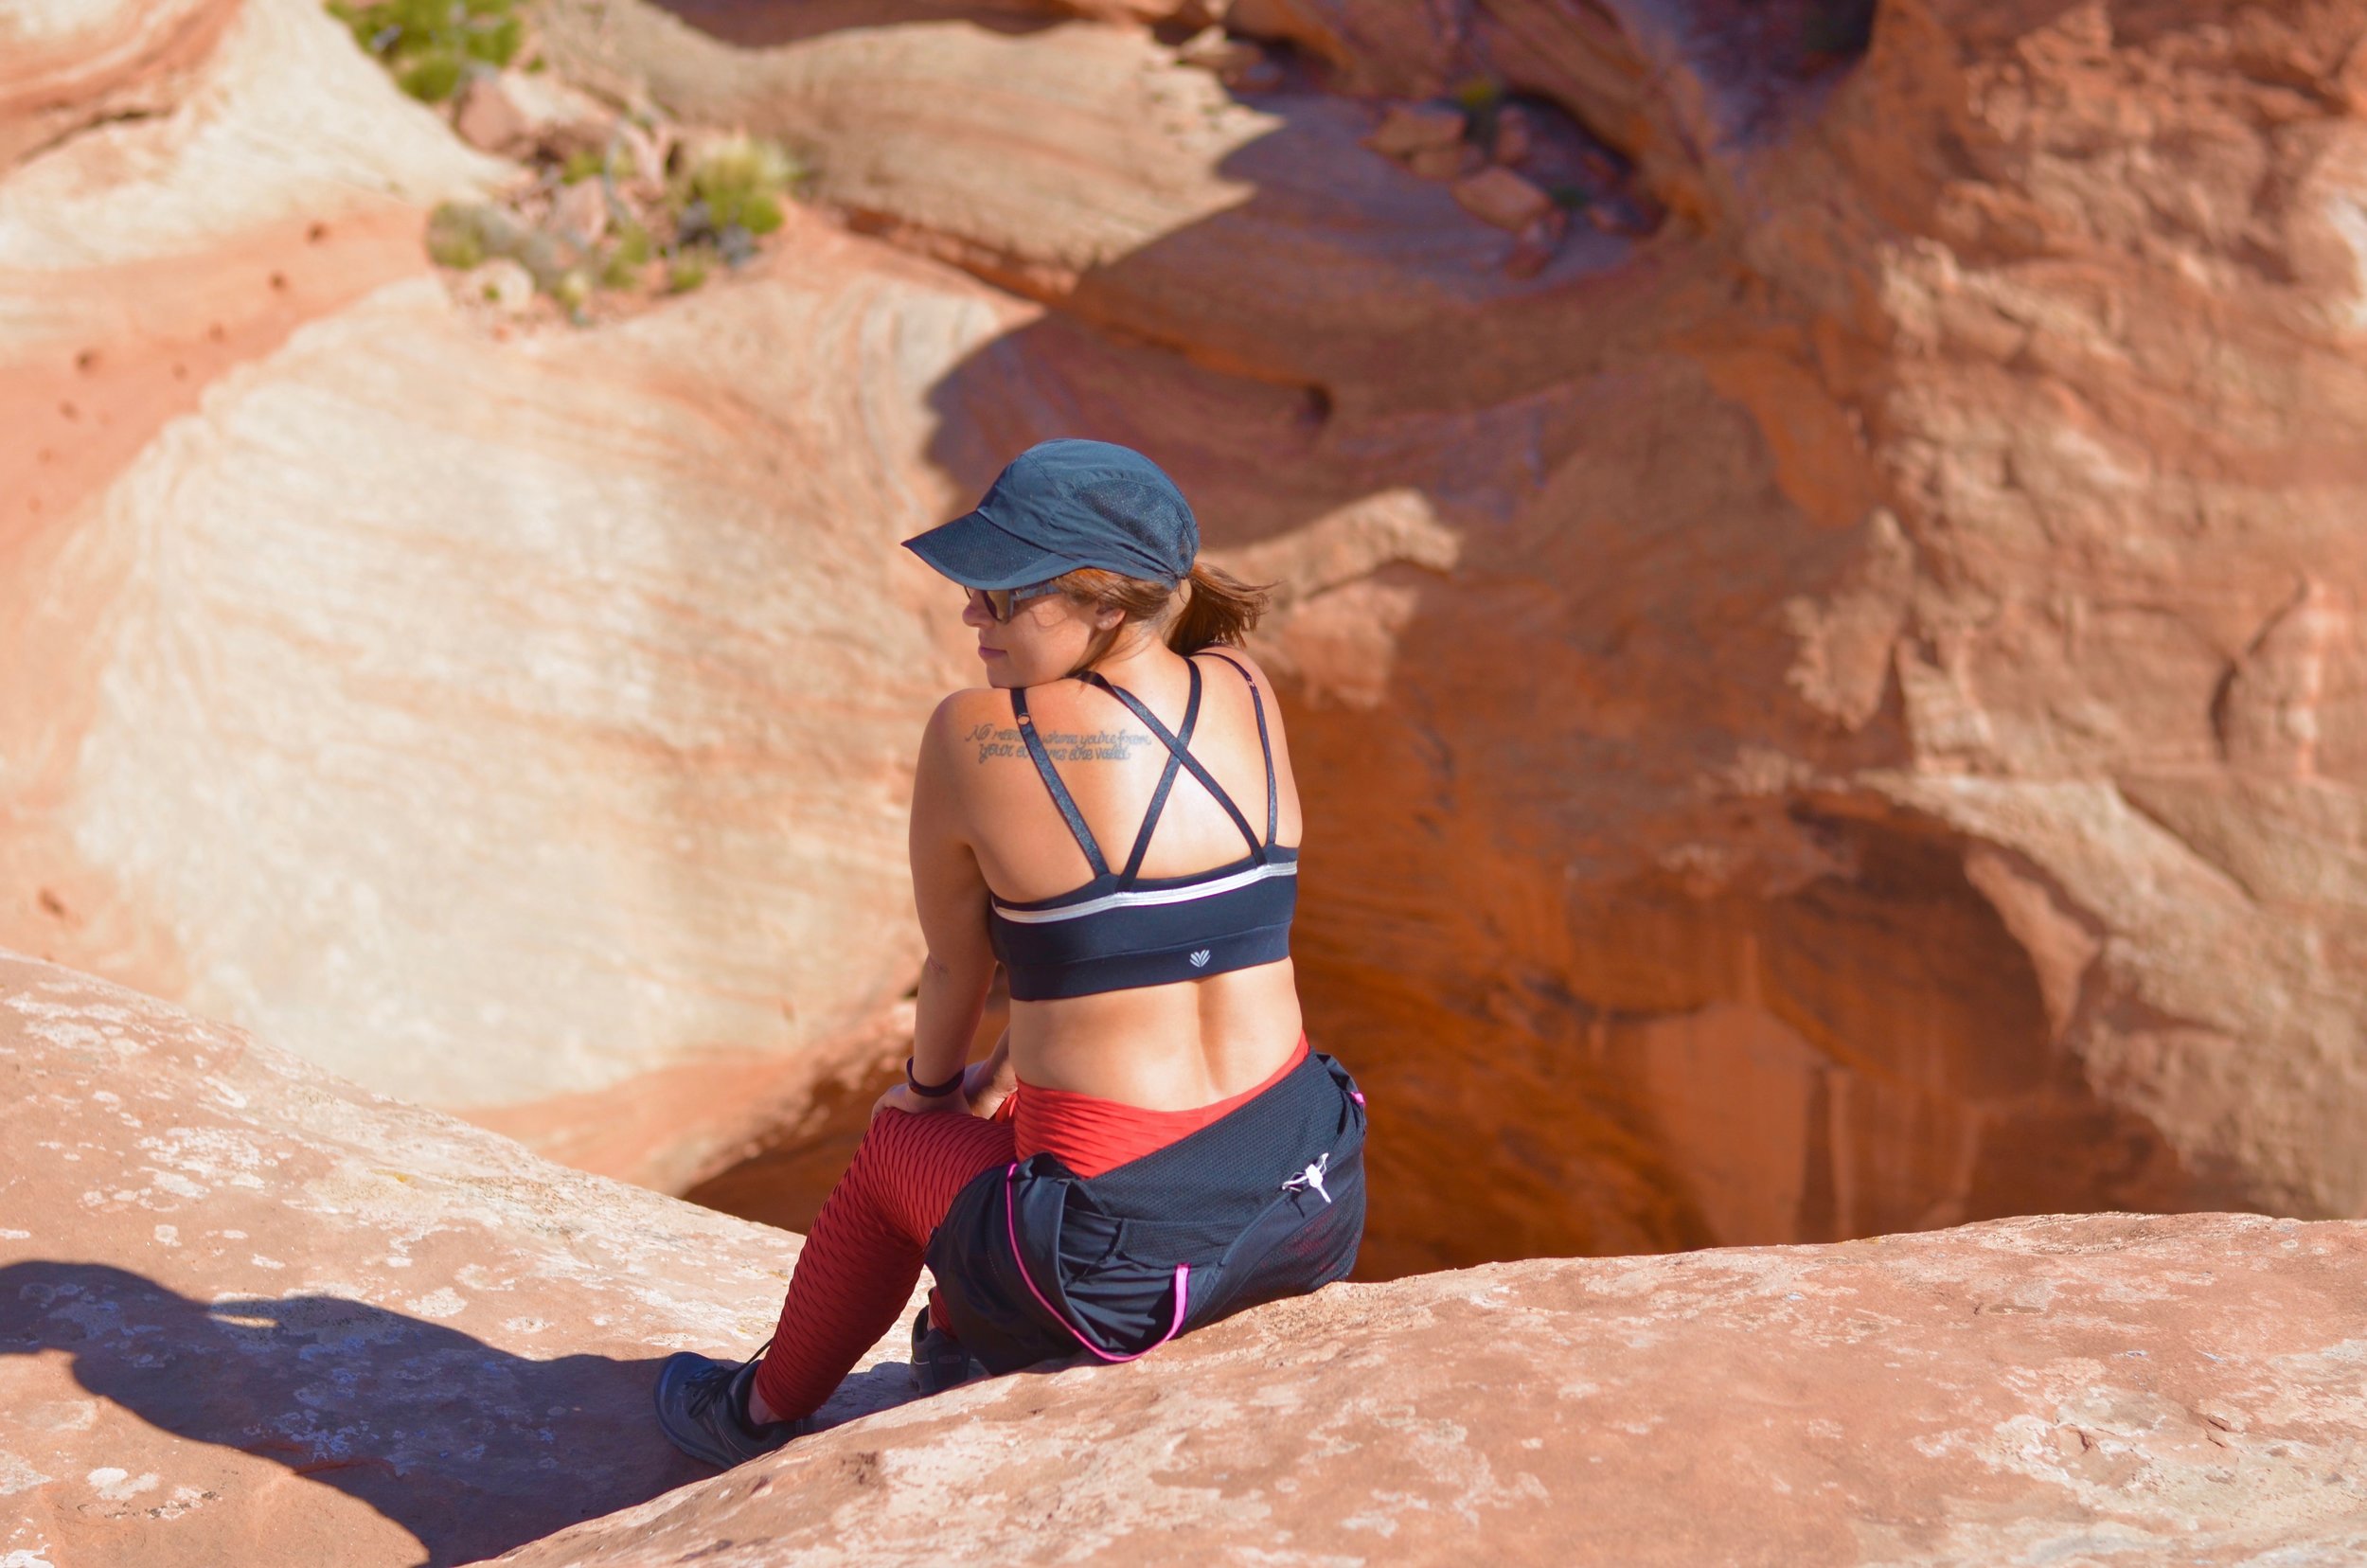
***Gallery above features the Bighorn Overlook Hike at Dead Horse State Park, Utah
MORE INFORMATION
- TOTAL TRAVEL TIME: 1.5 hours
- TOTAL MILES: 117 miles
- GAS PRICES: no gas today
- EATS: The Super 8 also had continental breakfast which was SO HELPFUL with just getting up early, grabbing some food and fruit to-go, and starting our adventures. For lunch as I mentioned before we took a picnic and stopped at the grocery store in Moab for goodies the night before. Also there is a Starbucks in the grocery store, BUT I never got my iced latte because the line was long every time we stopped. As for ice, we got it from the hotel and filled up the cooler bag. For dinner we were exhausted so I got sushi to-go from Bankok (I only eat veggie rolls but it was yummy!) and my friends opted for a pizza to-go from Pizza Hut. We were just tired, lazy, and wanted some quick grub.
- SLEEP: Super 8 whooo hooo!
- WISH WE HAD TIME: Yurts at Dead Horse State Park. Had I known about this option I would have LOVED to stay in these for one night. They need to be booked in advance and when I quickly looked them up it said they run from $99-$129 a night. Not bad! Canyonlands also has other districts including The Needles and The Maze, which would be cool to explore if I ever came back. Also seeing the sunset at Mesa Arch would be neat, but this time around we wanted clean pics without a huge crowd. With sunsets and sunrises you will get a huge crowd of photographers at many of these places, and you don't want to be in their shot when they are there taking professional photos!
- FINAL MUST-SEE LIST:
- Canyonlands National Park
- Short walk to Mesa Arch
- Drive to Viewpoint Green River Buck Canyon
- Picnic at Orange Cliffs Viewpoint
- Drive to Grand View Point Overlook and get out to walk perimeter
- Drive to Shaffer Canyon Overlook
- Dead Horse State Park
- Drive to Dead Horse Point Overlook
- Hike Bighorn Overlook
- Canyonlands National Park
DAY 7: ARCHES NATIONAL PARK

Delicate Arch, Arches National Park, Utah
ADVENTURES: We made a good decision in terms of less of a crowd at Arches on a Monday, despite it being a holiday, however, we woke up on this particular morning and it was cold, rainy, windy, and the temperature was in the 30s. Bummer! But nothing was stopping us. We were all SO EXCITED for Arches. We got into the park around 7:15am (the park was only 5 minutes from the Super 8!) and we headed straight to the most popular hike at the park, the Delicate Arch. Getting here early is a MUST because parking is super limited. I have read people wait up to 2 hours just for a parking spot to open to park then go hike. Delicate was moderate to difficult, about 3.5 miles round trip, very uphill, slippery rock, and the viewpoint was extremely steep. Please keep all these things in mind. Also expect crowds once you reach the arch. There are ways to manipulate angles for photos but chances are people will be in your pics! Either way it is a BEAUTIFUL site to see!
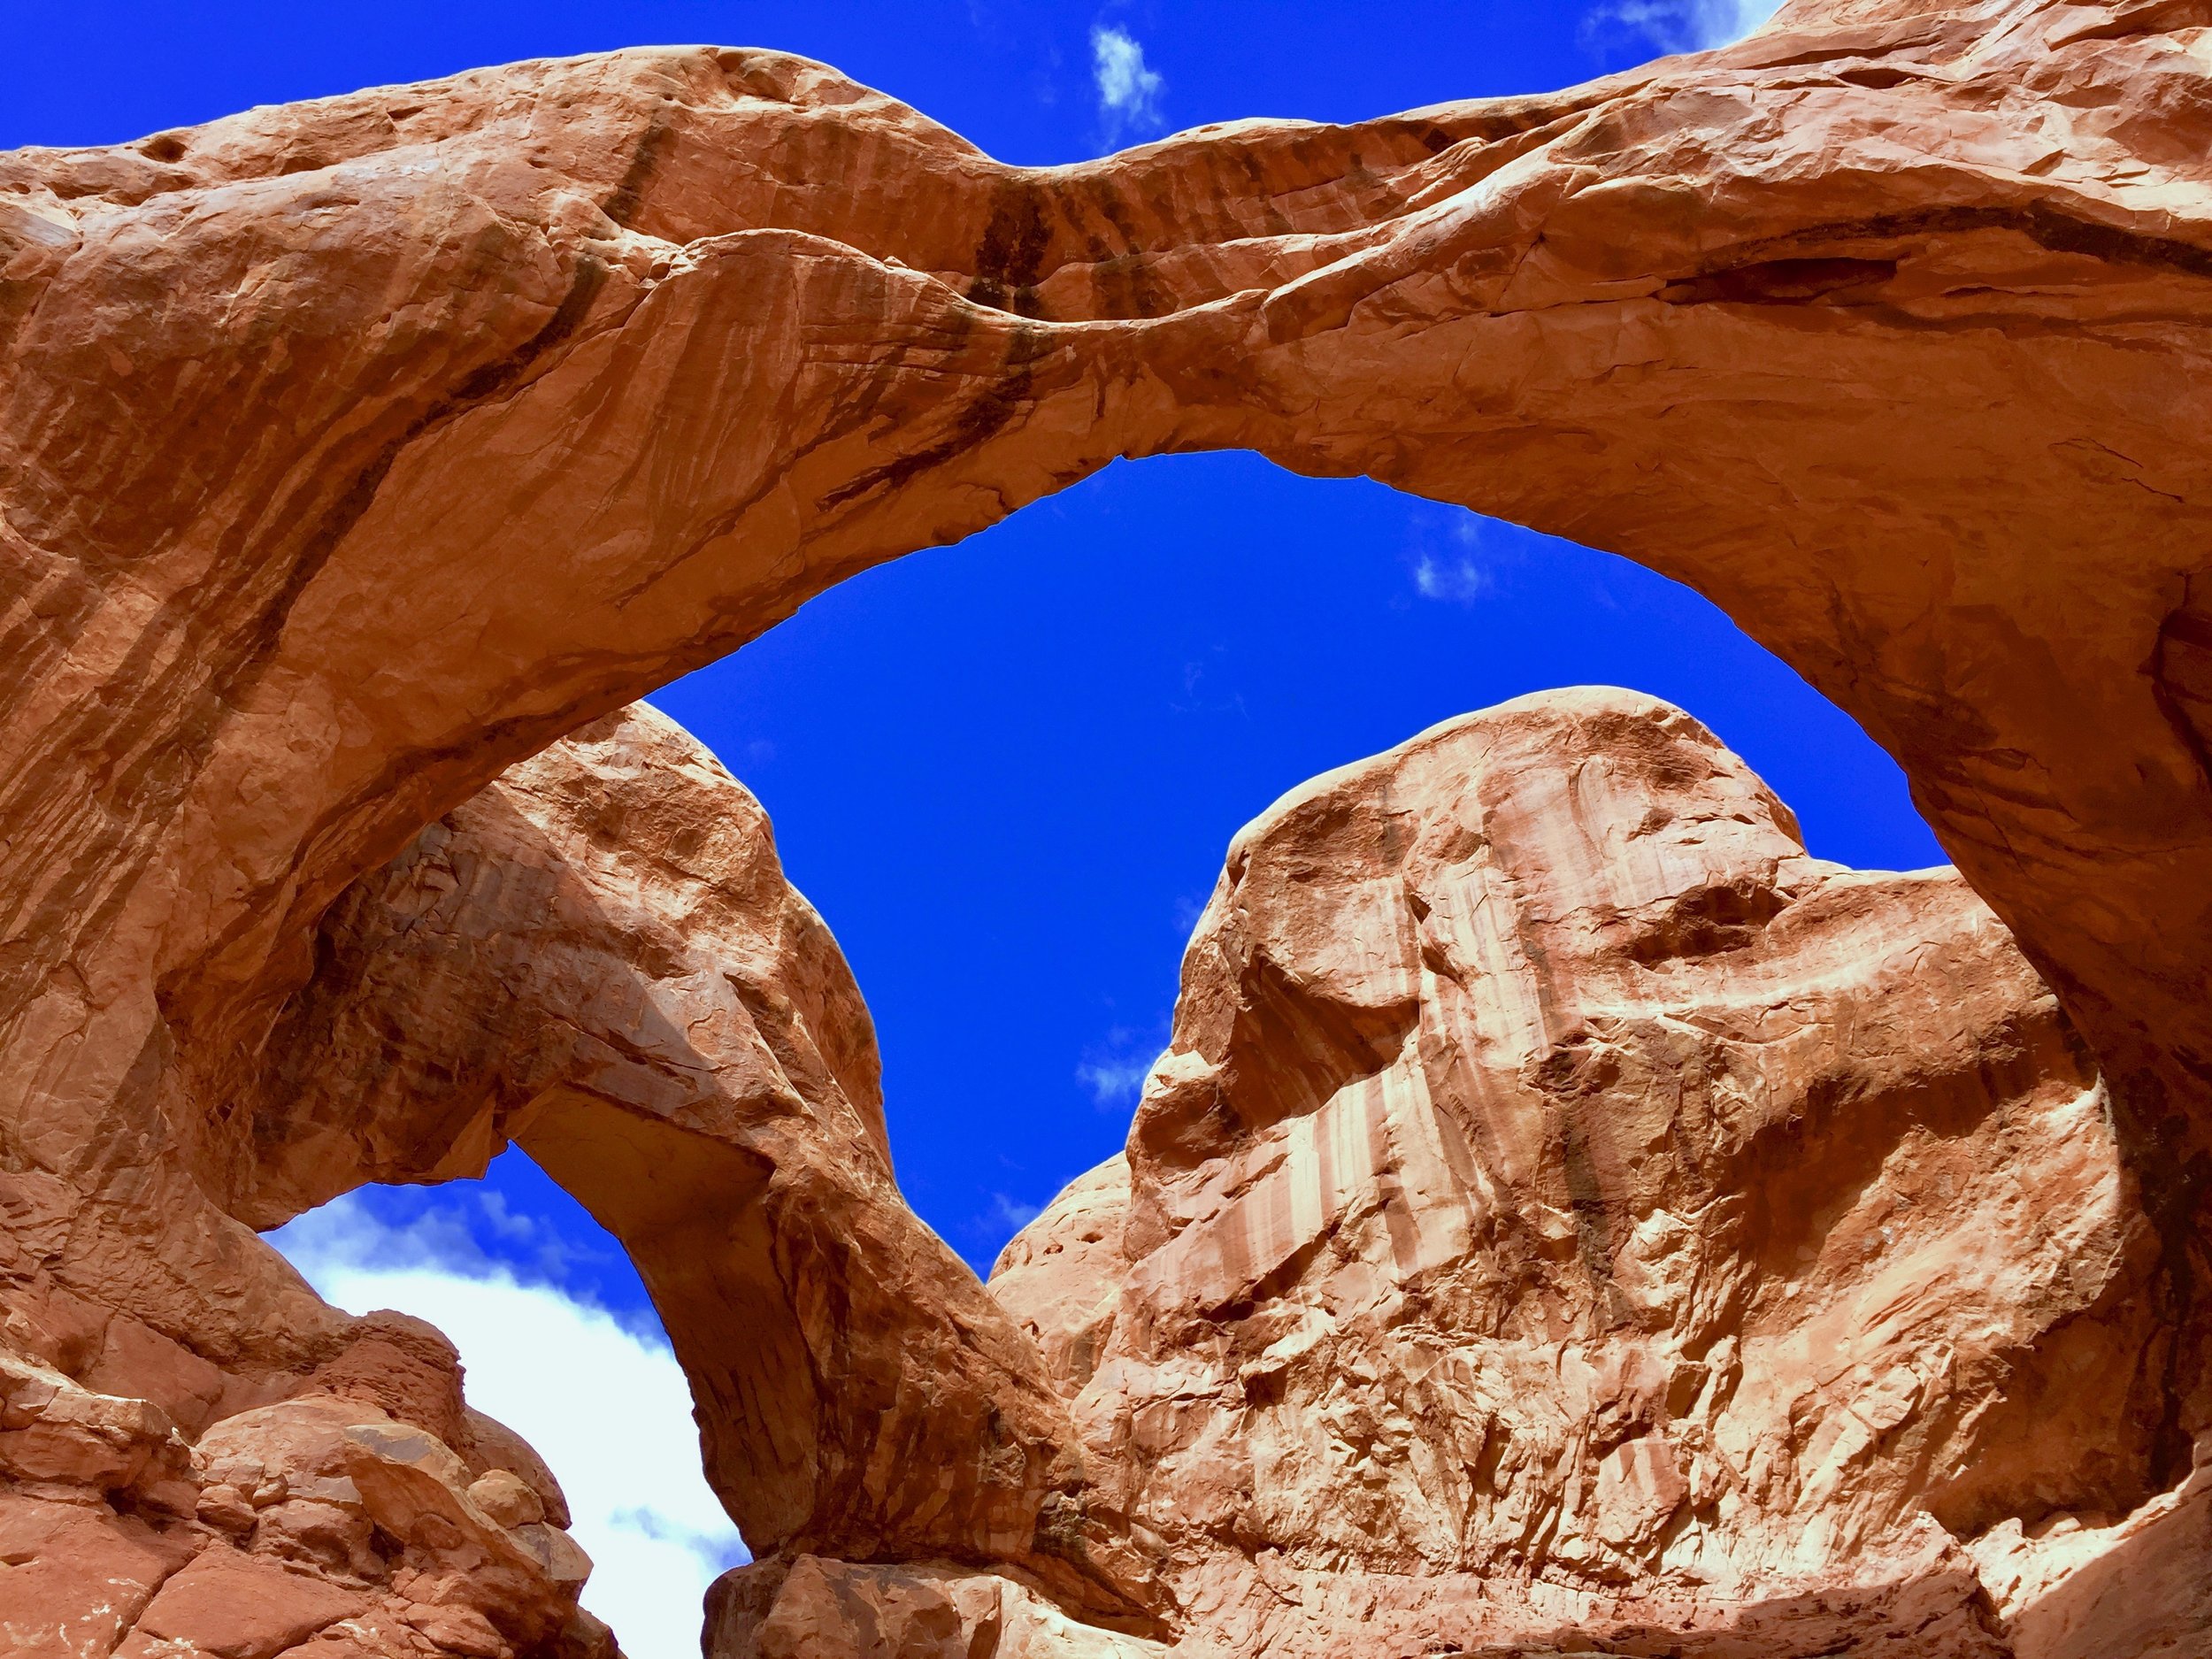

***In order as they appear: Landscape Arch, Skyline Arch, Double Arch, Balanced Rock
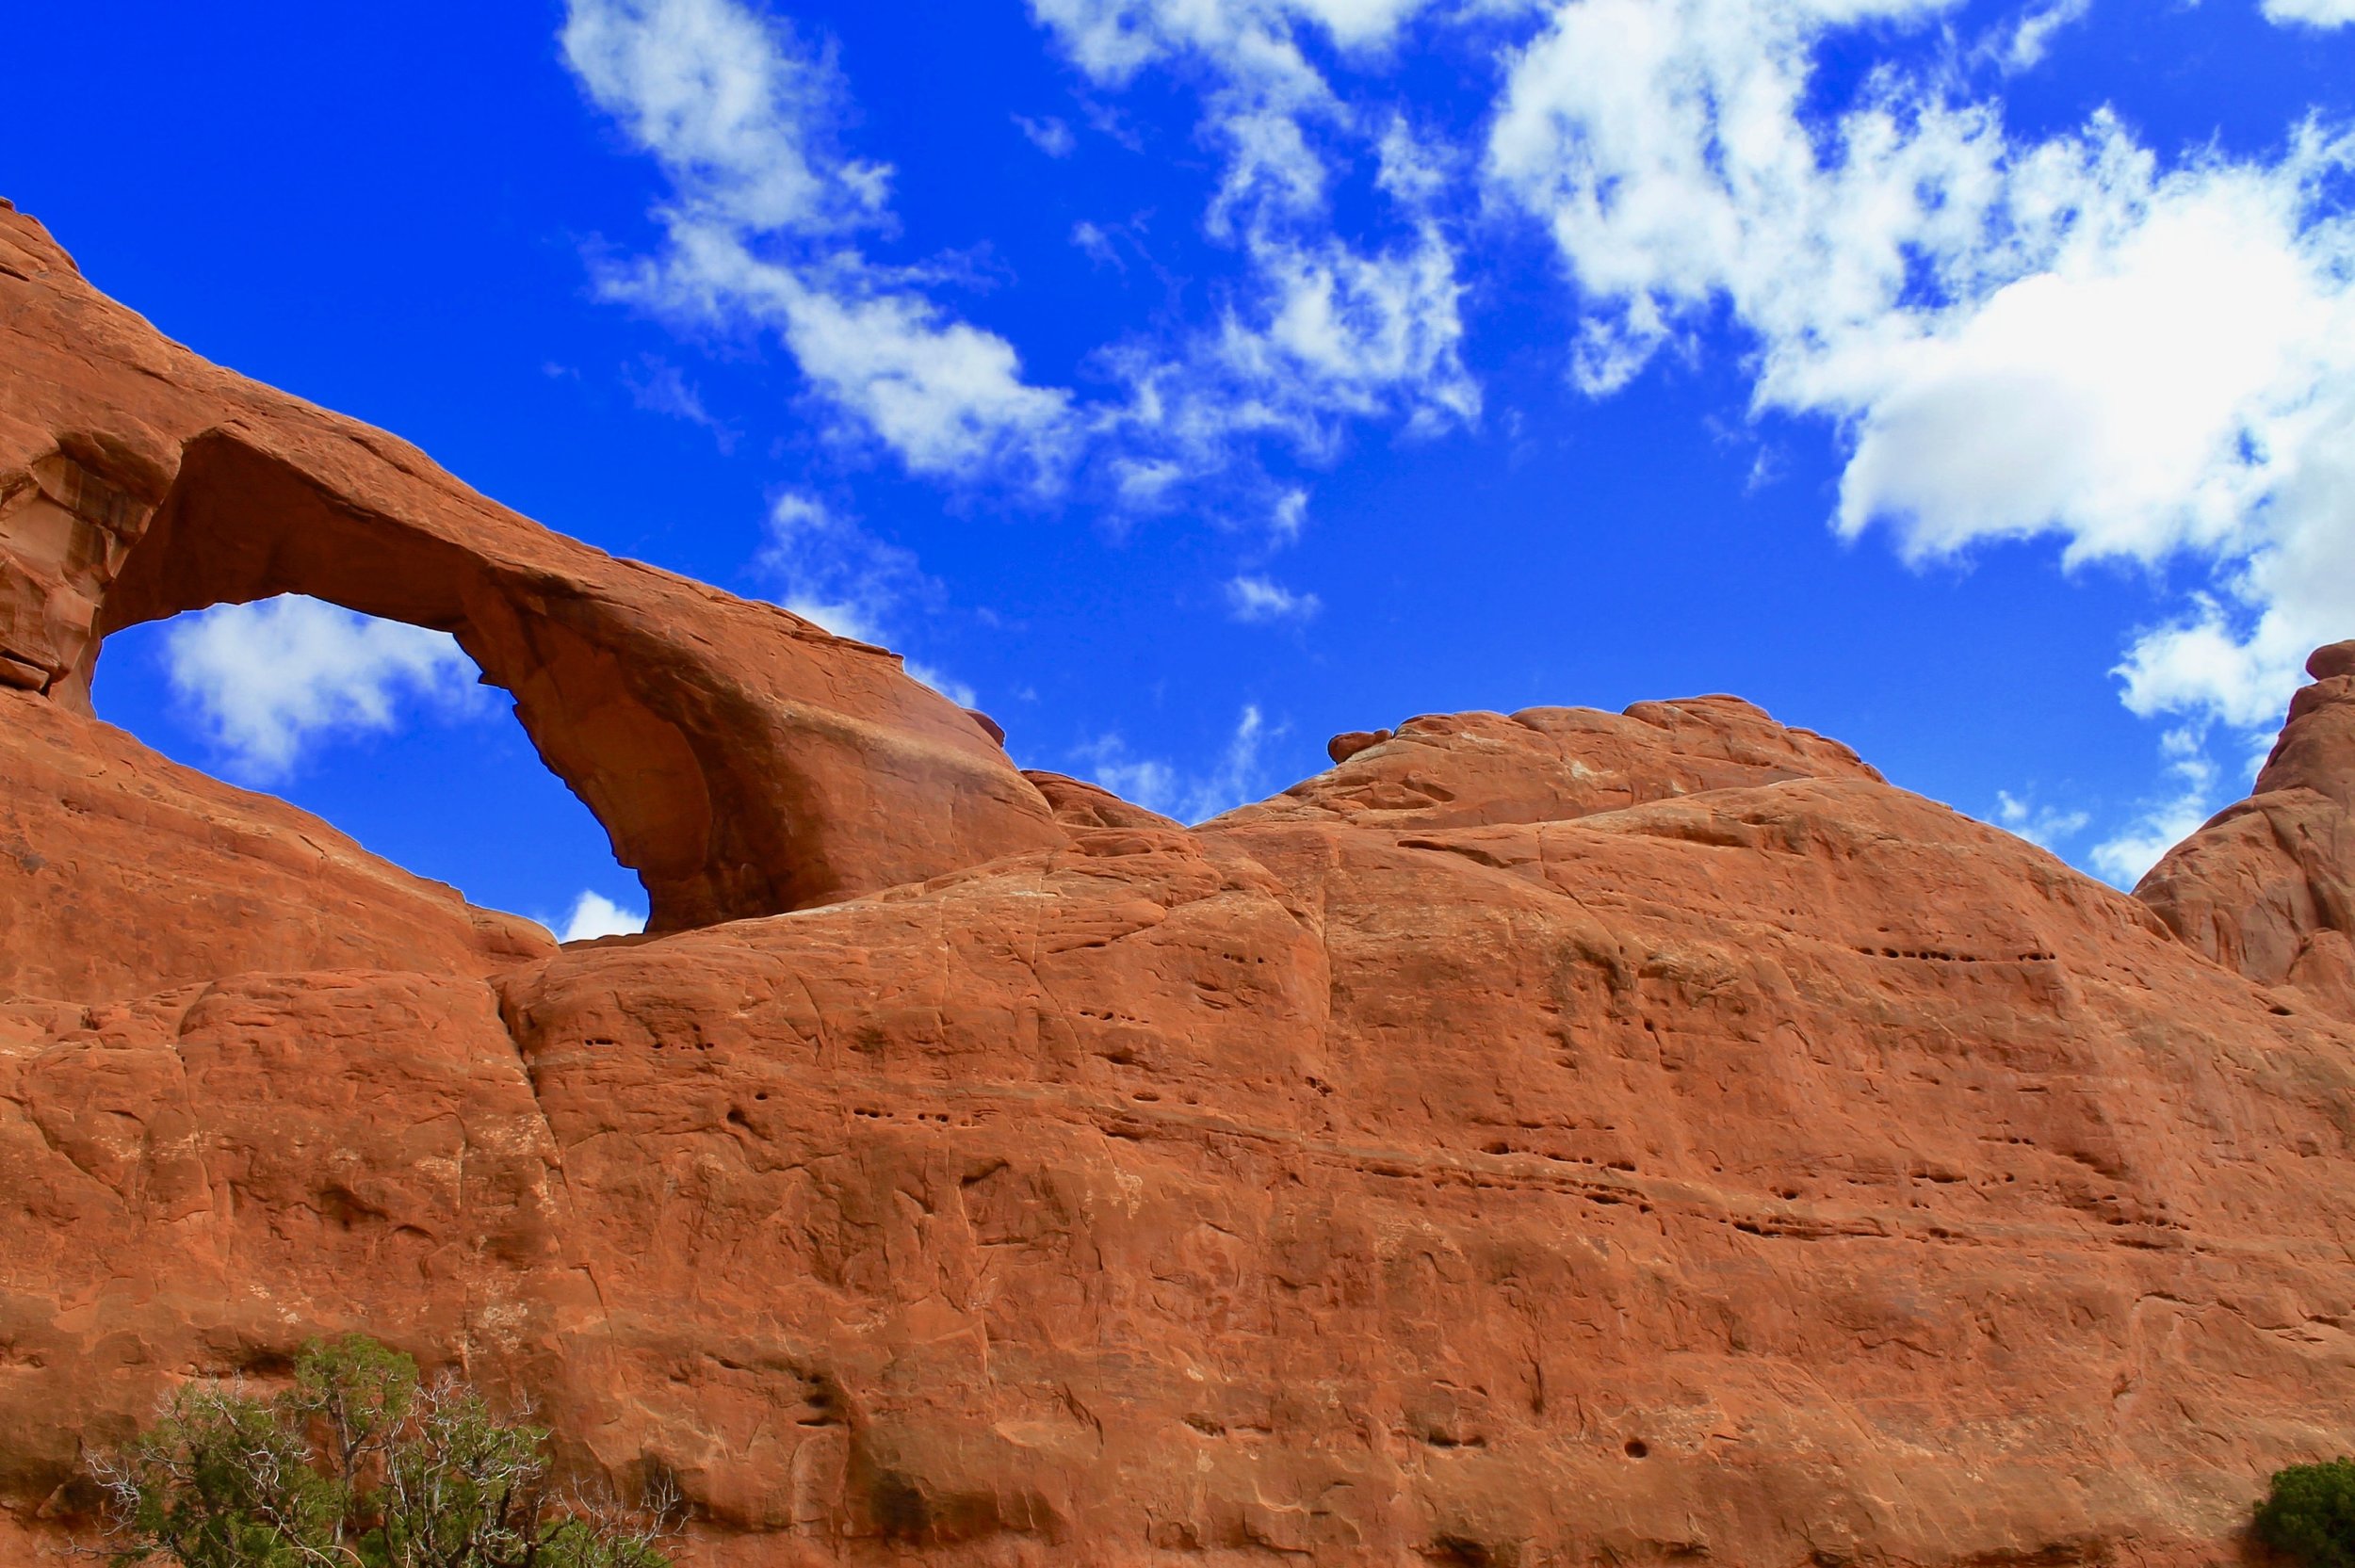
After Delicate Arch we drove to the Landscape Arch. This hike was about 1.5 miles roundtrip, easy, flat, and the viewpoint is from a far... as you can't get up close and personal with this arch like the Delicate Arch. From this particular hike you can continue on to Double O Arch, which is considered one of the harder hikes in the park. Being as cold as it was we did not do that. We jumped back in the car and drove to the Skyline Arch, where we walked a little less than half a mile to snap a picture. We did the same for the Sand Dune Arch but at this point it was so windy we were running back to the car freezing! The Balanced Rock we also just pulled over and took a photo of but did not go exploring. The last arch we made it a point to see was the Double Arch. This one was about half a mile round-trip and just a flat walk to get to depending on if you want to continue climbing up into the arches. Before leaving the park we pulled over at the Panorama Point where the views were absolutely stunning. In one direction all the arches meet the eye and in the other direction snow-capped mountains were off in the distance. So pretty! We left Arches around 2:30pm because we were so beat and cold to be honest but we were able to still see so much in that timeframe!

Panorama Point, Arches National Park, Utah

Panorama Point, Arches National Park, Utah
TIPS: Get to the park when it opens. This is crucial for Arches. AND we were there so early there wasn't anyone at the gate to collect admission and cars were getting let in free of charge! Kinda sweet but didn't matter for us since we had our National Parks Pass. Also be sure to check the hours. Normally Arches does not close, but when we were there it closed at 7pm due to construction during the off season. It is important to do a little research before arriving because the park is known to have 2,000 existing arches! So choose wisely! Also be prepared with layers, ear warmers, gloves, hot hands, lots of water, snacks, a picnic (we ended up eating in the car we were so cold but Arches did not have food available anywhere), proper shoes, AND a drawstring bag or Camelback. In some cases, especially hiking the Delicate Arch both your hands will be needed for some light climbing and gripping. Water-proof jackets and clothing in general are also never a bad idea. Make sure to have enough water for the entire day. The only water filling station was at the very beginning of the park at the Vistior's Center and really is out of the way if you end up needing it. Also grab maps at the Visitor Center. This park wasn't too hard to navigate but I just want to note that I had practically no service on my phone at this park.
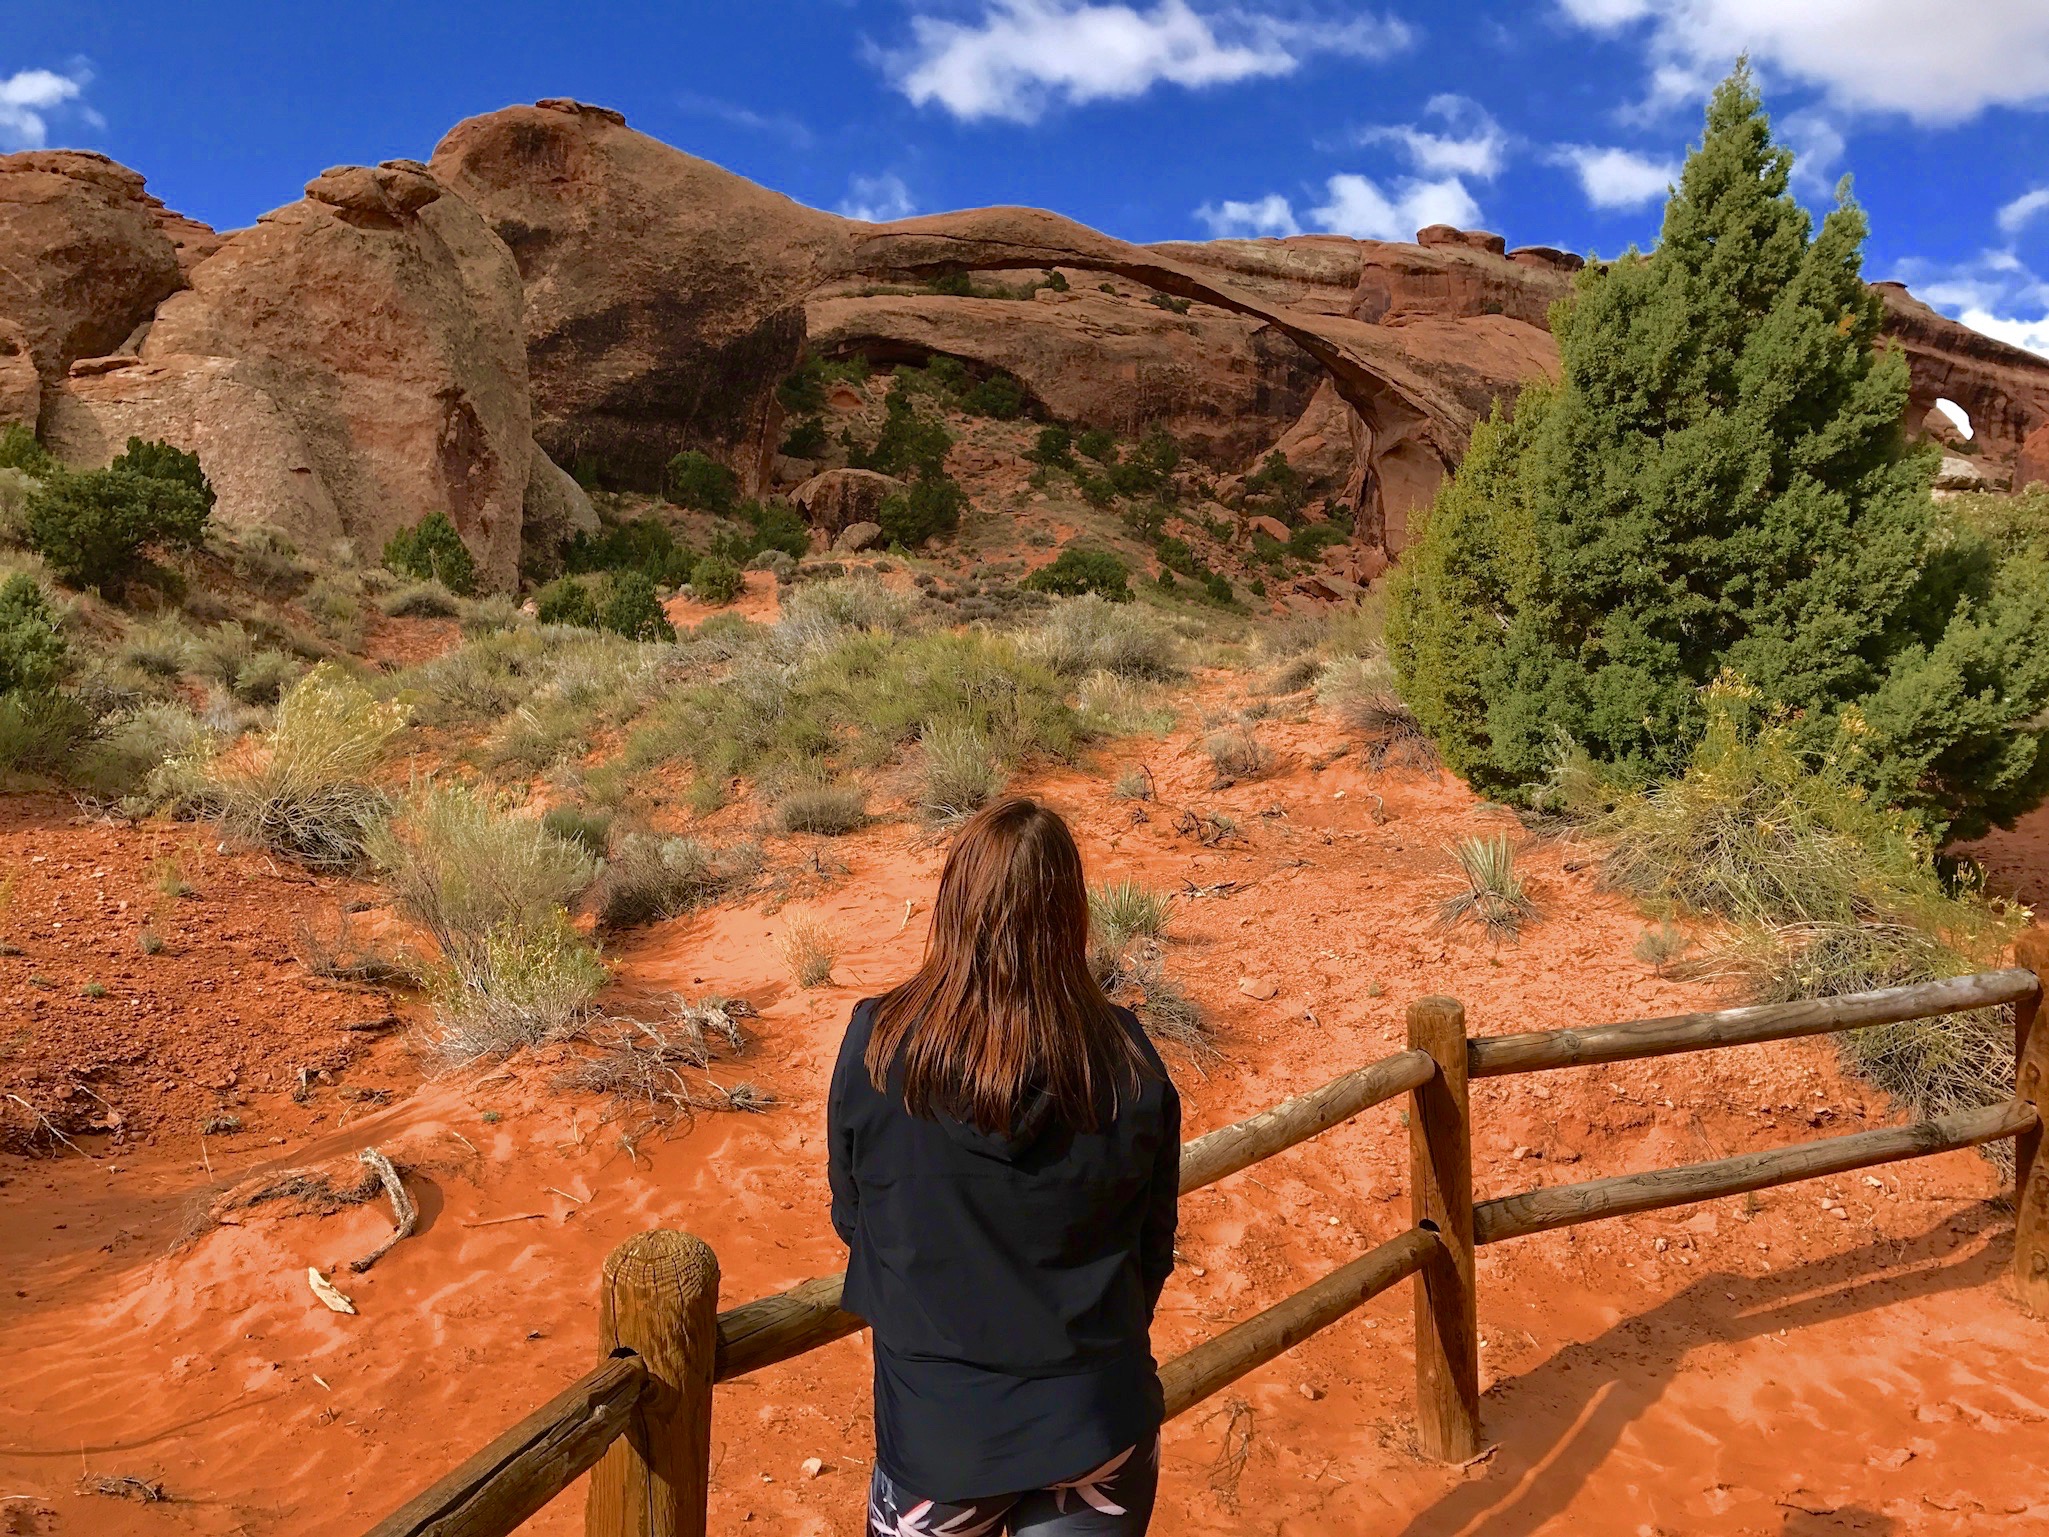
Landscape Arch, Arches National Park, Utah
MORE INFORMATION
- TOTAL TRAVEL TIME: just the time spent in the park driving
- TOTAL MILES: 64 miles
- GAS PRICES: $2.79/gallon
- EATS: We filled up on fruit, oatmeal, yogurt, and hot tea at the Super 8. Also a woman there had her own bagels to toast, so if you want bagels and you are staying there come prepared because they do not serve them! For lunch we did the picnic drill again and had the cooler bag filled in the back of the car. After our half day at Arches we opted for ice-cream at The Spoke in the town. (isn't that bizarre how you crave cold stuff after being cold all day? Or is that just me?) Also the "in town" area in Moab is super cute! Reminds me of a little skiing village similar to Jackson Hole, Wyoming. Dinner was obviously Pasta Jays again. It just had to be, it really was so DELICIOUS!
- SLEEP: Super 8 one last night!
- WISH WE HAD TIME: Next time I want to tackle the Double O Arch which is supposedly a 4.2 mile hike round-trip. I also would like to check out the Windows Trail and Turret Arch (both super close to each other) and only a mile hike. Delicate Arch would be so incredible to see at sunrise or sunset but this was not possible when we were there as the park hours were 7am until 7pm due to construction. Normally the park does not close! So we missed out on that opportunity.
- FINAL MUST-SEE LIST:
- Delicate Arch
- Landscape Arch
- Skyline Arch
- Balanced Rock
- Double Arch
- Sand Dune Arch
- Panorama Point

Pasta Jay's Restaurant, Moab, Utah

Pasta Jay's Restaurant, Moab, Utah
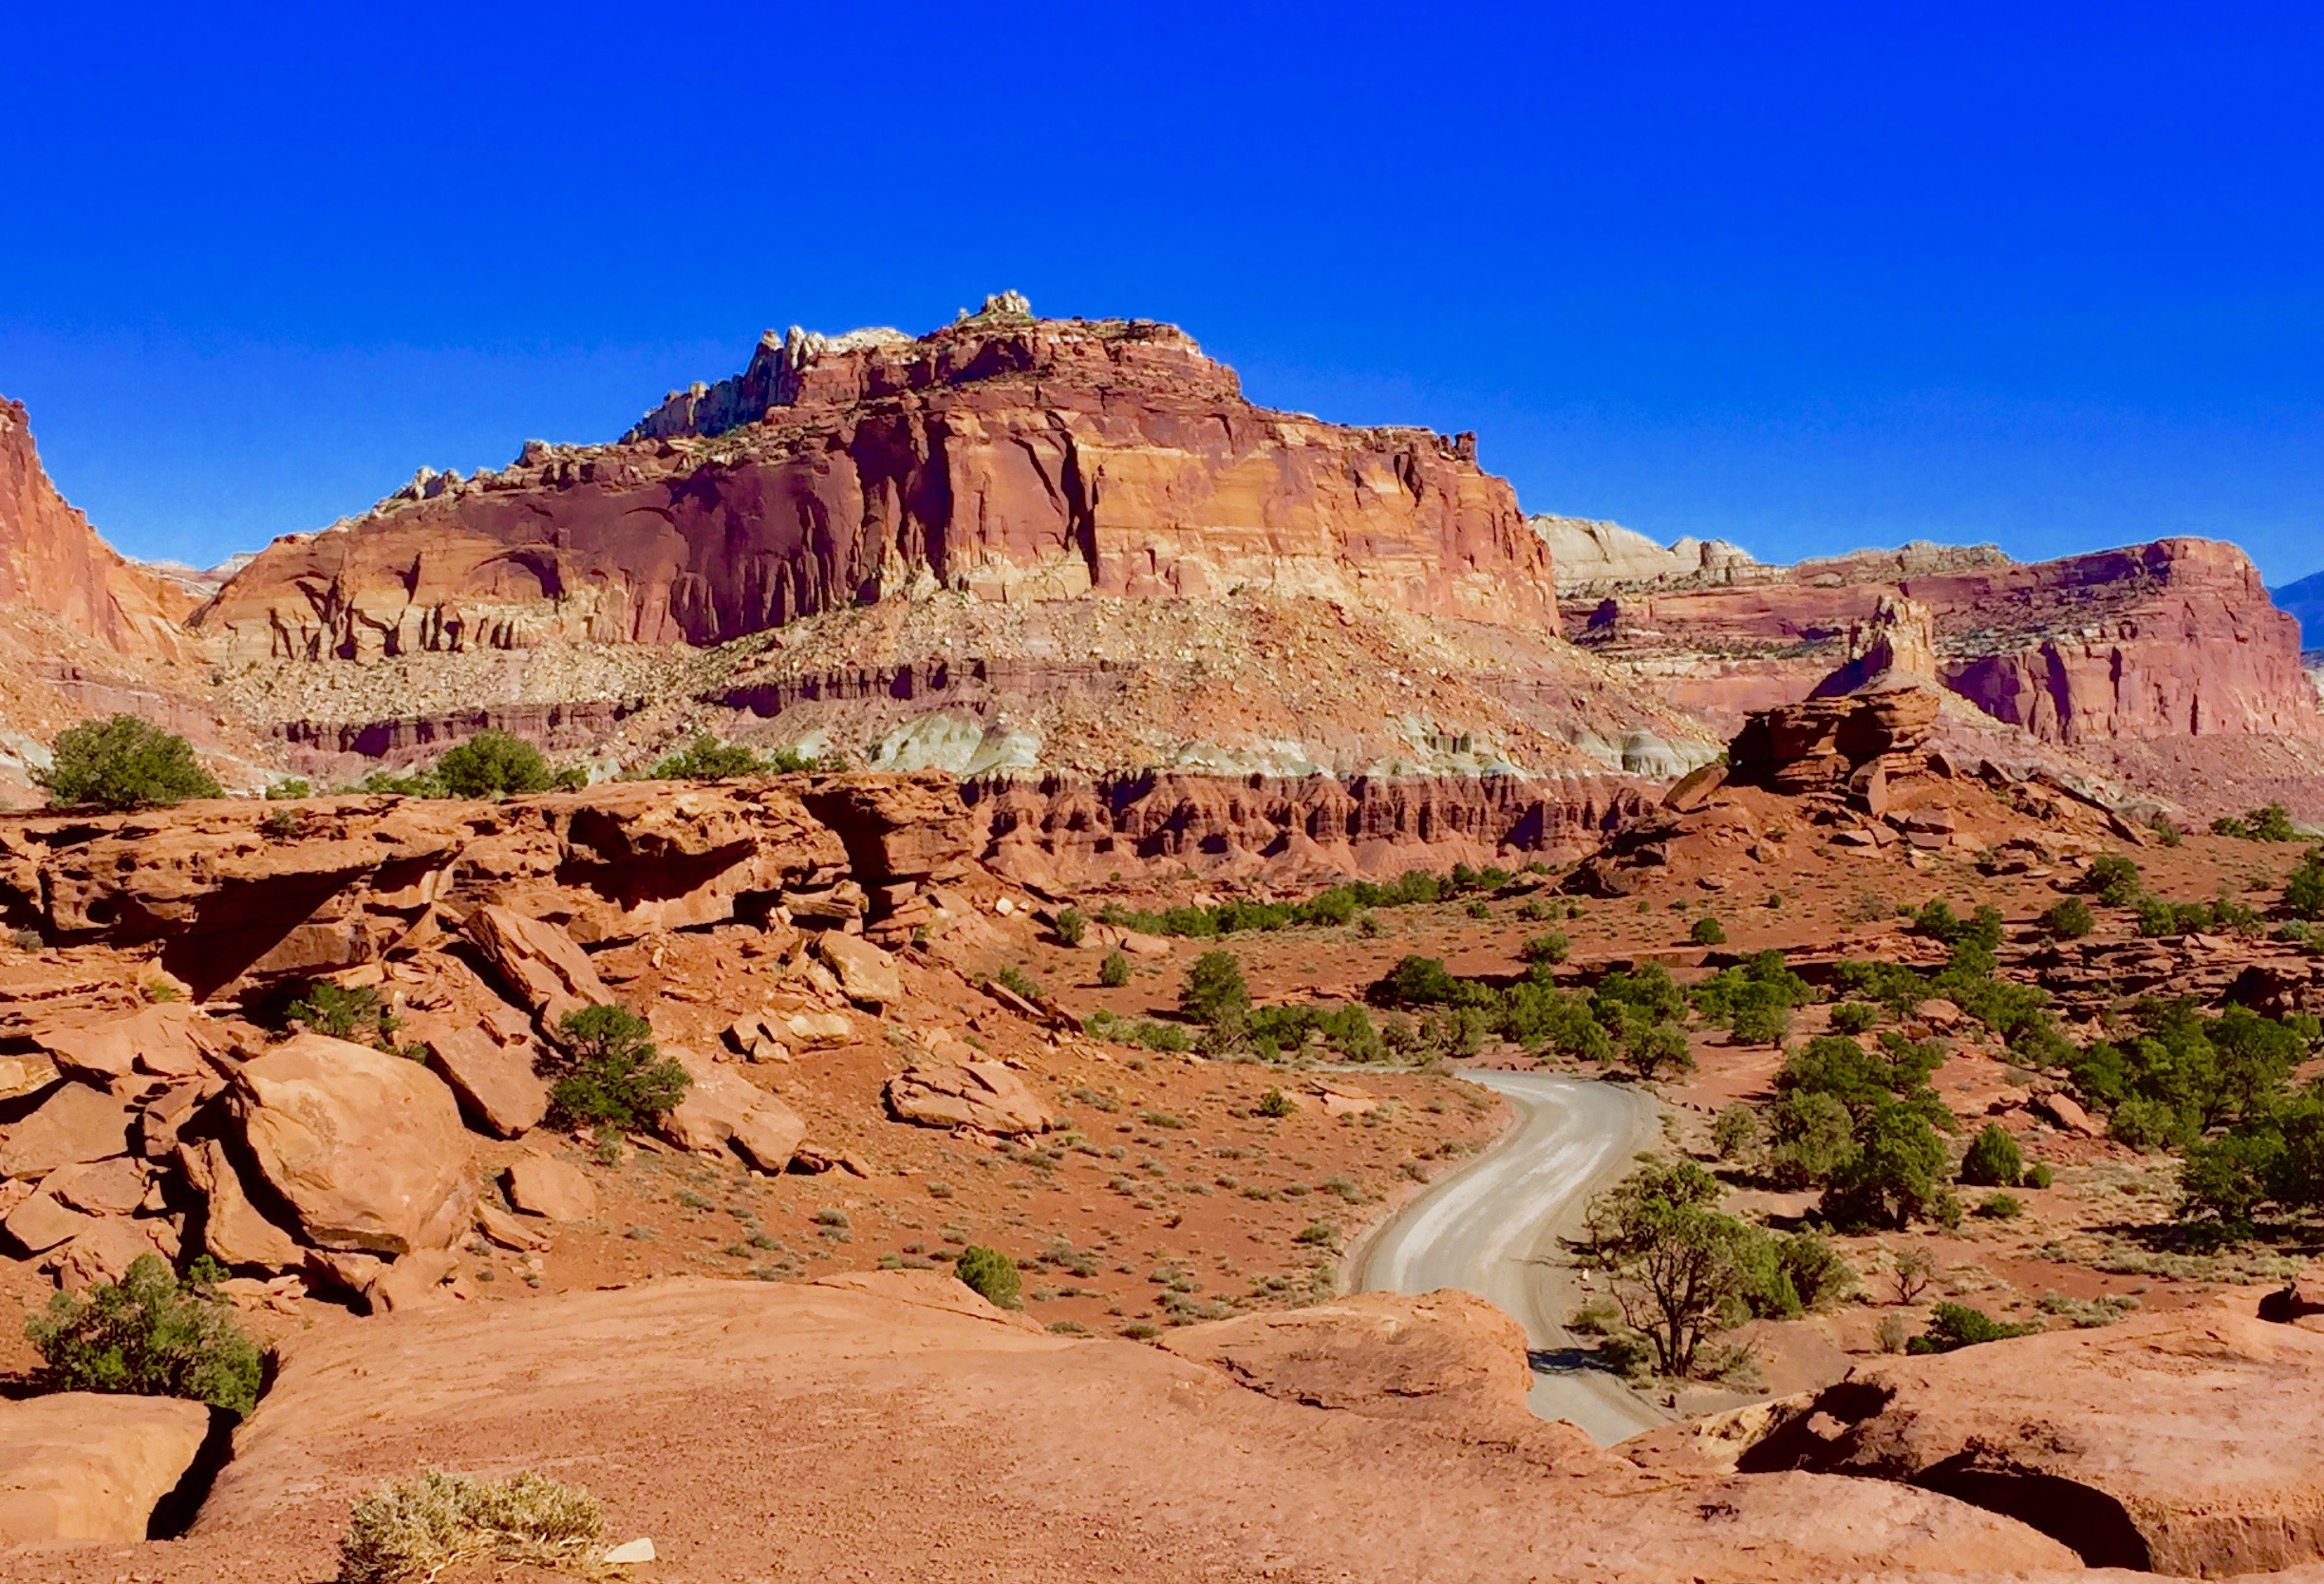
DAY 8: CAPITOL REEF NATIONAL PARK

Hickman Bridge, Capitol Reef National Park, Utah
ADVENTURES: I am not going to lie we took our time getting up and heading to Capitol Reef even though we knew we had a 2 and a half hour drive to get there. We figured we wouldn't being spending too much time there and to be honest we were really just looking forward to stopping at the Gifford House upon arriving for one of their famous giant cinnamon buns! Once we got there we parked and decided to hike to the Hickman Bridge, a 2 mile round-trip moderate loop trail. This was a beautiful short hike. A little underwhelming after spending the previous day at Arches but still very beautiful.

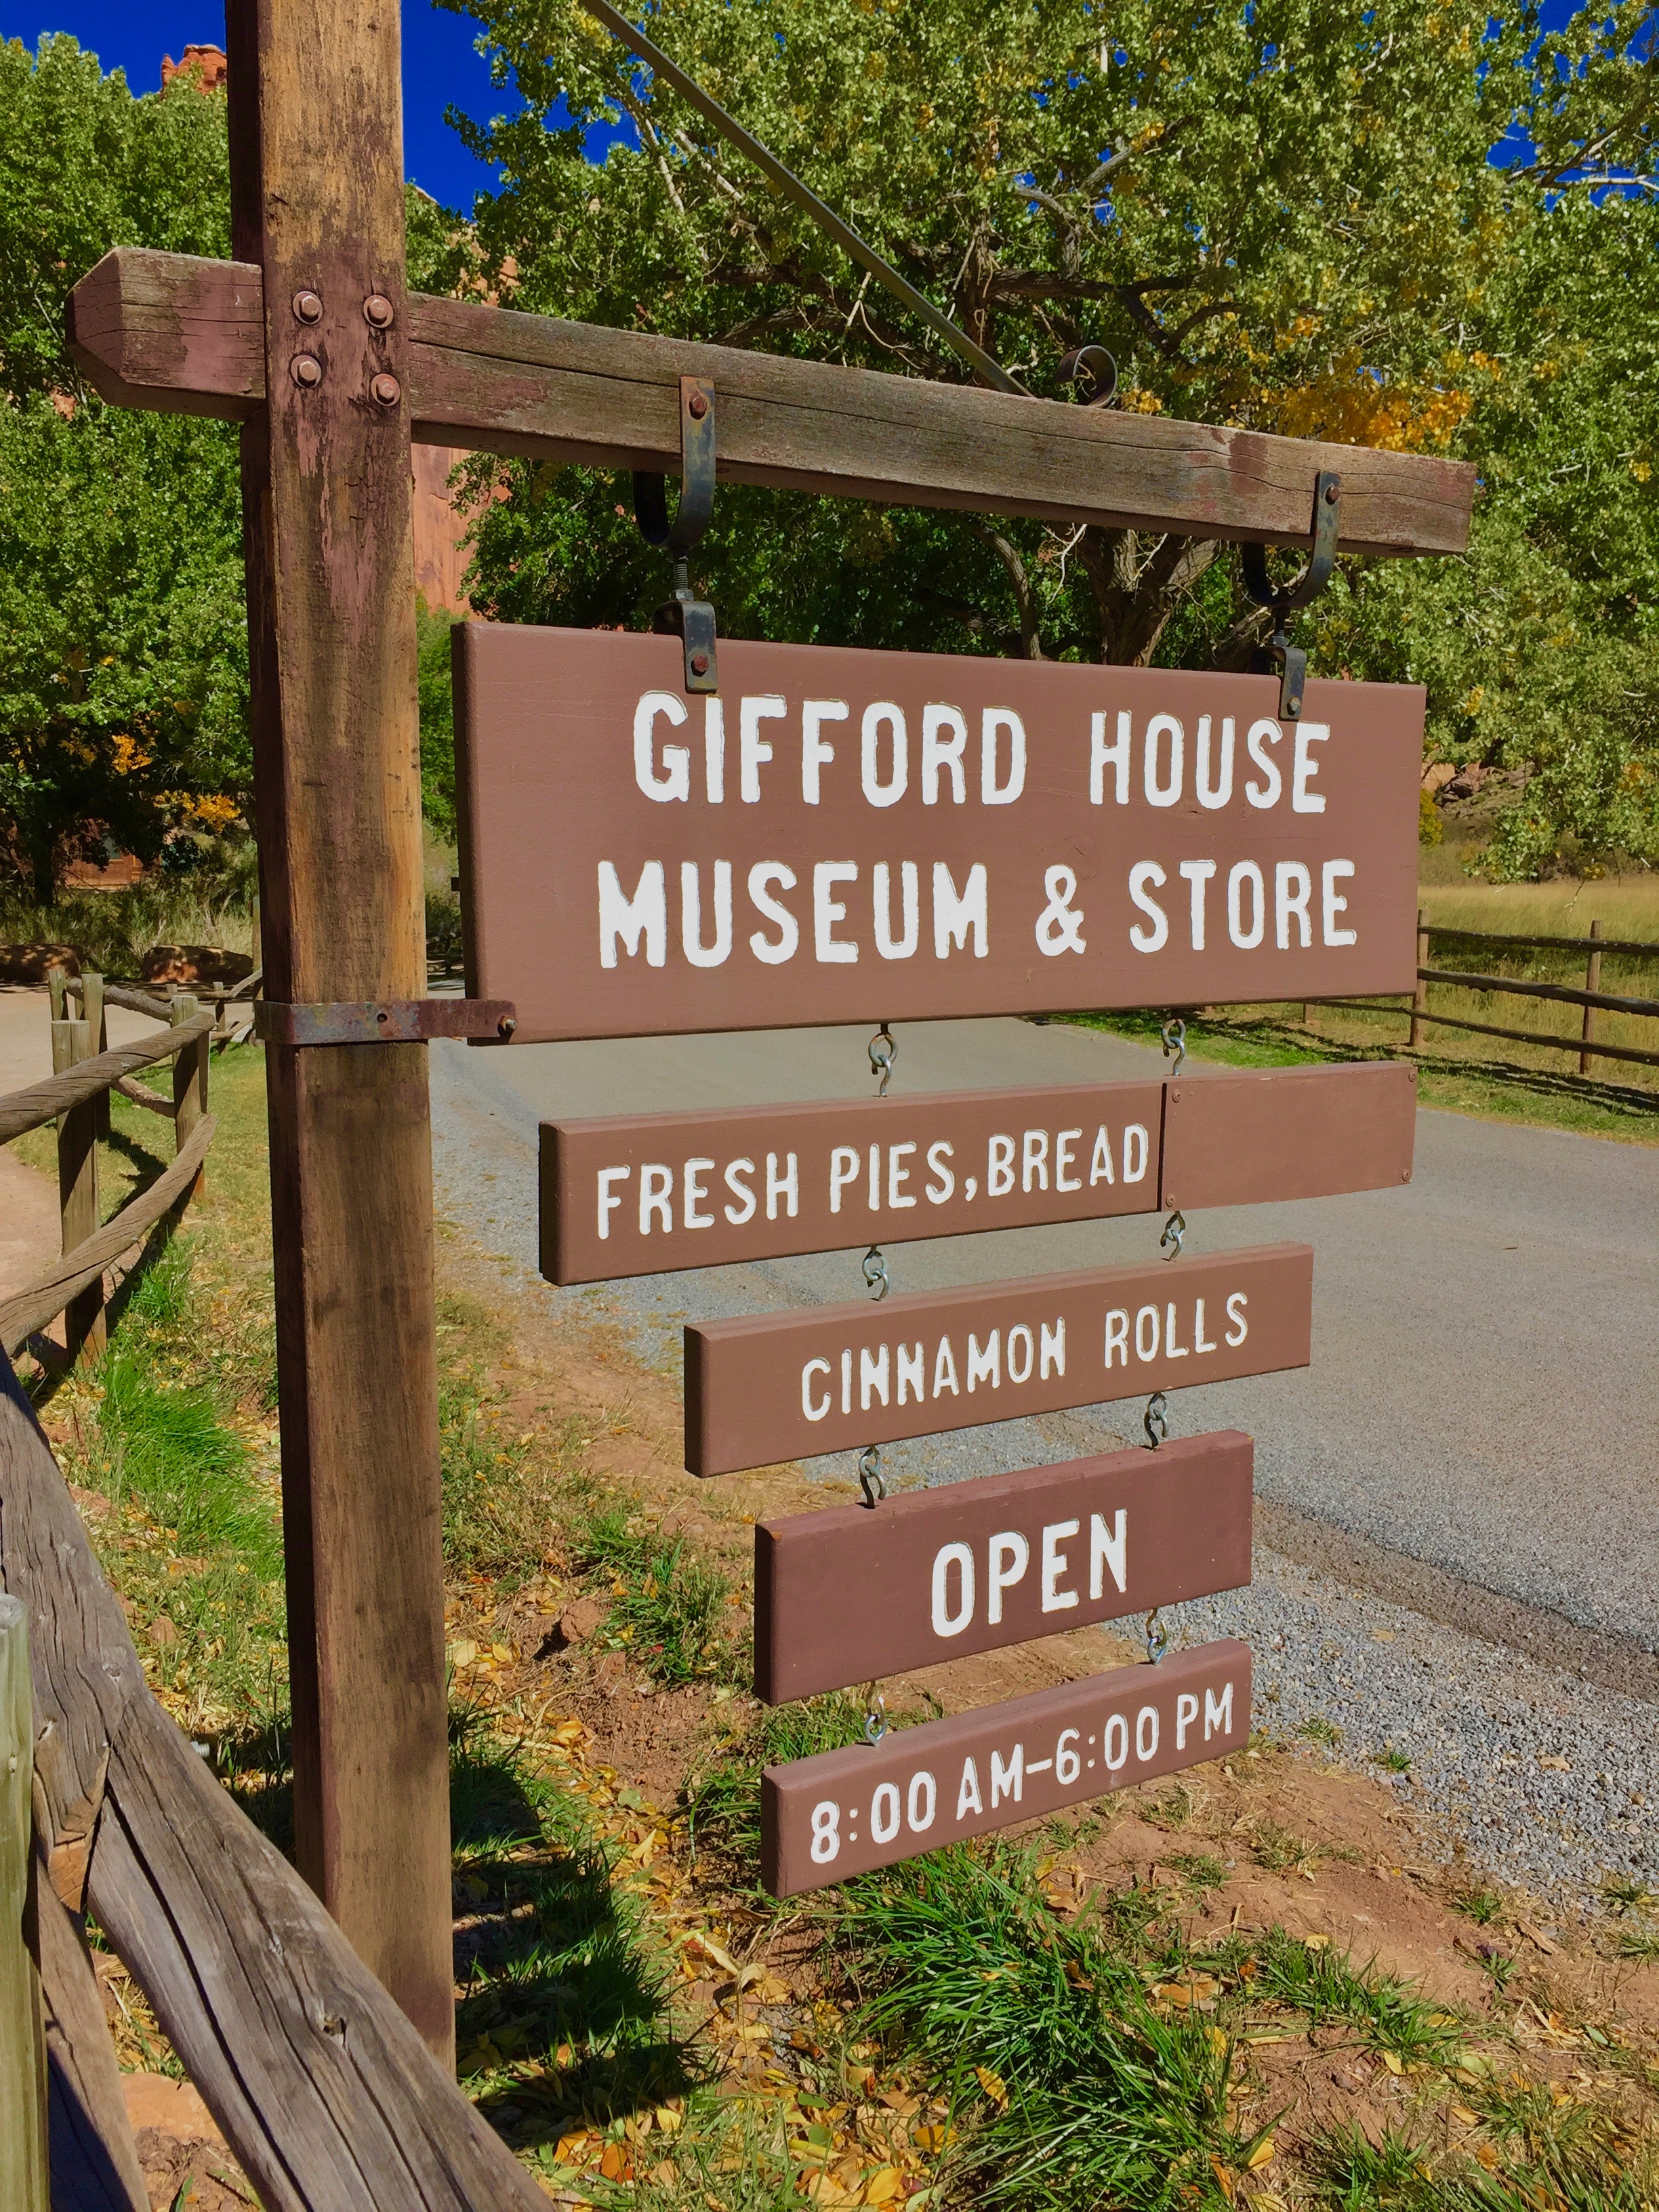
The Gifford House, Capitol Reef National Park, Utah
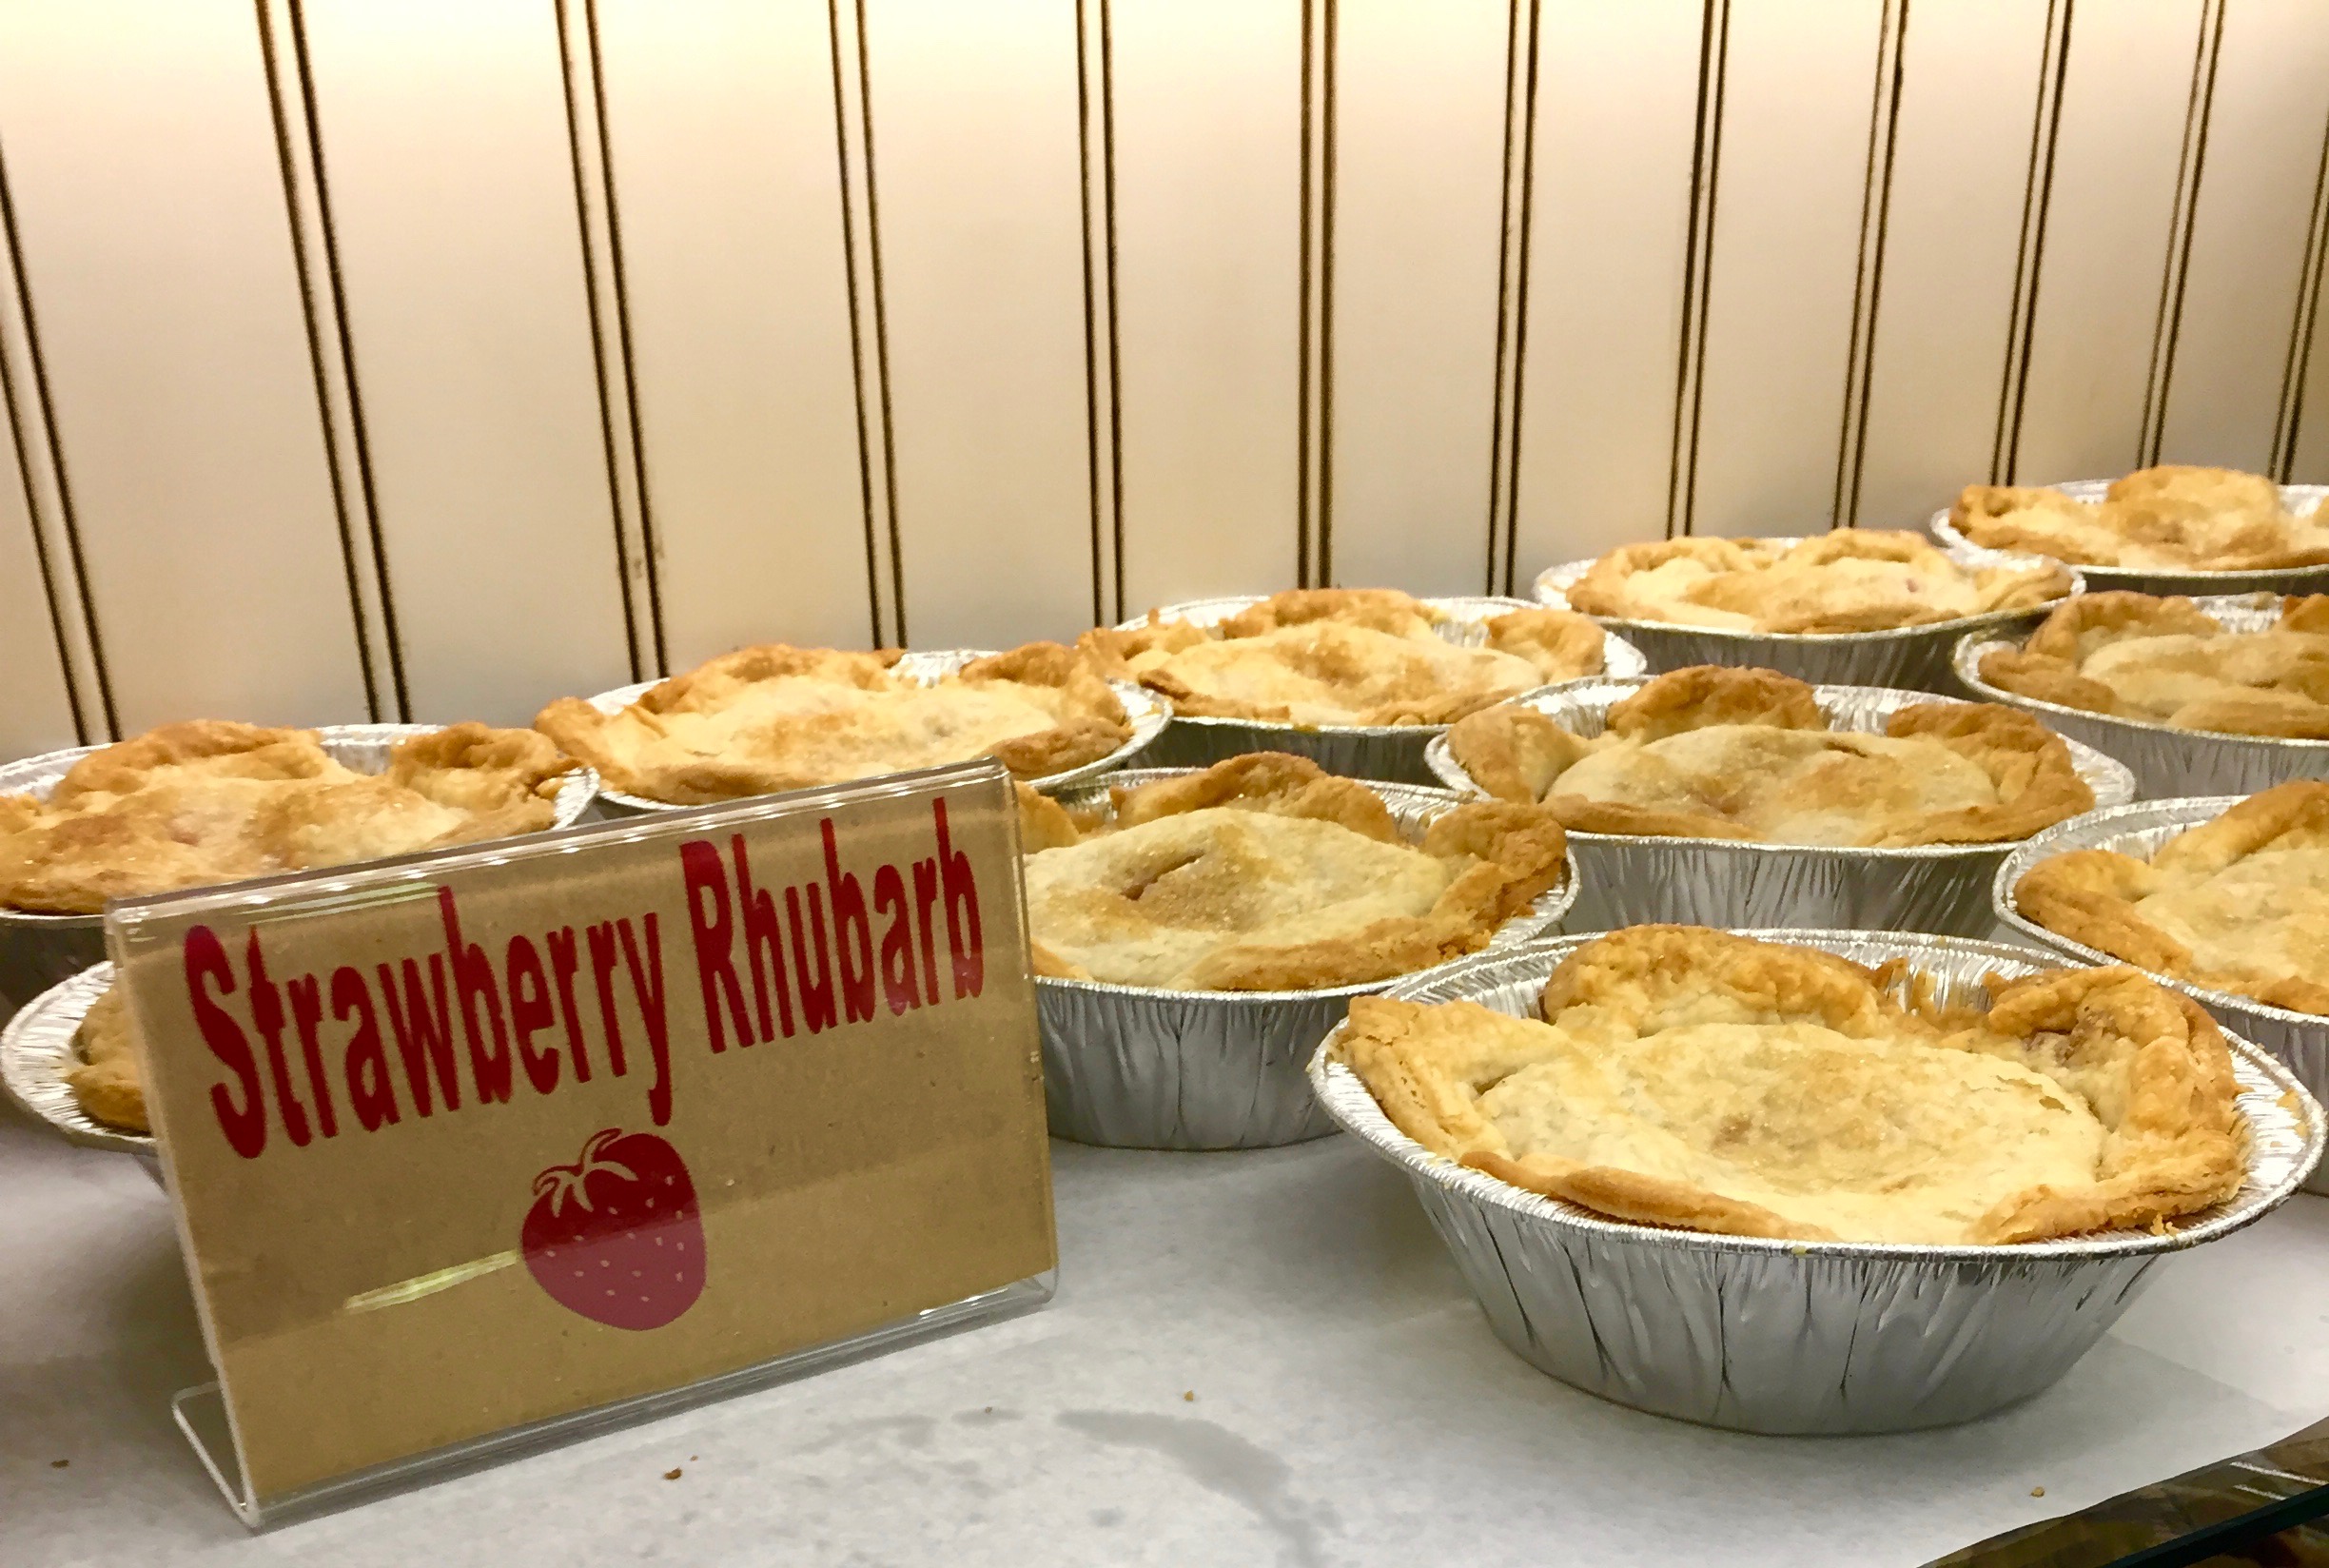
Next we excitedly drove to the Gifford House which is inside Capitol Reef. READ THE NEXT SENTENCE VERY CAREFULLY... YOU MUST ARRIVE EARLY IN THE MORNING TO GET YOUR HANDS ON A FAMOUS CINNAMON ROLL!!! And remember when I said we were taking our dear sweet time? UGH! Well, apparently surrounding the Gifford House is a campsite. And everyone staying at the campsite gets up early and snatches one of a very limited amount of cinnamon rolls that get shipped to the house every morning. And you guessed it...there were NONE LEFT! We opted for a couple slices of homemade pie and ice-cream instead. I enjoyed the Strawberry Rhubarb Pie as well as a Pumpkin Pie for the road. Strawberry was my fav!

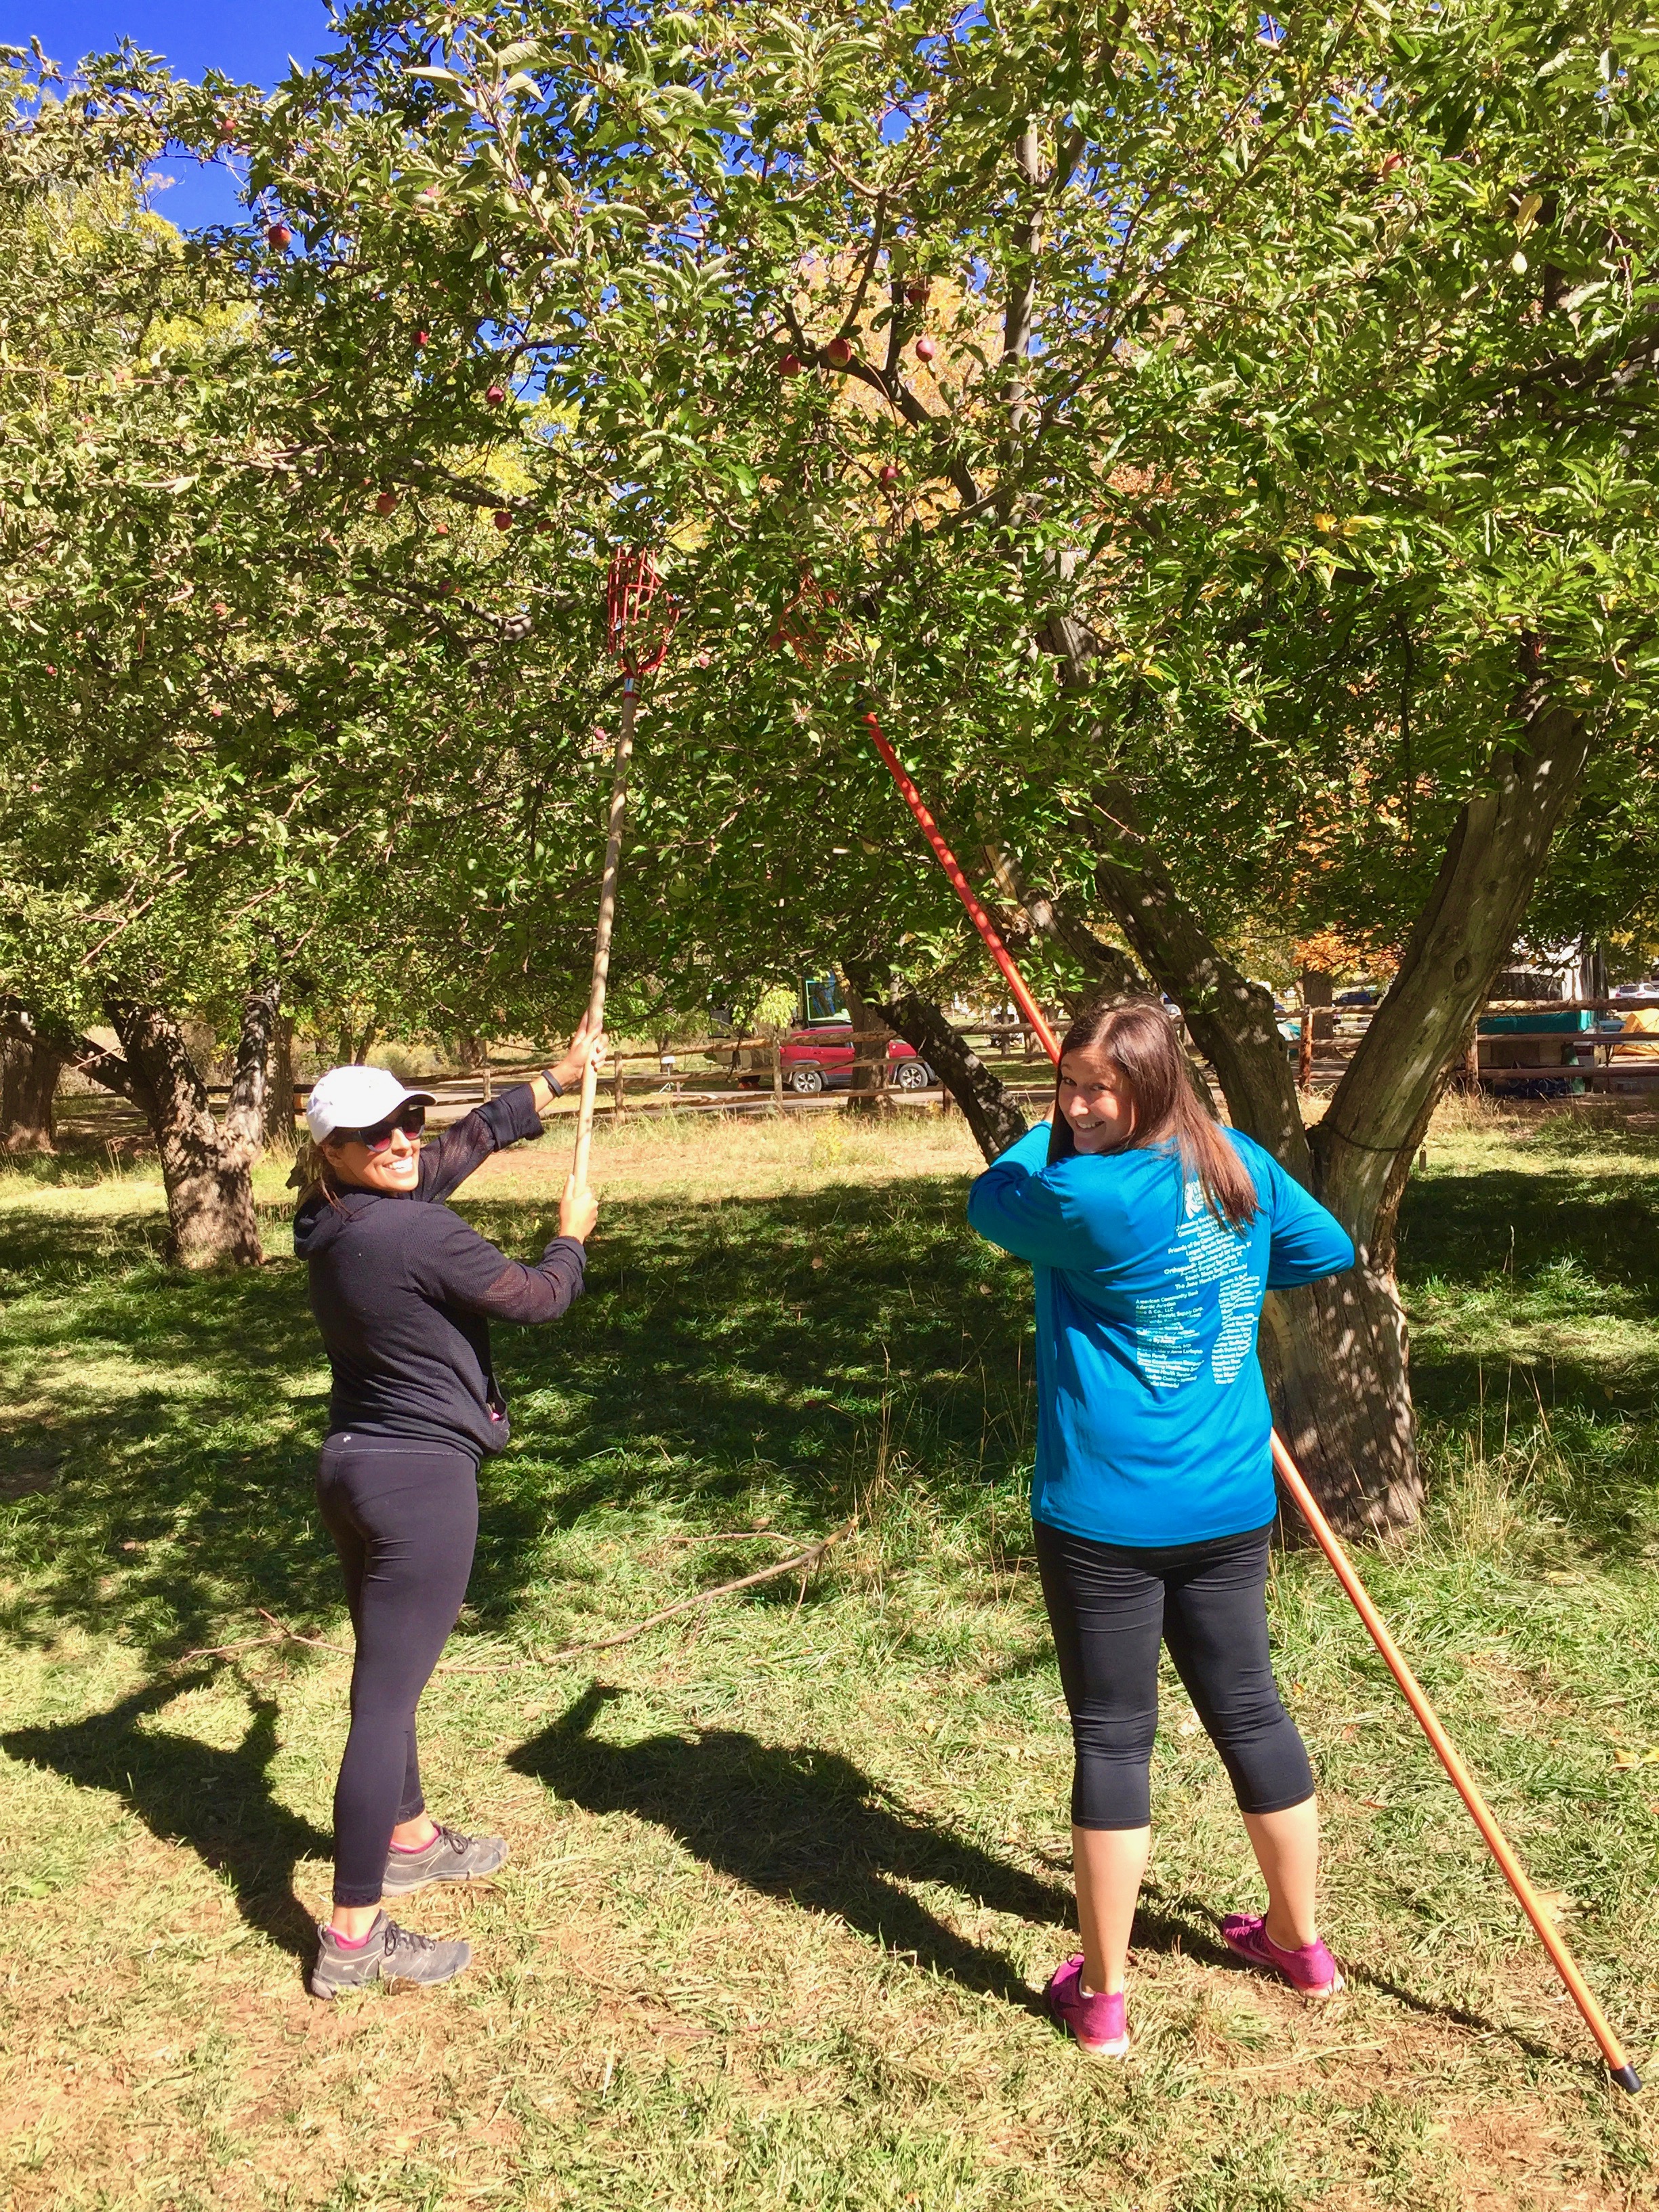
Before leaving the Gifford House area be sure to check out the little apple orchard right past the house towards the campsite. It was filled with deer and trees filled with apples. Someone told us the apple-picking rule of thumb was you can take as many apples as you can fit into your pockets. So sure enough I filled my pockets to the brim. And believe me when I say do the same because those apples were the best tasting apples I may have ever picked my entire life! No joke! Next we decided to enjoy a little more of the park before leaving and went on the scenic drive. This drive was on a very narrow road that eventually turned into a dirt/sandy road. My brakes weren't tolerating this road very well so we had to drive pretty slow. The scenic drive we could have done without. It was a little adventure but not very photogenic. There just wasn't much to see. Before leaving the park we drove to the Panorama Point and Goosenecks Overlook. In total we spent around 4 hours at the park.
Hickman Bridge Trail, Capitol Reef National Park, Utah
TIPS: Arrive super early in the AM if you plan on getting your hands on a cinnamon bun. Also be sure to have plenty of gas and food before making the drive to Capitol Reef because the closest actual town was right outside of the park called Torrey, Utah. The payment process for this National Park goes by the honor system. (paying a box in the parking lot) I didn't pay much attention to it since we had our National Parks Pass. Be sure to wear hiking shoes for Hickman's Bridge. You can probably get away with tennis shoes but just be safe!

Hickman Bridge Trail, Capitol Reef National Park, Utah
Panorama Point, Capitol Reef National Park, Utah
MORE INFORMATION
- TOTAL TRAVEL TIME: 5.3 hours
- TOTAL MILES: 295 miles
- GAS PRICES: $2.87/gallon
- EATS: Before hitting the road we had breakfast one last time at the Super 8 in Moab. Lunch was literally pie and ice cream! And for dinner we exited Capitol Reef and made a stop at Slacker's Burger Joint in Torrey, Utah. There wasn't many choices in Torrey so be aware of that! This place was enjoyable. I had a chicken sandwich with sweet potato fries but apparently they are known for their root beer floats! There were a few other random places to grab food and a Subway in a gas station but that was about it. When we got to Bryce we didn't eat again because most places were closed by 8:30pm so be aware of that.
- SLEEP: Best Western Plus Ruby's Inn in Bryce
- WISH WE HAD TIME: Explore the Dixie National Forest. Check out Calf Creek Falls and Escalante. All of these things we passed but I don't know much about!
- FINAL MUST-SEE LIST:
- Hickman's Bridge Hike
- Gifford House Cinnamon Bun or Pie
- Apple Picking at the Orchard near Gifford House
- Drive to Panorama Point & Gooseneck's Overlook
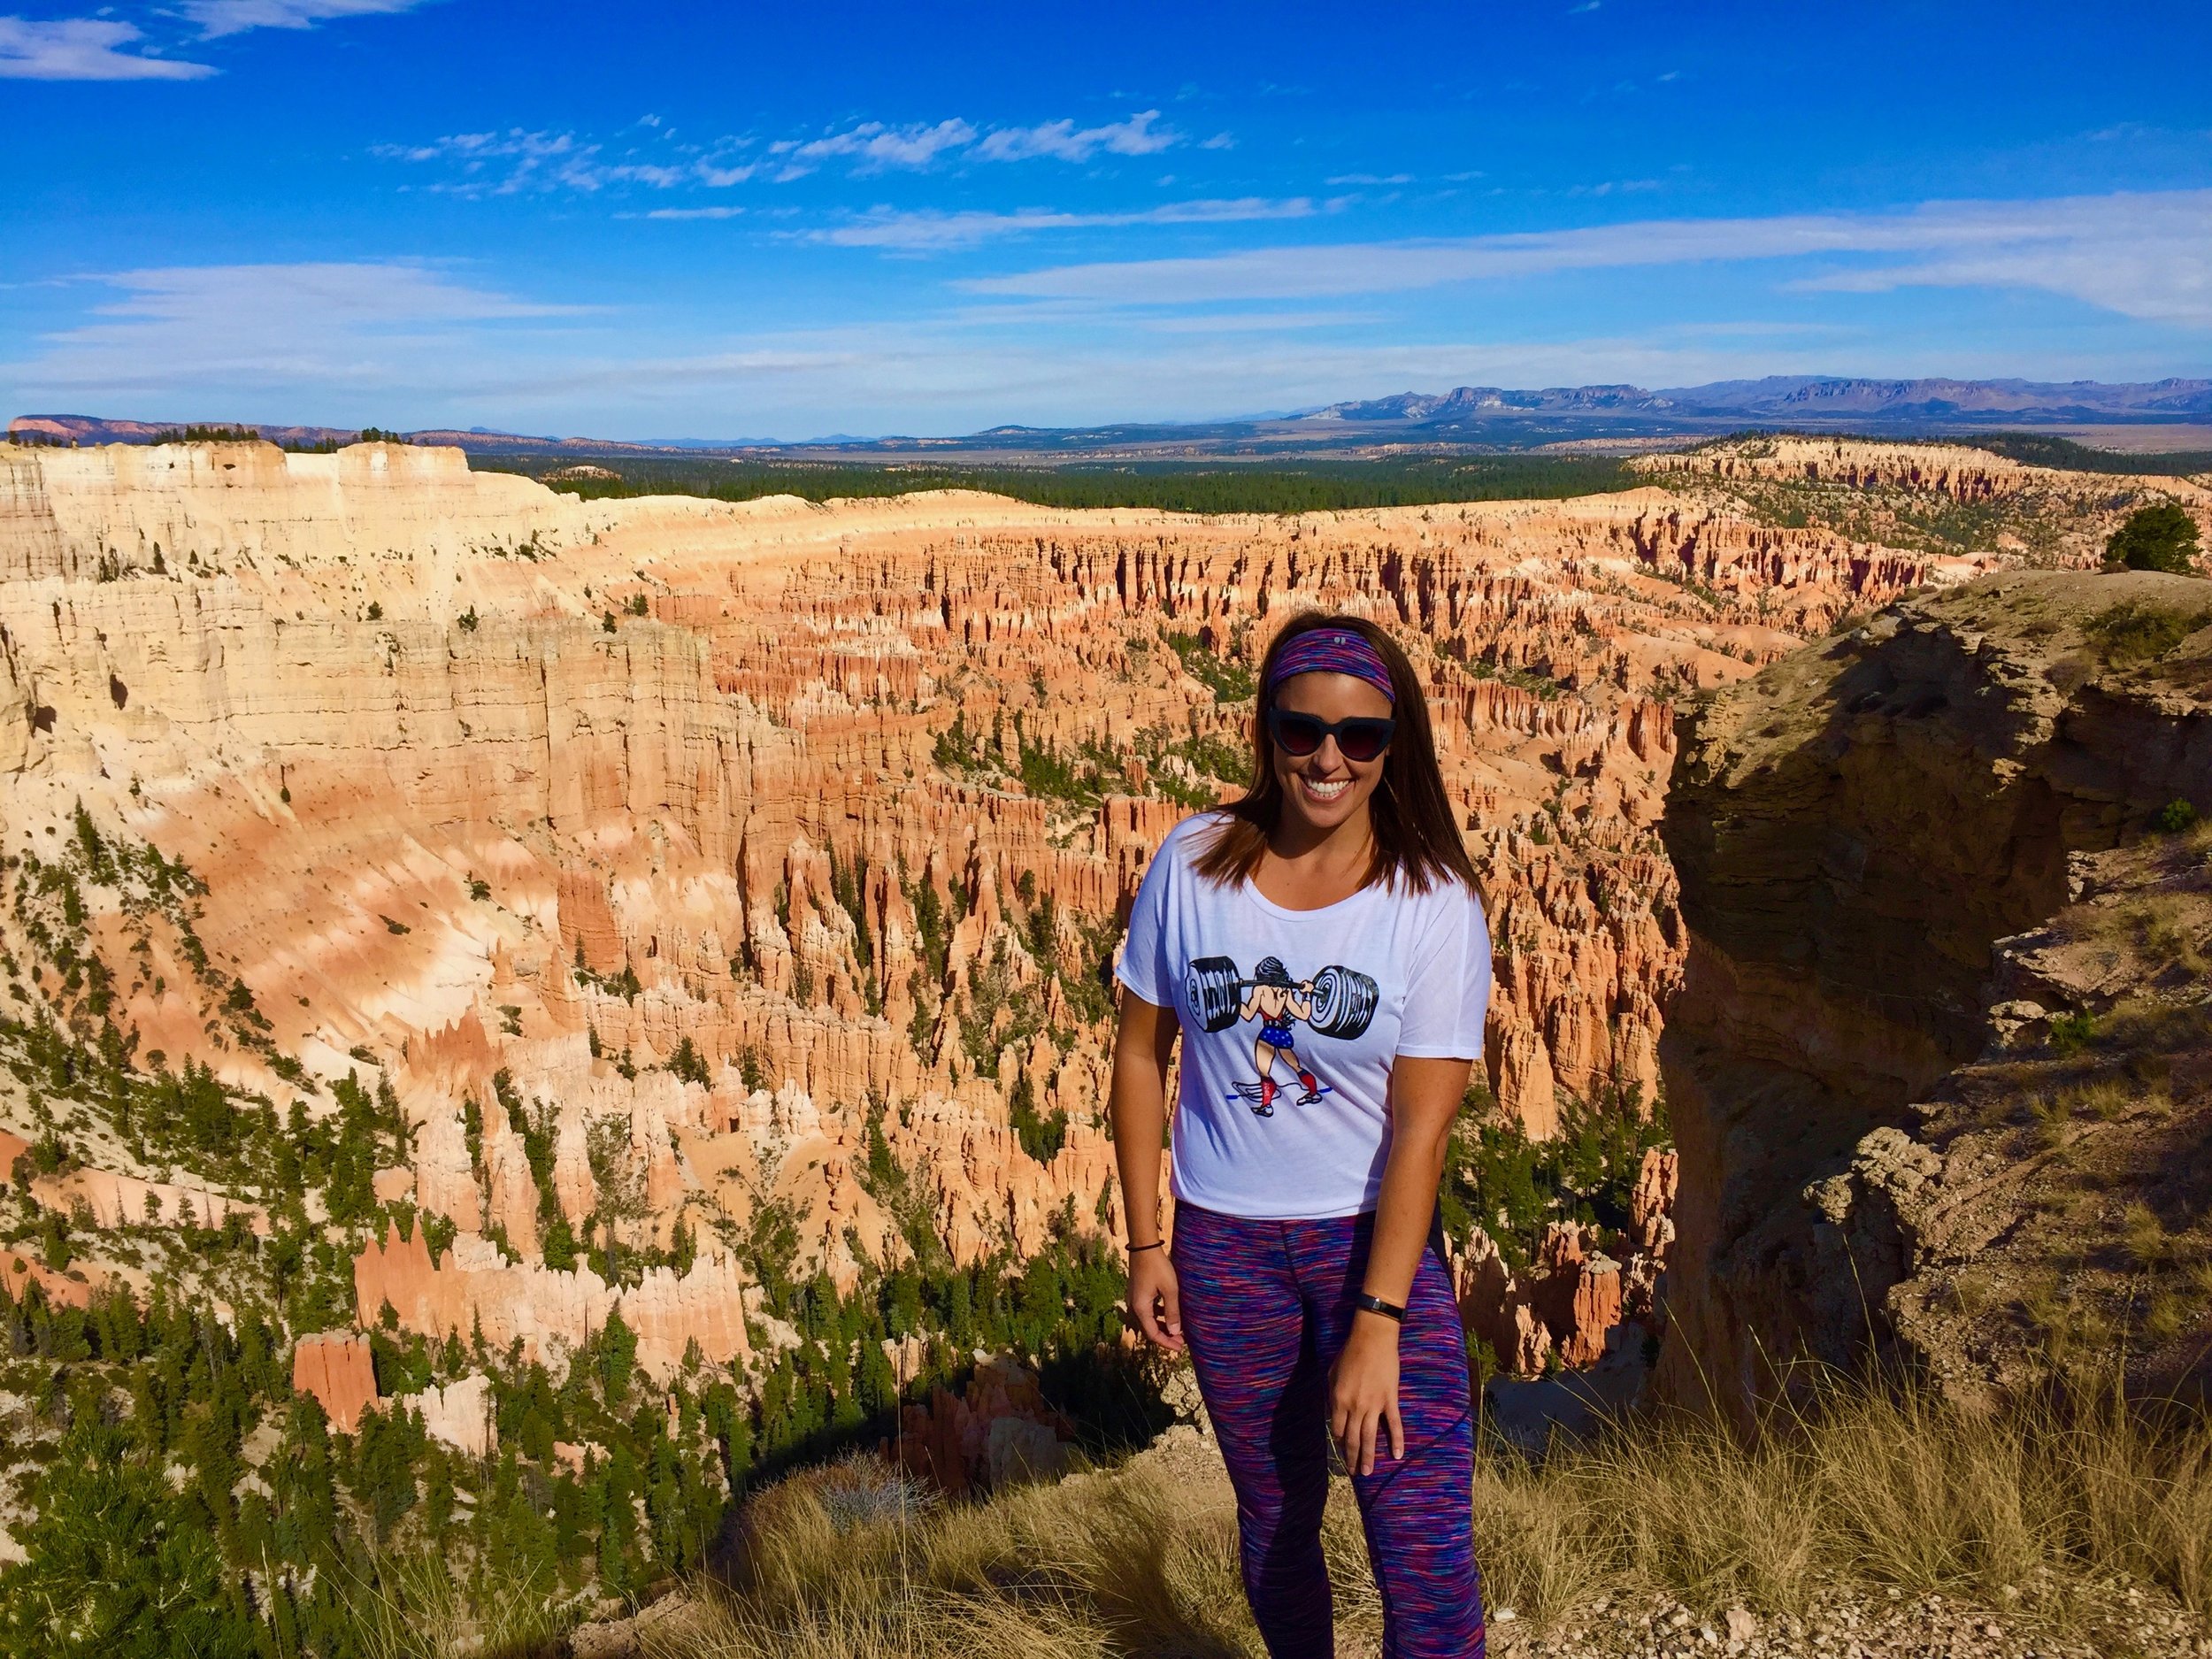
DAY 9: BRYCE CANYON NATIONAL PARK
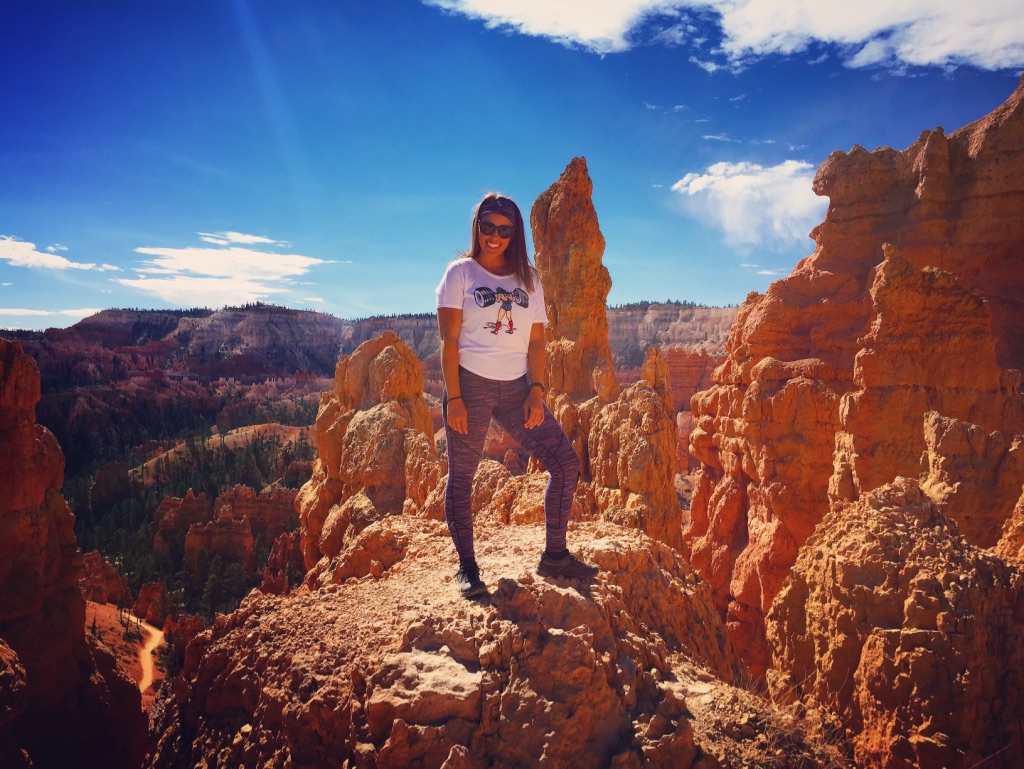
Navajo Loop Trail, Bryce Canyon National Park, Utah
ADVENTURES: We started our day off early and drove literally 5 minutes from our hotel to Bryce National Park. We planned our day out after making a quick stop at the Visitor's Center. We decided the best way to go about our day was to park our car in the long-term parking lot and the use the park's shuttle. Our first stop was Bryce Point. From there we did a relatively easy 1.5 mile walk along the Rim Trail to Inspiration Point.
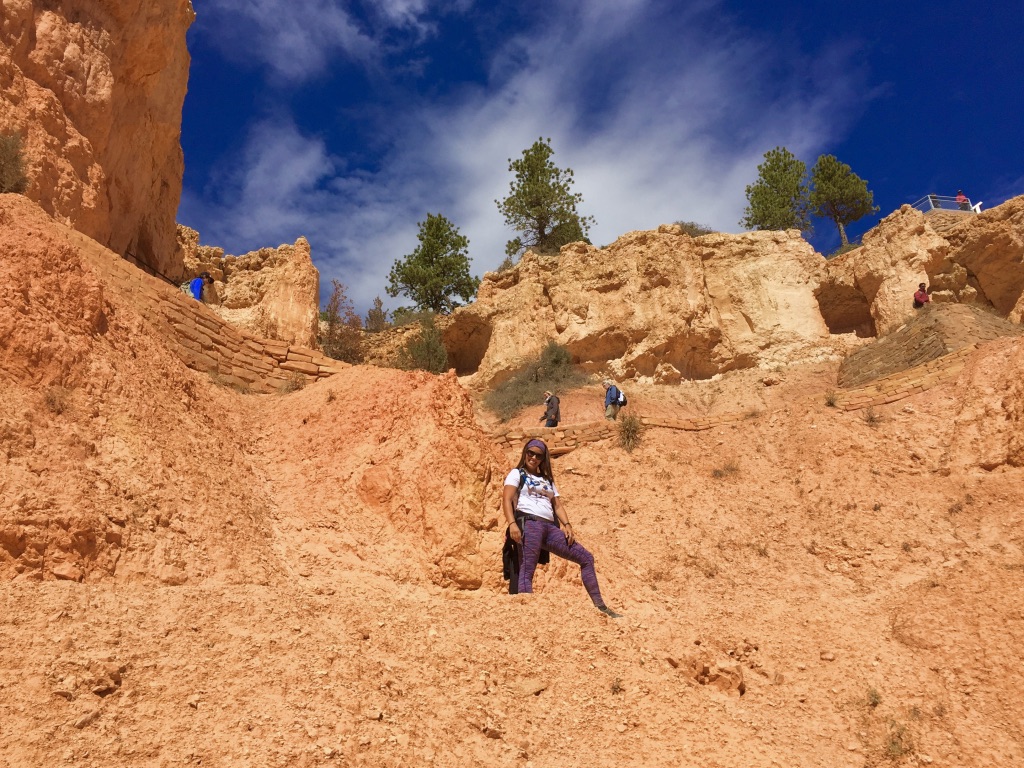
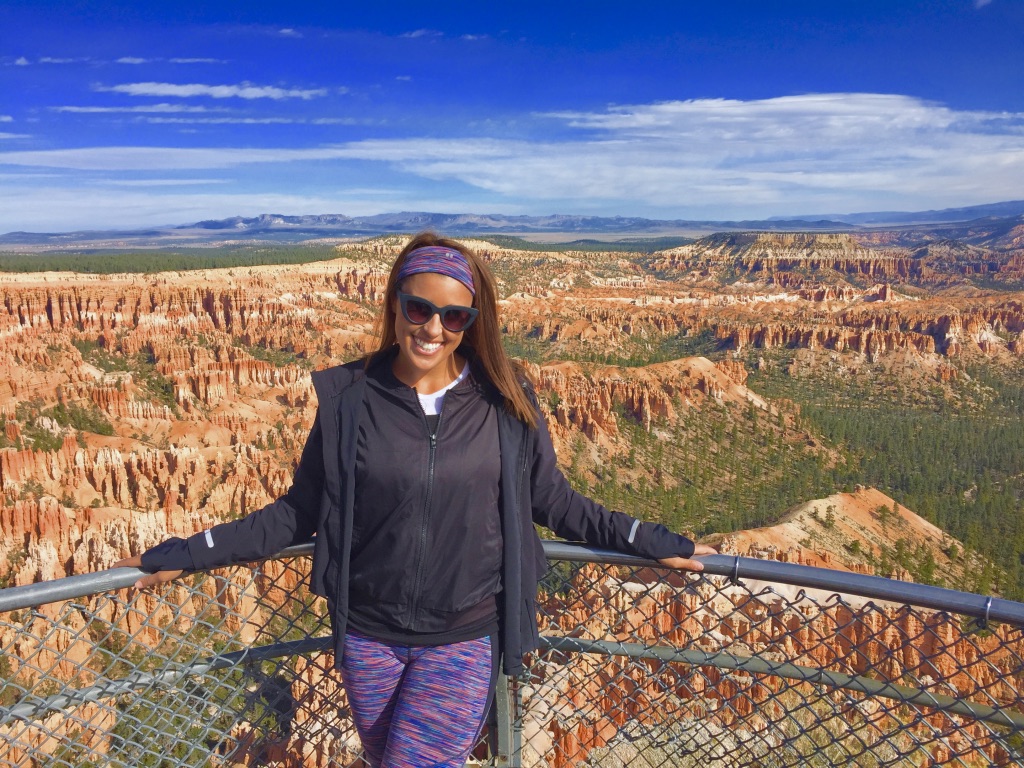
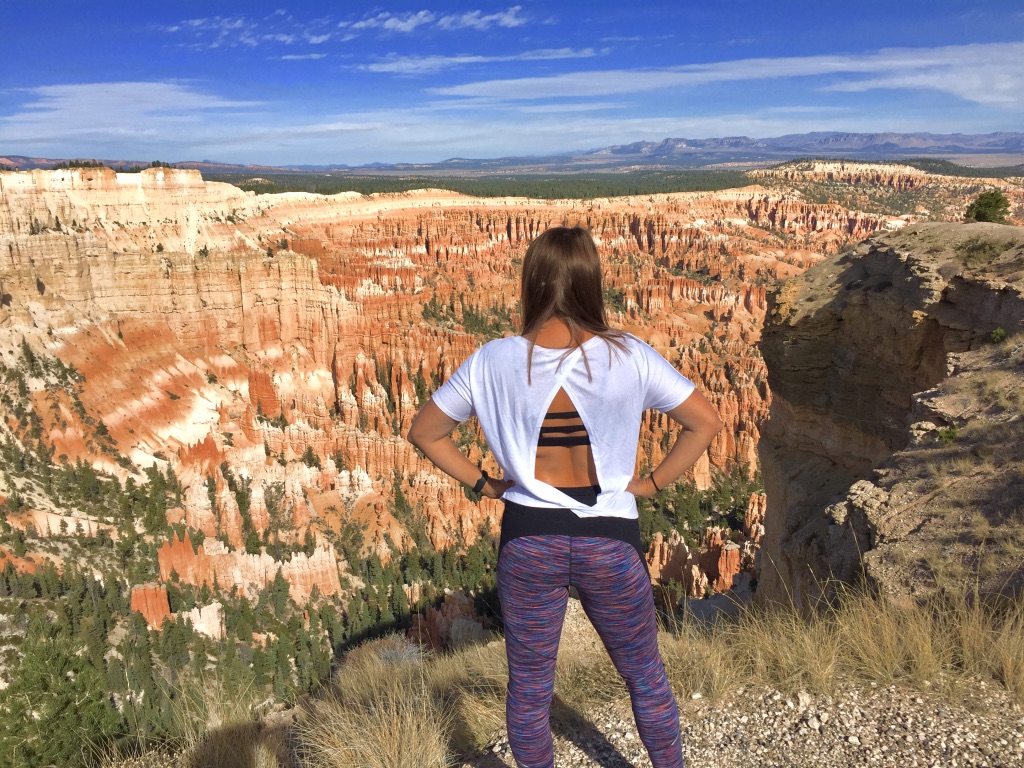
*** Bryce Point, Navajo Loop Trial, Rim Trail, Navajo Loop Trail
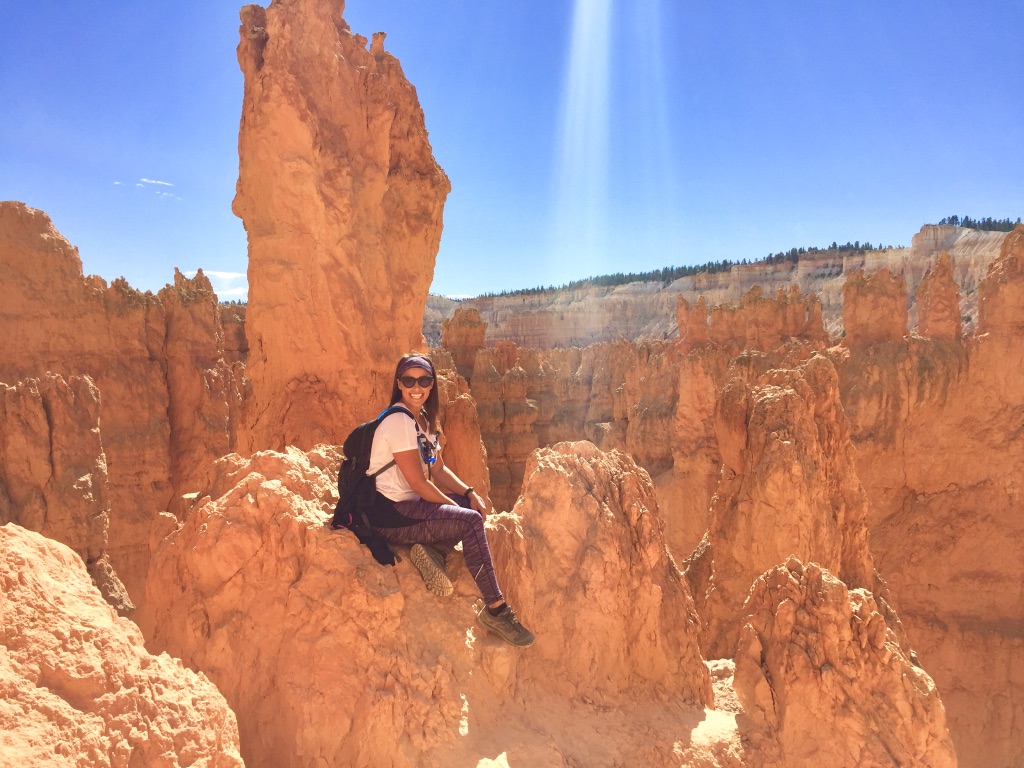
Next up was the Navajo Loop which in my opinion is a MUST. The park ranger suggested we start the loop/Queen's Trail at Sunrise Point and then finish the hike at Sunset Point. This particular way ended up being a decent amount of incline at the very end of the hike. (see 3rd photo above this) If you want more downhill and less incline you should do it the reverse way and start at Sunset Point. This hike is 3 miles round-trip. Throughout this hike you will see incredible views of the Hoo-doos. Be prepared for inclines both ways and wear shoes with traction. After this hike we worked up an appetite and had our eyes set on eating in the park at Valhalla, their pizza joint. To our disappointment it was closed for the season and we didn't want to eat at the sit down Bryce Canyon Lodge so we decided to exit the park and venture for food elsewhere. In total we spent about 5 hours exploring Bryce. After leaving the park it was off to St. George, Utah.
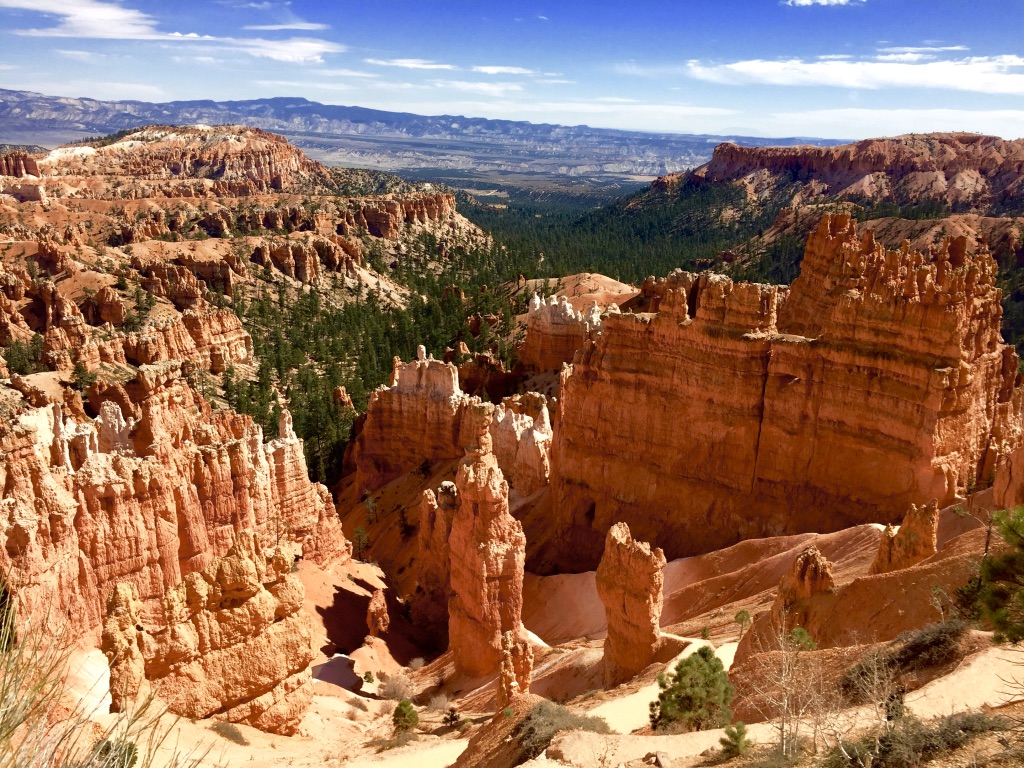
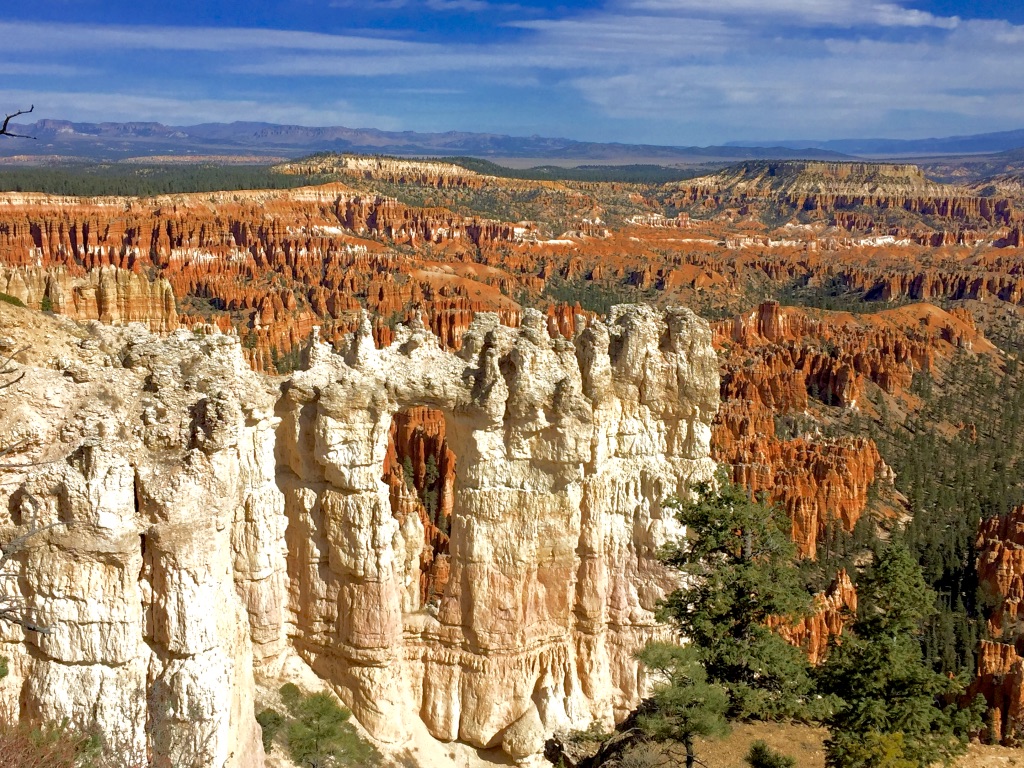
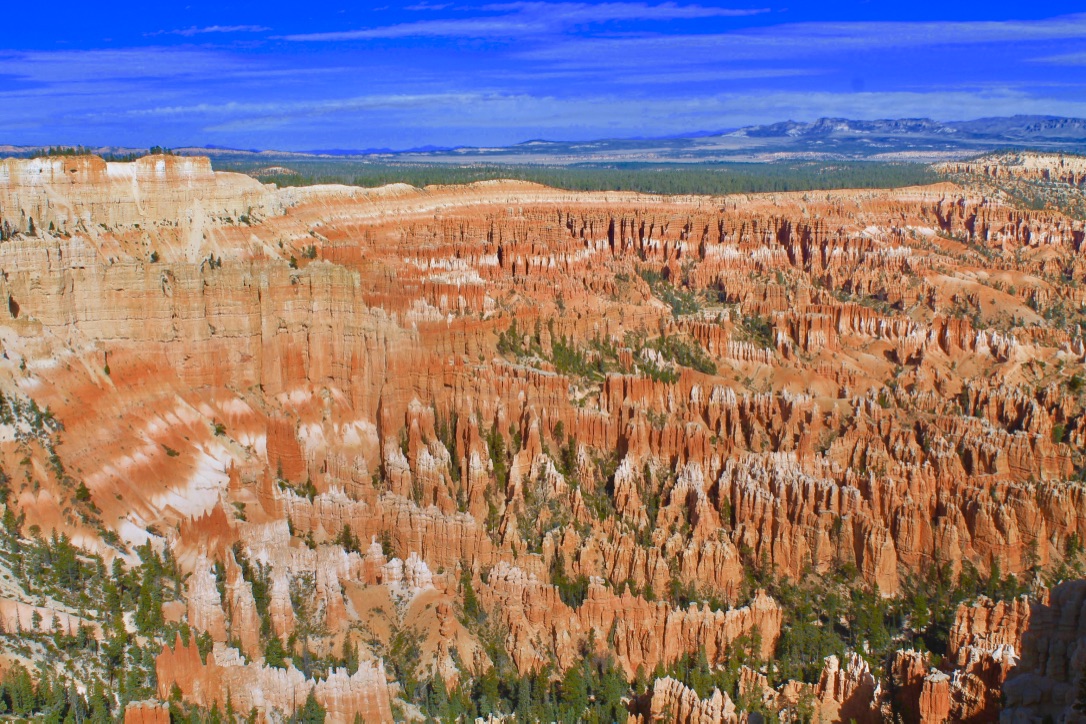
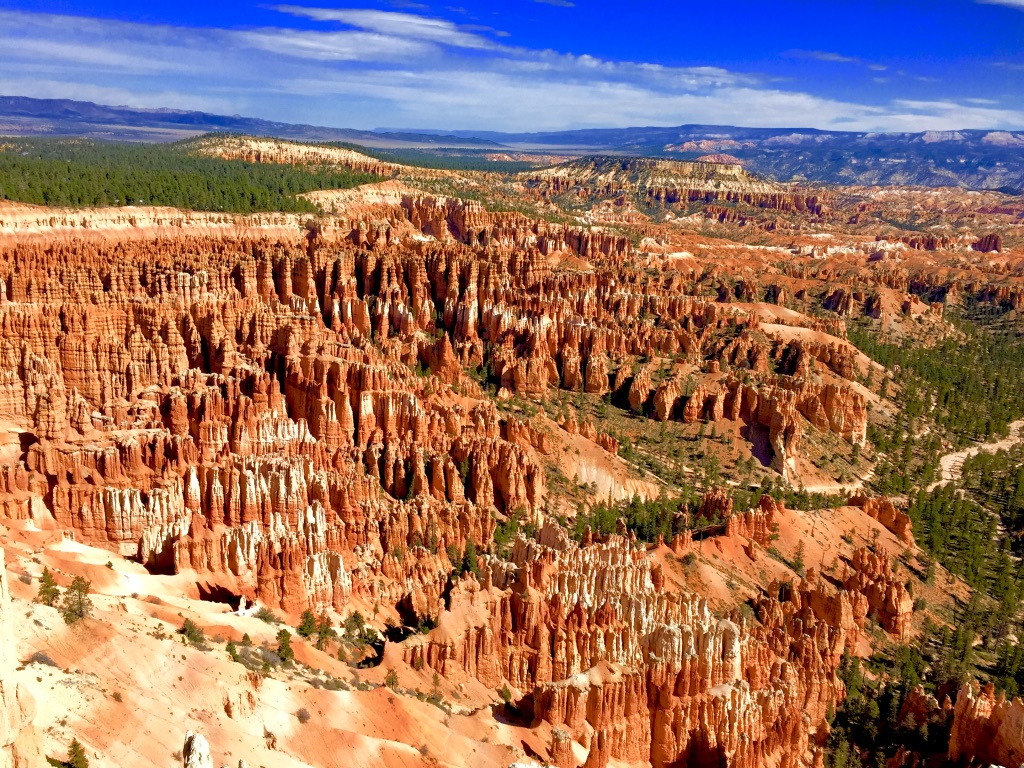
***Photos above taken along the Rim Trail and at Inspiration Point
TIPS: This is totally up to your preference but the option to take a shuttle from your hotel to the park exists as well in terms of getting into Bryce. I am not entirely sure if that changes the entrance fee so that would be something you may want to check on. There was plenty of room in the long-term parking lot but I can imagine that changes during peak times and during the official park season. Definitely do the shuttle once in the park. Many of the trails are not loop trails, therefore, after each hike you would need to find a way to walk back to your car if you utilized their parking lots. Keep in mind that this town is pretty small so there are not a lot of food options or other leisure things to do.

Navajo Loop Trail, Bryce Canyon National Park, Utah
MORE INFORMATION
- TOTAL TRAVEL TIME: 2 hours and 15 minutes
- TOTAL MILES: 165 miles
- GAS PRICES: $2.87/month
- EATS: The Ruby Inn did not have complimentary breakfast but they did have a restaurant where we ordered breakfast before our adventures at Bryce. For lunch, as I mentioned before we really wanted pizza and something quick but the pizza place inside Bryce was closed for off-season. They have a sit down dining option which was a little nicer and pricier at the Bryce Canyon Lodge but we just weren't really feeling it. Instead we found a place next to the hotel that served personal sized pizzas and we grabbed those before heading back on the road. Not very filling, but I think we were all too tired to care and just wanted to take off for St. George, Utah! I can't forget to mention the dinner reservation we were all so psyched for in St. George at Capaletti's! This is a really good family owned Italian restaurant, reasonable prices, closed random days, and it is highly recommended that you make a reservation. So insanely good! I always get the lasagna and the mushroom gnocchi appetizer to split.
- SLEEP: Fortunately my best friend's family has a second home in St. George, Utah so this really helped us out for the time we had planned to spend at Zion National Park (about a 45 minute drive from St. George). Other surrounding areas with hotels close to Zion include: Cedar City, Zion, or St. George.
- WISH WE HAD TIME: I totally noticed their were tee-pee like options for sleeping at the Ruby Inn in Bryce or right next door. That would be cool if I ever went back.
- FINAL MUST-SEE LIST:
- Bryce Point
- Walk to Inspiration Point
- Hike Navajo Loop/Queen's Trail
- Lunch at Bryce Canyon Lodge (optional but heard the food was good)
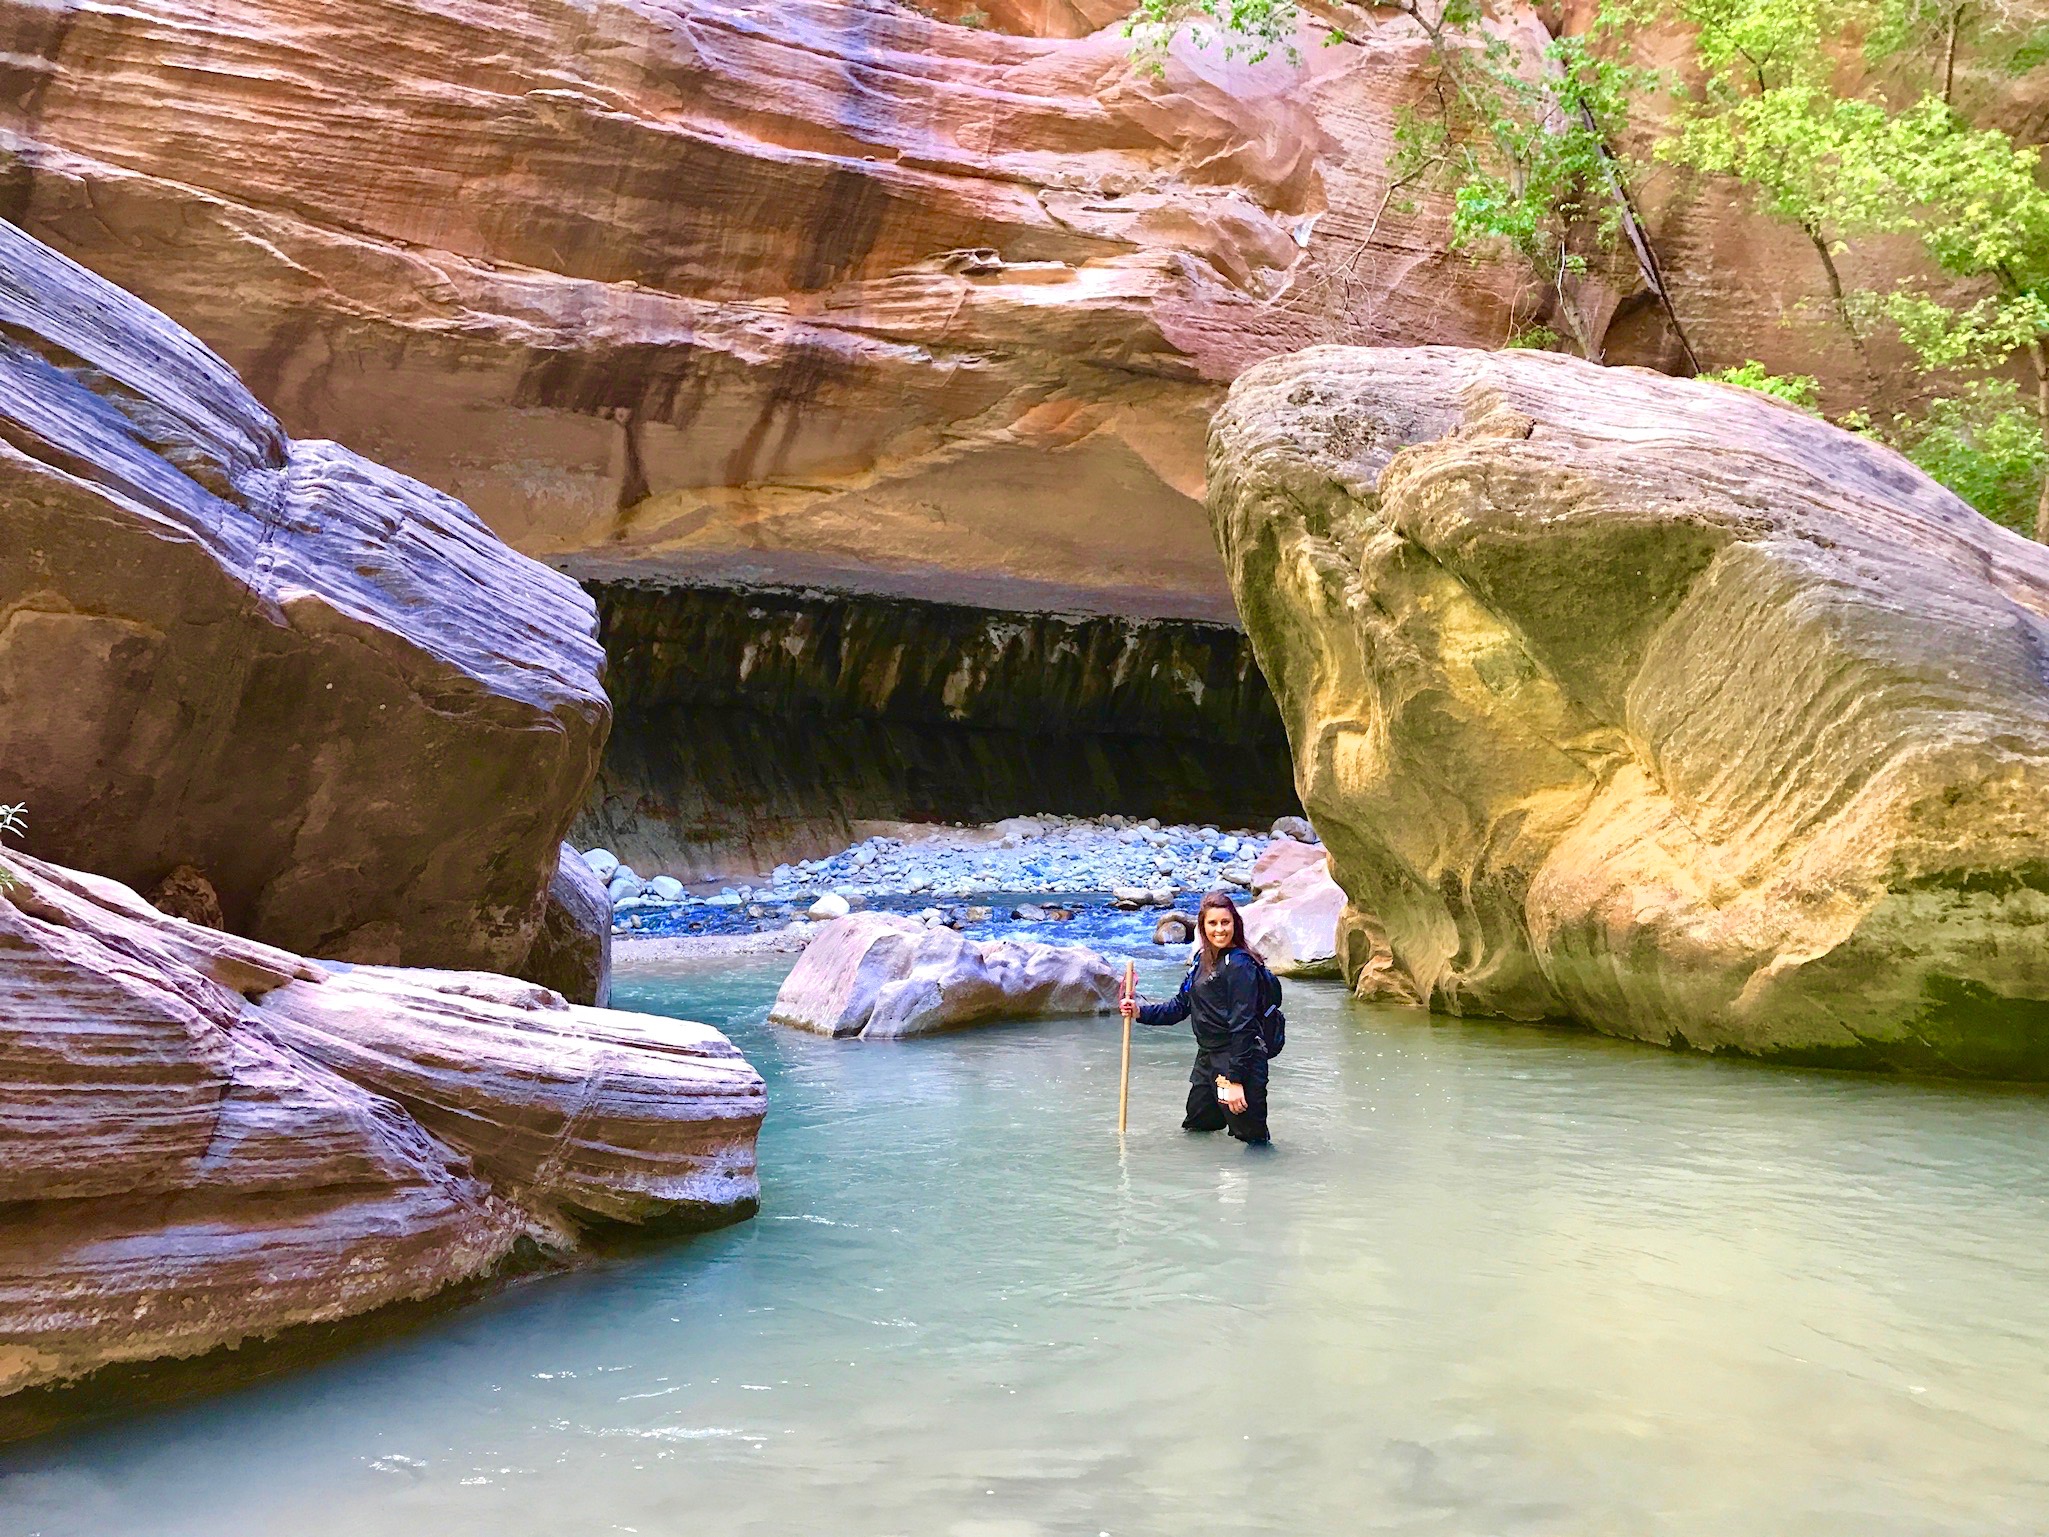
DAY 10: ZION NATIONAL PARK

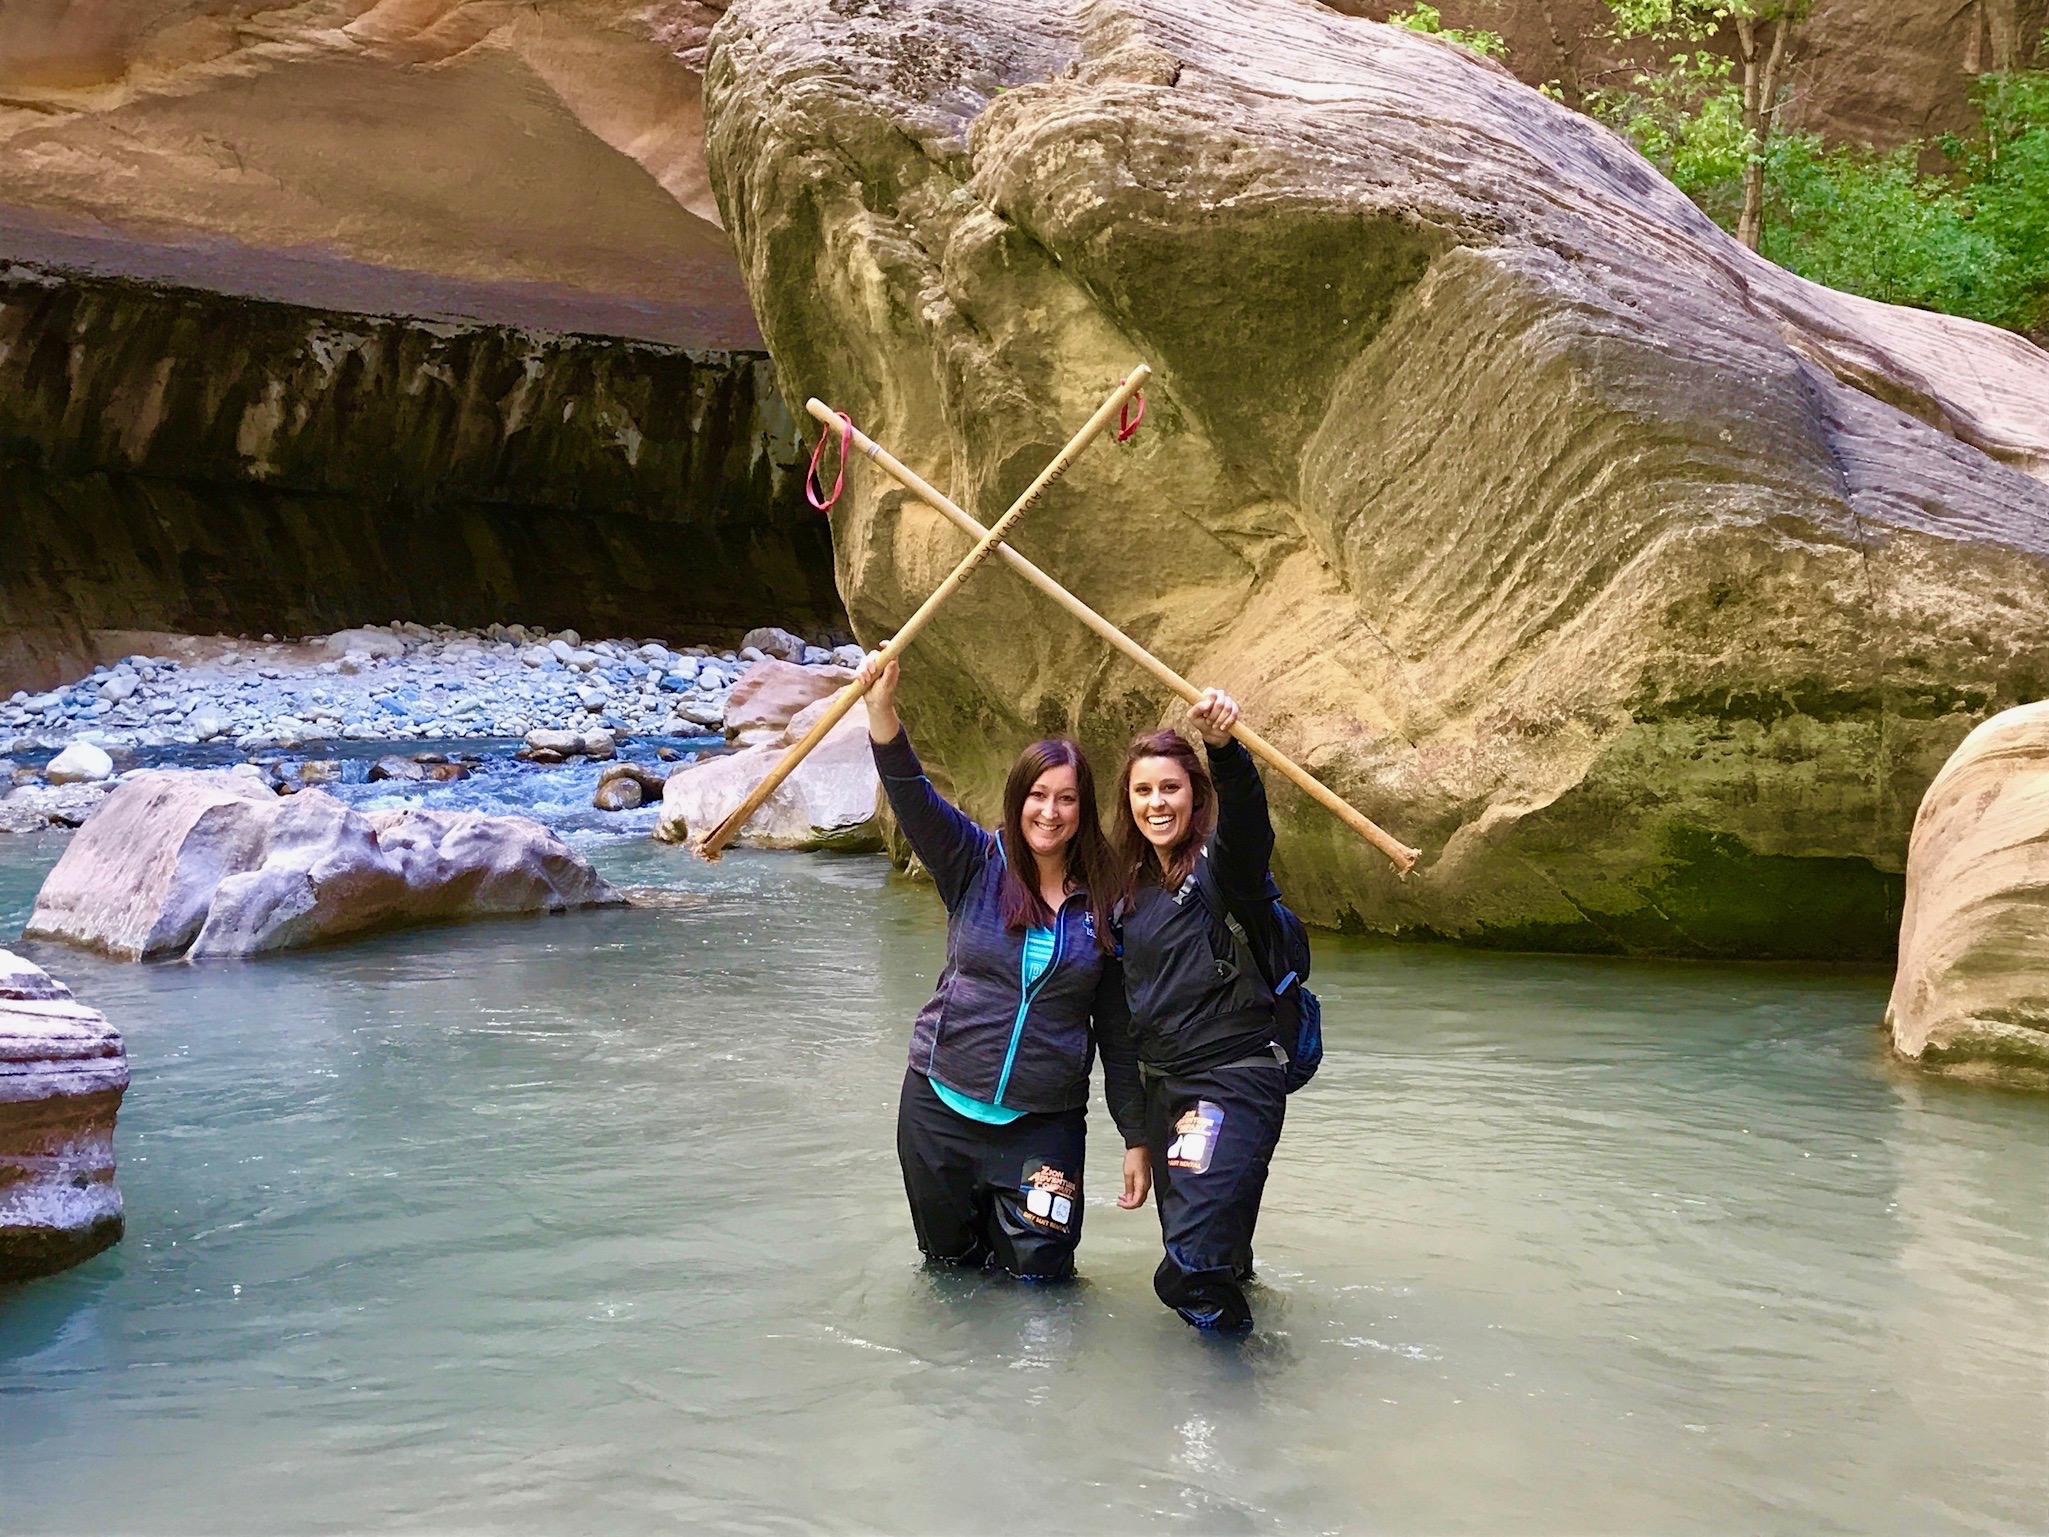
The Narrows at Zion (Wall Street) National Park, Utah
ADVENTURES: I was ecstatic about this day! I had been to Zion in the past and hiked Angel's Landing (strenuous, steep, climbing on rope, 3.5 hour roundtrip hike) but this time around we were attempting The Narrows. This hike is completely in water! We left St. George at 7am and it took about 45 minutes to an hour to get to Zion and there was little to no traffic this early. Before heading to The Narrows we stopped at Zion Adventure Company to get geared up. We went with the pant suit, shoes, socks, and walking stick package to be safe. (We heard mixed reviews as to whether waterproof gear was necessary). I am here to say it most definitely is! After renting our gear we used our National Parks Pass to get in and parked at the Zion Visitor Center which keep in mind fills early on in the morning. From there we took the shuttle to the very last stop... The Narrows. There are 9 stops on the shuttle in total. So keep in mind it takes around 45 minutes just to get to the shuttle stop. Also be aware that there is about a 1 mile trail walk until you reach the beginning of the water. I suggest not getting completely geared up in layers until you get to the start of the water especially if it is warmer out.

The Narrows (Beginning) at Zion National Park, Utah
Entering the water was a bit of a shock at first considering I had never done anything like this before. I wasn't expecting it to be as difficult as it was, I think it is just extremely important to be aware of how slippery the rock in the water is and how choppy the rocks are beneath you. There is no way I could have hiked that without a hiking stick! At the beginning there is a really pretty wall of rock with a small stream of water. (photo above) Naturally we stopped for photos but again be careful, it can be very easy to drop things in the water if you don't have a good grip and position in the water. We decided to hike to the Wall Street Starting Point. Here there was a fork in the path which allowed you to continue straight OR take a right towards another path. At this particular point we chose neither paths. We felt like we had seen enough and we also made the mistake of not packing lunches and only packing snacks so we felt to continue to the "waterfall" people were talking about would have taken way too long. It was still really gorgeous at the beginning of the Wall Street Starting Point and we took incredible photos. Also even though we had gear my feet still felt wet and pretty cold not going to lie! It took us 3.5 hours to hike in the water to the Wall Street Start Point and back. My Fitbit read 17,000 steps and 7 miles for the entire day at Zion. I highly recommend this hike especially if it is the right time of the year weather-wise. It was one of the most unique, coolest experiences I have ever had.

The Narrows at Zion (Wall Street) National Park, Utah
TIPS: Okay so I have A LOT but I promise you this will all be extremely helpful for your trip to Zion. First and foremost, if you are planning on The Narrows CHECK THE WEATHER and RENT GEAR. On the day we hiked it was a high of 80 degrees BUT the water temperature was 50 degrees. Make sure to LAYER UP! You can always strip layers off as the day goes but what you don't want is to be miserably cold all day and trapped on a hike in water! Also if the weather calls for any rain a flood warning will be in effect and hiking the Narrows is not suggested. In terms of renting gear I suggest using the Zion Adventure Company, they were absolutely great and super accommodating. We showed up there and lucked out with them having our sizes that early on in the morning BUT 100% make sure you RESERVE gear ahead of time because they do SELL OUT of sizes by afternoon. It was $47 a person for the water pants, water shoes, socks, and walking stick.

The Narrows at Zion National Park, Utah
Make sure to bring enough water and food. I suggest snacks along with an actual meal like bagged sandwiches. This is super important because obviously you are in the middle of a trail in the water. There is nothing else around! As I mentioned before bring layers. I was wearing gloves and ear warmers when we started around 11am but by 1pm I had taken multiple layers off along with my gloves and ear warmers. It is also important to bring some type of water resistant bag. I had my camelback and this bag clipped onto it which held my DSLR camera and all of our cell phones.
The Narrows at Zion National Park, Utah
Throughout our hike we saw multiple people barefoot or wearing open-toed shoes which I absolutely DO NOT suggest. The rock is extremely slick and you just never know what can be in the water. The safest way to go is the water shoes especially considering how cold the water temperature is. If you want an idea of how high the water was I am 5'4" and the water at it's highest point was around thigh high on me. There was maybe a few points I had to lift the back of my bag up so it wouldn't hit the water but otherwise all my stuff remained dry. Be aware that the trail can also get pretty busy and traffic can start to form. It isn't exactly easy to pass by someone when you are in water! Be patient! On our way back around 1pm there was a lot more people hiking the Narrows than when we started.

Zion Adventure Company Rental Gear

Taco Bell, St. George, Utah
MORE INFORMATION
- TOTAL TRAVEL TIME: 2 hours
- TOTAL MILES: 100 miles
- GAS PRICES: Did not get gas today
- EATS: As you can imagine with our trip coming to the end we were nowhere near as energized as Day 1. What I am getting at is we made our first stop of the day at Starbucks in St. George which opens at 5am and is actually a very nice, new Starbucks! During our hike we snacked since we just got lazy and never packed a lunch. After a day spent in water hiking we just couldn't make up our minds so stopped at Taco Bell AND KFC in St. George. Hey we earned it!
- SLEEP: Luckily we had my friend's home in St. George to crash at and we all had our own privacy and rooms to wind down before our drive back to LA the next morning! As I mentioned before other surrounding areas with hotels close to Zion include: Cedar City, Zion, or St. George. Did I mention there is an awesome resort called Red Mountain Resort & Spa in St. George? If you are in the area with downtime most definitely look into a spa service or a healthy dinner at the Red Mountain Resort, I highly recommend it.
- WISH WE HAD TIME: Next time I go to Zion I would love to look into their camping options. In terms of not camping and staying as close as you can for a decent price I remember passing a newer La Quinta just outside of Zion! I would also love to check out the St. George SandHollow State Park and explore that! Obviously we were not prepared enough to hike to the big waterfall people were speaking of but next time that will be the goal. Finally, if you have the time look into seeing a show at the Tuacahn Amphitheater in Ivins, Utah. I have been to St. George multiple times and have yet to do this but have heard nothing but amazing things. Be sure to look at the schedule ahead of time and book tickets, as these sell out as well.
- FINAL MUST-SEE LIST:
- The Narrows or Angel's Landing
- Show at the Tuacahn Amphitheater (if time allows)
DAY 11: LAS VEGAS & FINAL STOPS

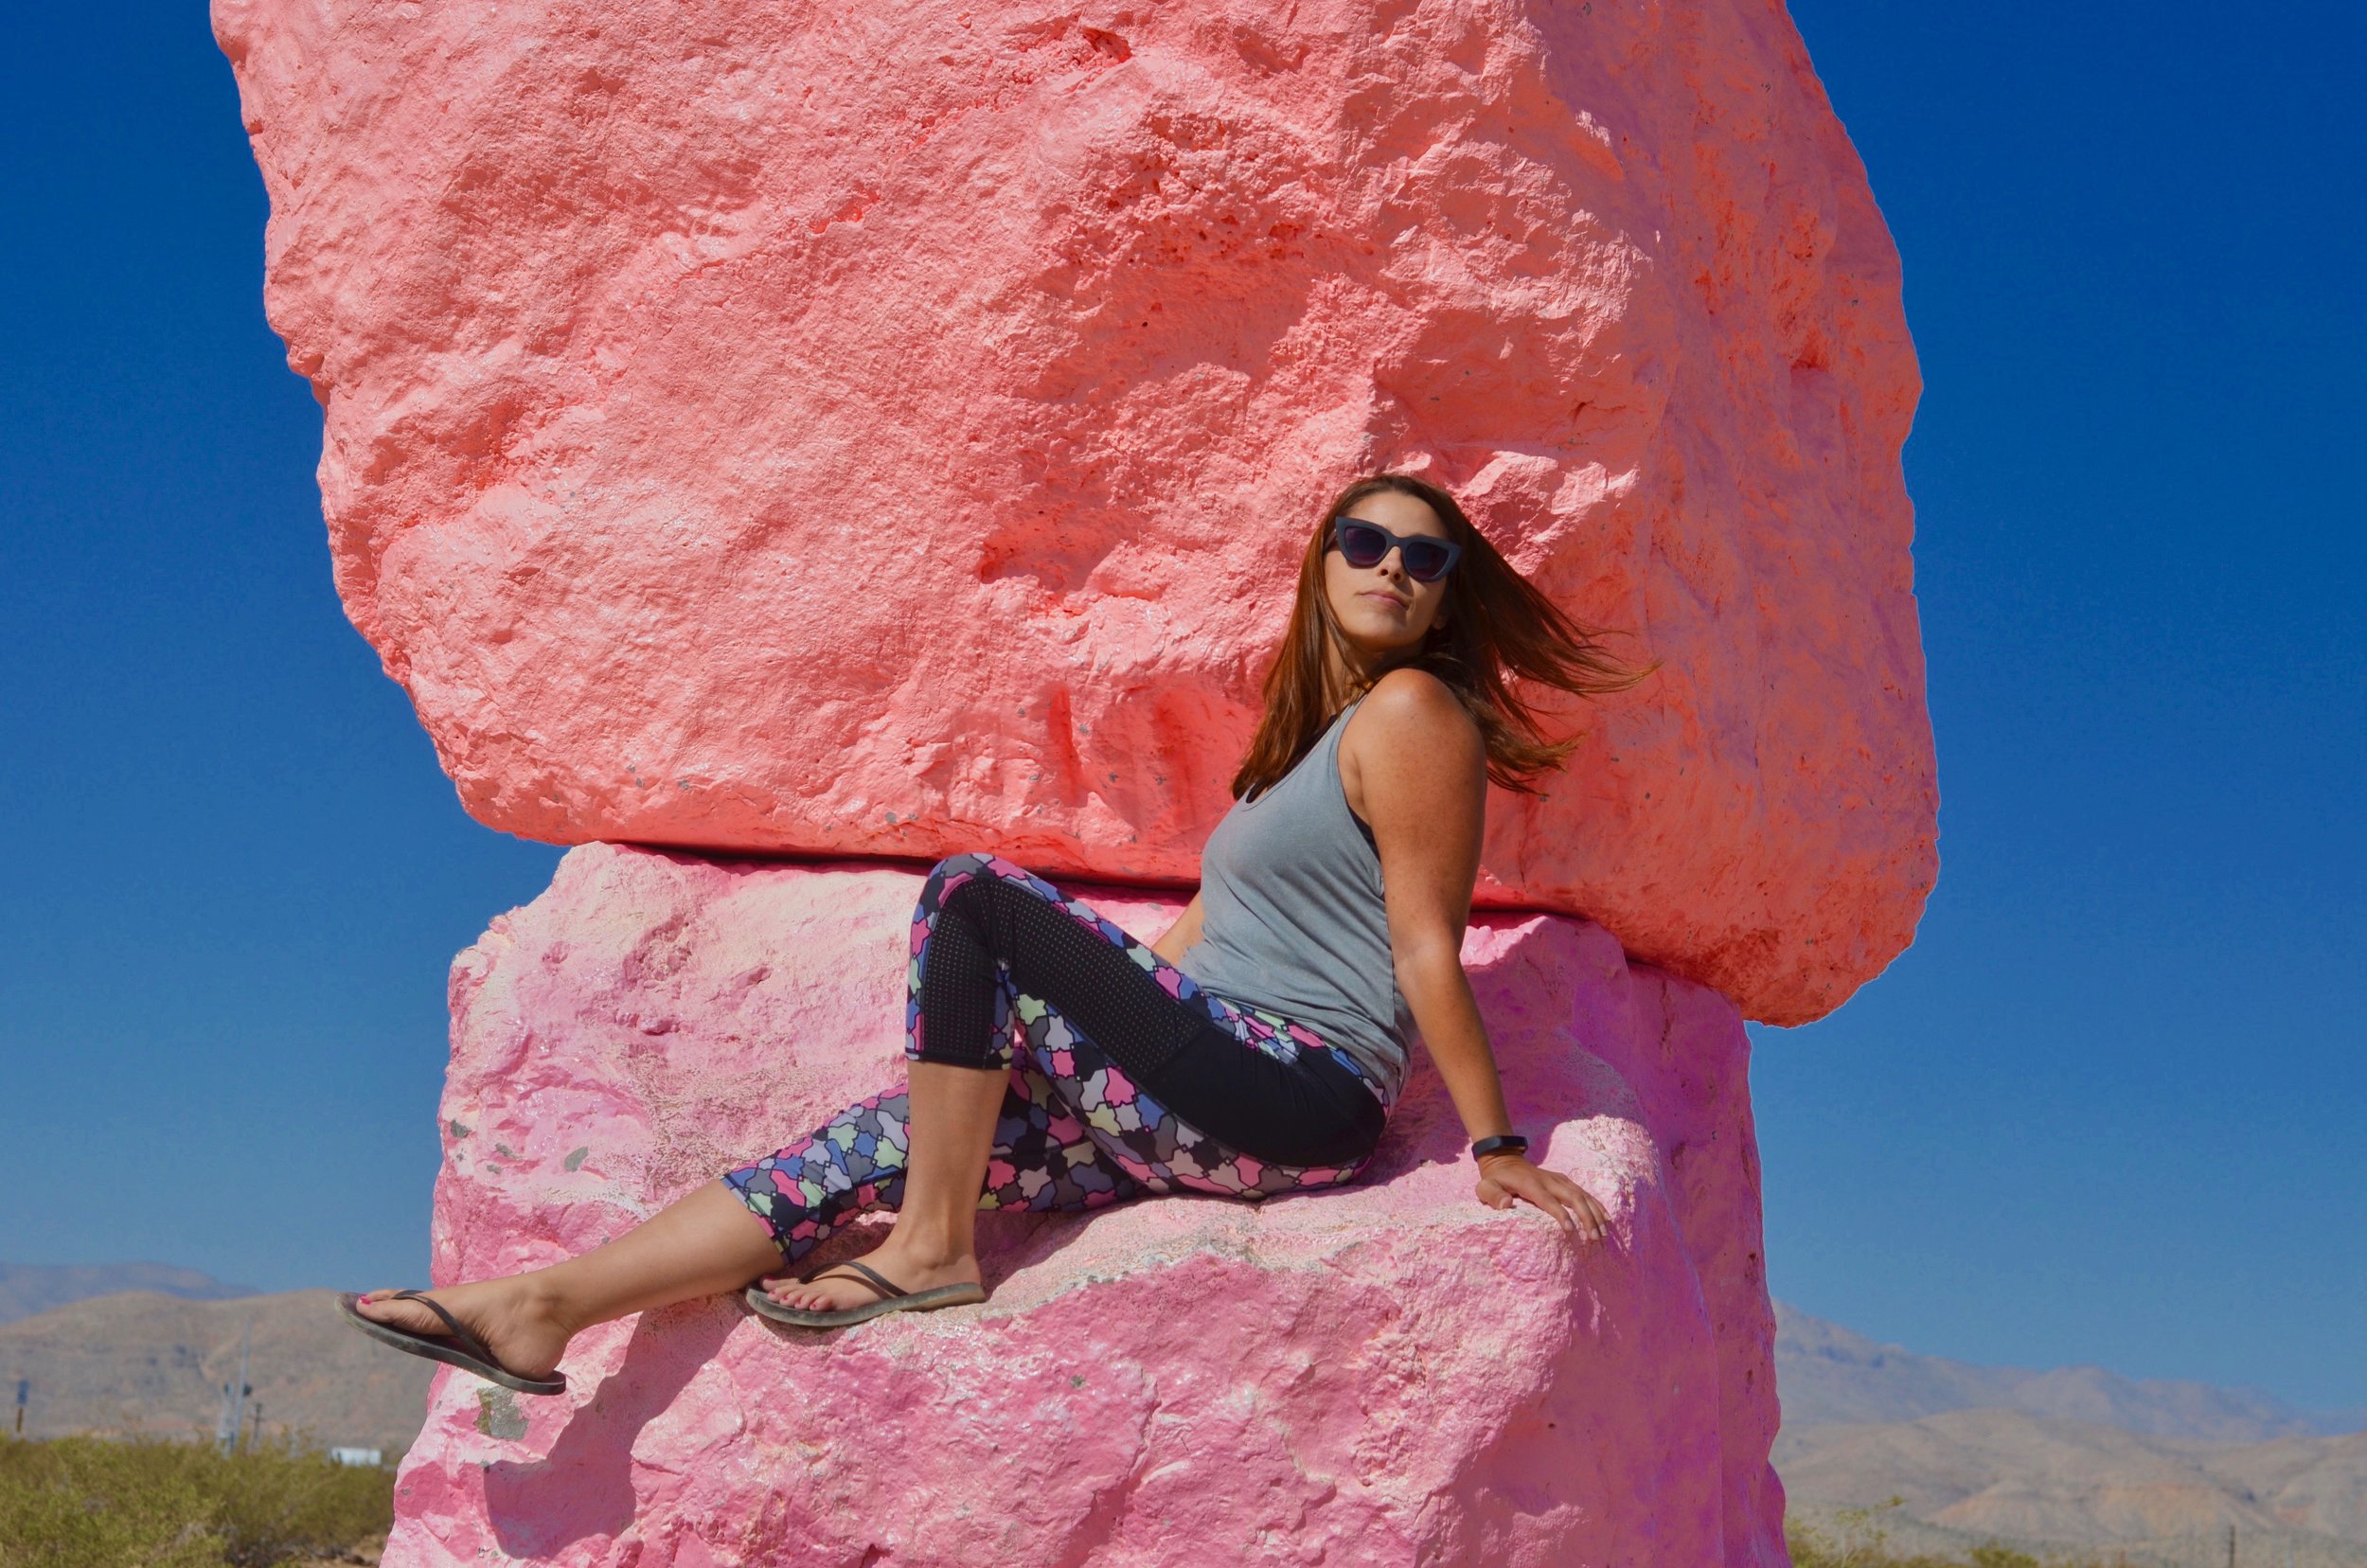
Seven Magic Mountains, Las Vegas, Nevada
ADVENTURES: Today marked our final journey back to Los Angeles. BUT FIRST a quick stop in Las Vegas. My friend Jess decided to fly from Vegas back to Phoenix which was one reason to make the stop along with a quick hour at the Hardrock slots. It also happened to be shortly after the Las Vegas Shooting and we stopped to pay respects to all the lives lost at the memorial which was really nice. After leaving Vegas and heading towards LA we pulled over to take some photos at the Seven Magic Mountains. That was a pretty unique, cool photo opt.
Seven Magic Mountains, Las Vegas, Nevada
Then it was back on the road until we were a little past Barstow and decided to exit at Yermo Road to check out Peggy Sue's 50s Diner. I am glad we made the stop because it was so cool inside! We spent a little time in their gift shop which featured memorabilia from all the oldie films and all your favorite candies from the 1900s. The pie was delicious and I stuck to a classic grilled cheese and chili! We decided to check out Calico Ghost Town which was also at this exit but it ended up being an epic fail. It closed at 5pm and we pulled up at 4:40pm AND it cost to get in. Bleh! We honestly just wanted to snap some pics but it was a no go. Finally we had one more abandoned stop to make at the Abandoned Dinosaurs in Apple Valley. After noticing this was literally parts of old statue type dinosaurs in someones back yard in the middle of nowhere, we played it safe and jumped back on the road to LA!

Seven Magic Mountains, Las Vegas, Nevada

Seven Magic Mountains, Las Vegas, Nevada
TIPS: If you are planning to drive from the St. George area back to Los Angeles it is best to get gas near the strip in Vegas. The few stops outside of Vegas were charging $1-2 more a gallon! As usual, leave early for the trek back. We left at 9am and it was just such a long day, granted we had a few more sights we wanted to see before wrapping up our entire trip.
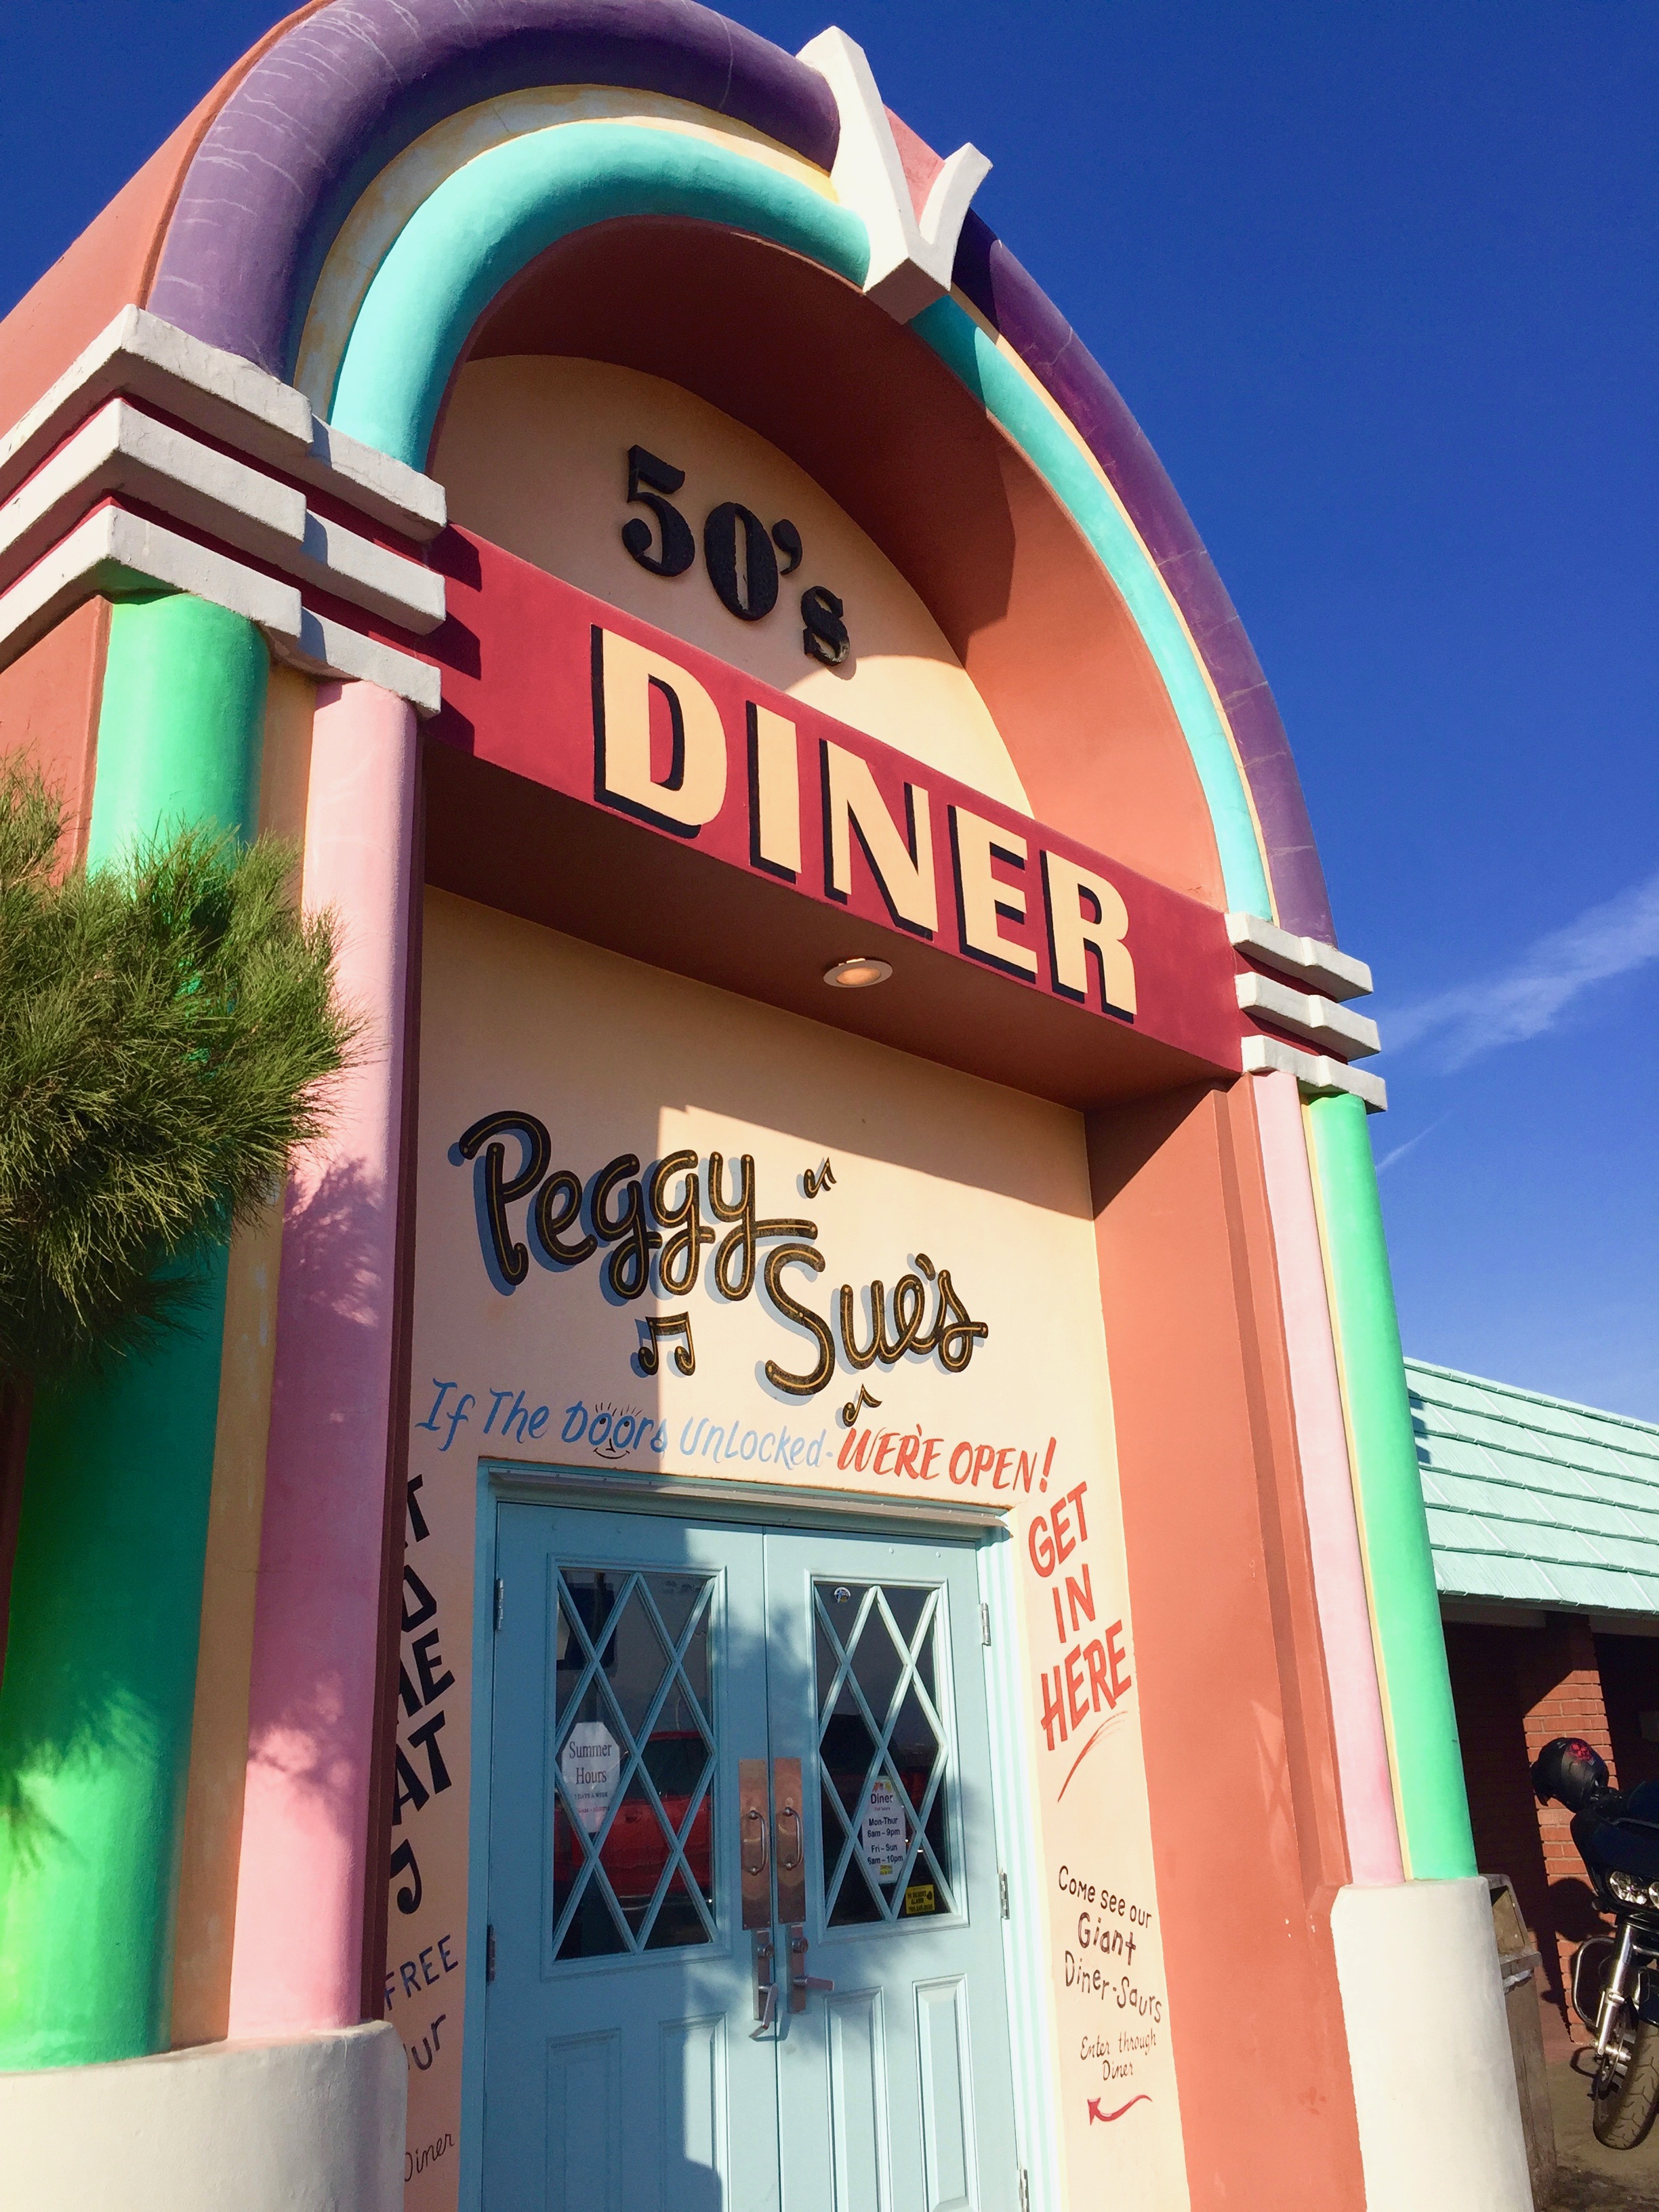
Peggy Sue's 50's Diner, Yermo, California
MORE INFORMATION
- TOTAL TRAVEL TIME: 6.5 to 7 hours
- TOTAL MILES: 458 miles
- GAS PRICES: $2.89/gallon
- EATS: We skipped breakfast and decided on In-And-Out in Vegas for a quick lunch. As mentioned earlier we stopped for a dinner at Peggy Sue's 50s Diner which was a really cool stop that I highly recommend!
- SLEEP: MY OWN BED IN LOS ANGELES! FINALLY!
- WISH WE HAD TIME: To stay in Vegas for a night! HAHA
- FINAL MUST-SEE LIST:
- Seven Magic Mountains
- Peggy Sue's 50s Diner
- Calico Ghost Town (if you DARE)

Peggy Sue's 50's Diner, Yermo, California
FINAL THOUGHTS
11 days, 5 National Parks, so many photos, memories, adventures, and a total of 2,704 miles later and our road trip was complete! The final verdict? Here were my TOP PICKS from the entire trip!
1. DELICATE ARCH AT ARCHES NATIONAL PARK
2. THE NARROWS AT ZION NATIONAL PARK
3. THE HOO-DOOS AT BRYCE CANYON NATIONAL PARK
4. HORSEHOE BEND AND THE LOWER ANTELOPE CANYON

FINAL COST
The entire trip including hotel stays, gas, parking fees, The National Parks Pass, and food was around $450-$550 a person. Mind you we split everything amongst 3 women and had two nights accommodated for in St. George and 1 night accommodated for in Scottsdale!
PACKING LIST

CLICK FOR COMPLETE PACKING LIST
ORIGINAL ITINERARY
CLICK FOR COMPLETE ITINERARY
HAVE A SAFE, ADVENTUROUS, & MEMORABLE ROAD TRIP FIT FRIENDS!
XoXo, Brittney